Stable Diffusion is an open-source deep-learning model. It can generate (paint) images conditioned on text descriptions.
I tried to run Stable Diffusion on my Android phone and it worked. No root required.
But why…? Because why not. A developer, Raoul Straczowski, on Github ran Stable Diffusion on his Raspberry Pi 4 and it could generate images up to 400x400 pixels. I think it should work on flagship Android phones, too. Therefore I tried many ways and it finally worked. The result is not bad.
1. Environment #
- Device: Sony Xperia 5 II (Android 13)
- CPU: Qualcomm Snapdragon 865 (Adreno 650)
- RAM: 8GB
- Storage: 30GB+
- High speed network for downloading large files.
2. Setup Linux environment #
-
Install Termux
-
Install proot Debian. We only need rootfs, there is no need to add a new user and install desktop environment.
-
Log into Proot Debian
proot-distro login debian --shared-tmp- Install Git, Vim, Python, Pip
apt update
apt install git git-lfs vim python3 python3-pip- Install Anaconda if you need it.
3. Install Stable Diffusion #
There are many versions of Stable Diffusion. I follow Raoul Straczowski’s instructions and choose Stable Diffusion v1.5 made by runwayml. It could run headlessly in terminal.
- Clone runwayml’s repository and download all models (around 30GB)
git clone https://huggingface.co/runwayml/stable-diffusion-v1-5
cd stable-diffusion-v1-5
git lfs pull- Then install python dependences
pip install --upgrade diffusers transformers accelerate ftfy xformers4. Creating a script for generating images #
Because my phone only has 8GB RAM, the maximum image size that it could generate is 320x320 pixels. Beyond that Termux will crash immediately.
-
Disable background process in Developer Settings. I also enable “Stay awake while charging”.

-
Termux will crash when generating large images due to the limitation of Android OS, so we have to increase the value of
max_phantom_processes. Please refer to Fix Singal 9 error to install ADB tools on PC, and execute following commands to set value ofmax_phantom_processesto 2147483647.
adb shell "/system/bin/device_config set_sync_disabled_for_tests persistent; /system/bin/device_config put activity_manager max_phantom_processes 2147483647"- Create a Python script.
cd ~
vim app.py- Type these
from diffusers import StableDiffusionPipeline, EulerDiscreteScheduler
# Use local models
model_id = "./stable-diffusion-v1-5"
# Use Euler sampling
scheduler = EulerDiscreteScheduler.from_pretrained(model_id, subfolder="scheduler")
# Enable low memory usage, set image size to 320x320 and steps to 50.
pipe = StableDiffusionPipeline.from_pretrained(model_id, scheduler=scheduler, low_cpu_mem_usage=True, height=320, width=320, num_inference_steps=50)
# Bypass NSFW filter
pipe.safety_checker = lambda images, clip_input: (images, False)
# Prompts
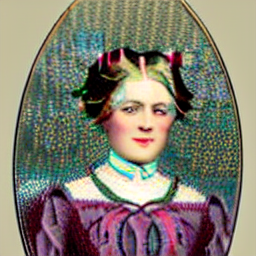
prompt = "A victorian woman stands on grass field."
# Start generating the image. Use CPU only
image = pipe(prompt).images[0]
# Save the image
image.save("result.png")- Let’s go!
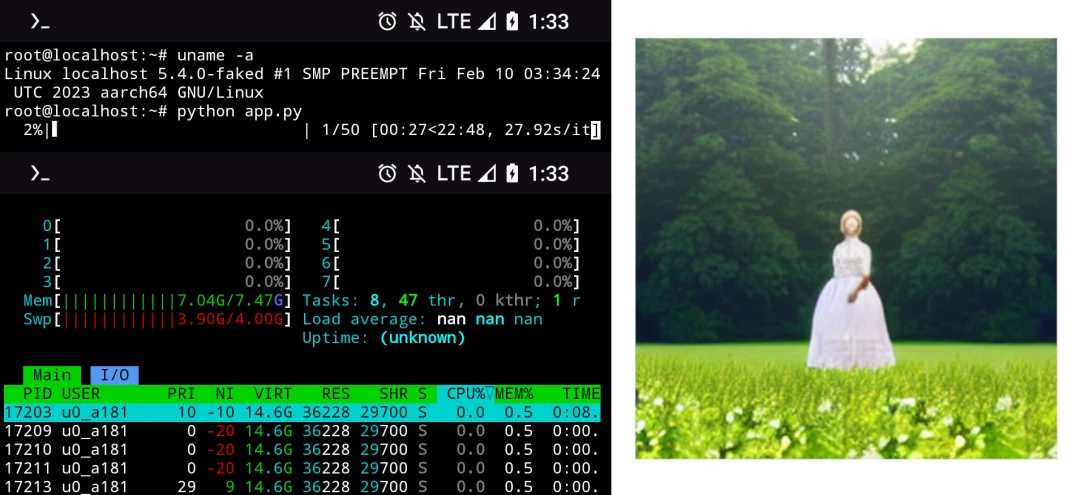
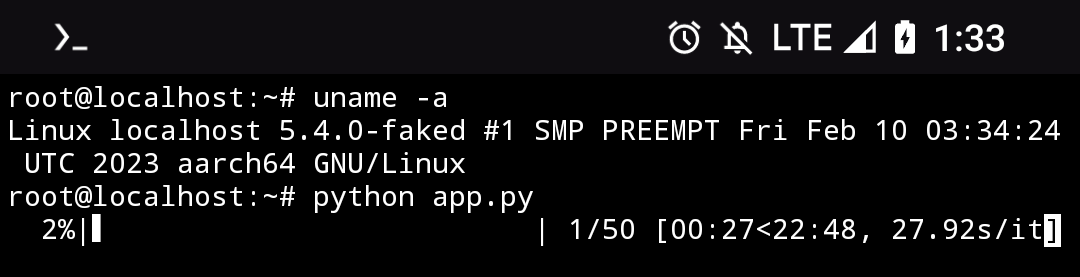
python app.py-
Wait for 20 minutes
-
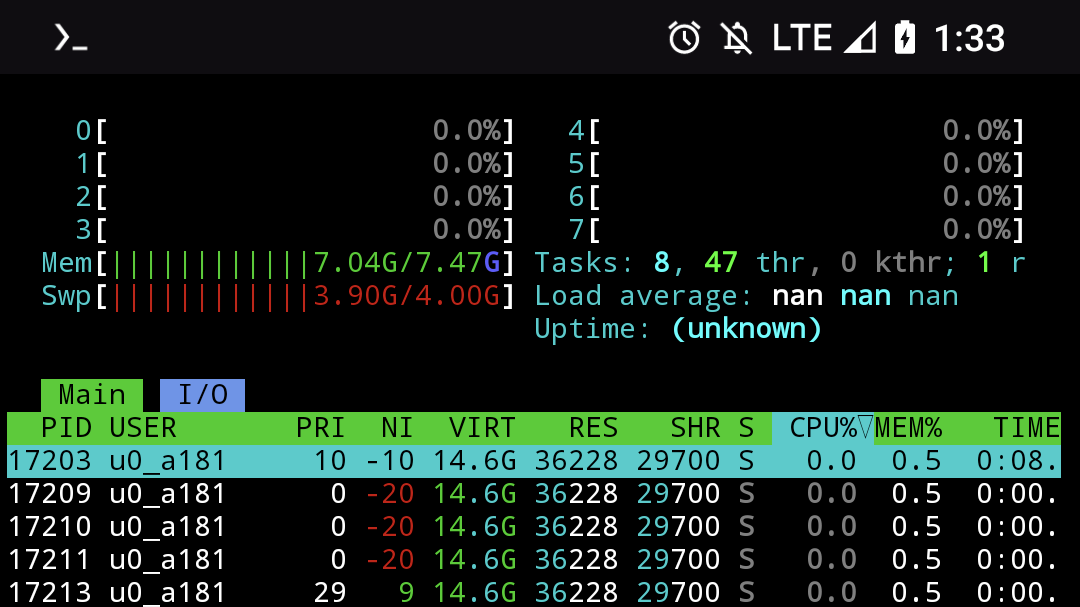
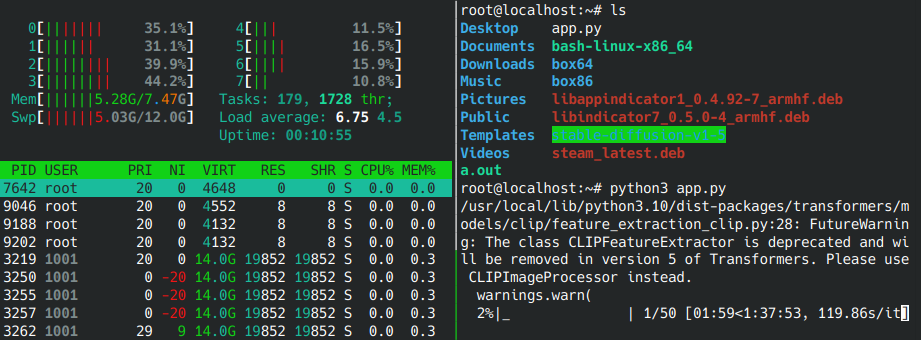
We can see Stable Diffusion consumes almost all memory while computing
-
To view the generated image, move it to the internal storage
mv result.png /sdcard- Here is the result. Not bad, huh?

5. Running Stable Diffusion with Adreno GPU #
We can run Stable Diffusion with Adreno GPU to accelerate the generation of images.
This is very experimental. Virglrenderer may not work on non-Adreno devices which do not support Vulkan.
- Install virglrenderer on Termux. Then start virgl server.
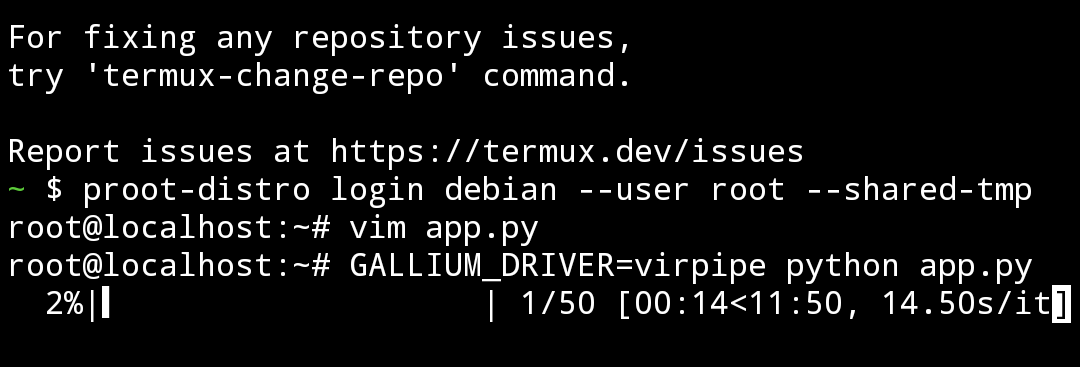
MESA_NO_ERROR=1 MESA_GL_VERSION_OVERRIDE=4.0 GALLIUM_DRIVER=zink virgl_test_server --use-egl-surfaceless- Log into Proot. Run Python script with virgl
GALLIUM_DRIVER=virpipe python app.py-
The time of image generation will reduce a little bit.
-
The result.
6. What if we run Stable Diffusion on chroot? #
Note: You need root permission to do this.
Since Stable Diffusion requires a lot of RAM, why not create a big swapfile on chroot? So Termux will not crash due to out of memory.
-
Install chroot Ubuntu in Termux.
-
Install Python and Stable Diffusion (similar to Ubuntu) or just copy files from proot-distro (the data is located at
/data/data/com.termux/files/usr/var/lib/proot-distro/installed-rootfs/ubuntu/root). -
Log into chroot Ubuntu. Create a 8GB swap file on chroot, so we will have 8 + 4 + 8 = 20GB RAM on our phone. If we don’t do this, the phone will reboot when it is out of memory.
dd if=/dev/zero of=/swapfile bs=1M count=8192 status=progress
chmod 0600 /swapfile
mkswap /swapfile
swapon /swapfile-
In the following test, I increase the size of image to 512x512 but Termux still crash while computing, so I enter chroot via ADB shell.
-
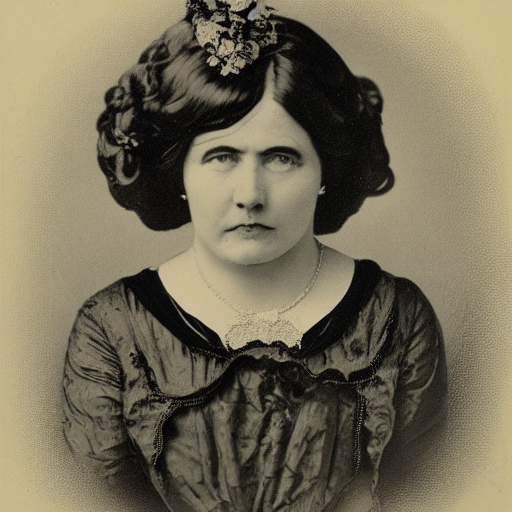
Wait for 1 hour, and here is the result. Her face is like saying “Why did you spend so much time on doing this?”