This guide is about installing Android-x86 9.0 QEMU virtual machine on x86_64 Linux host, so you can play Android games with 3D acceleration, keymappings on Linux PC. Google Play is also included.
Tested on Gentoo Linux (gentoo-kernel-bin 5.19.16) and Arch Linux (linux-zen-6.0.3) .
1. Prerequisites #
- A x86_64 Linux PC
- 4-cores CPU
- Intel or AMD GPU. Nvidia proprietary driver does not support VirGL (virtual OpenGL renderer).
- 8GB+ RAM
- 64GB+ storage
2. Install required packages #
Install QEMU, Libvirt, Virt Manager on your Linux host.
Enable libvirtd services:
sudo systemctl enable --now libvirtdMake sure KVM modules are loaded:
lsmod | grep kvm3. Install Android-x86 VM #
Note: You can try advanced Bliss OS instead of vanilla Android-x86. The installation procedure is similar to each other.
-
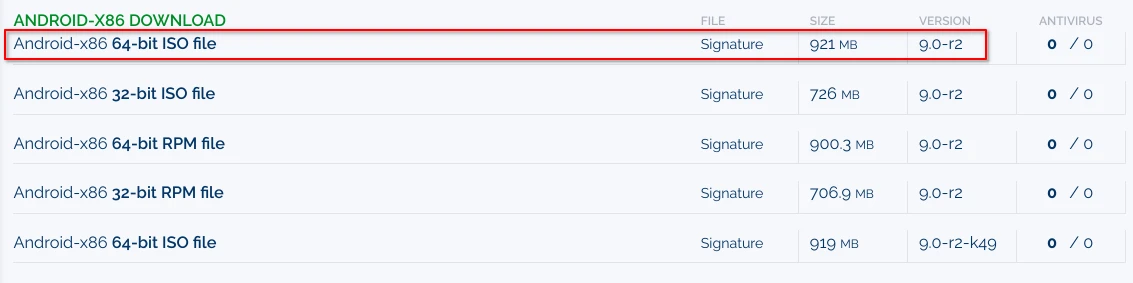
Download Android-x86 ISO from official website. Choose Android 9.0-r2 64bit.
-
Launch Virt Manager. Clcik
Creat a new VM.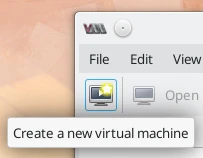
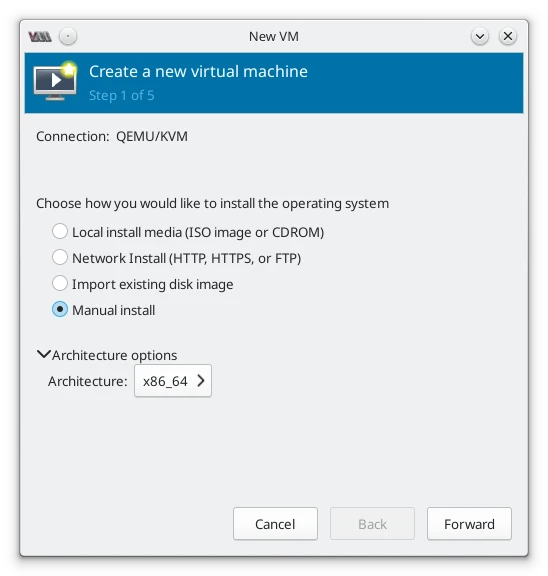
-
Select Manual Install
-
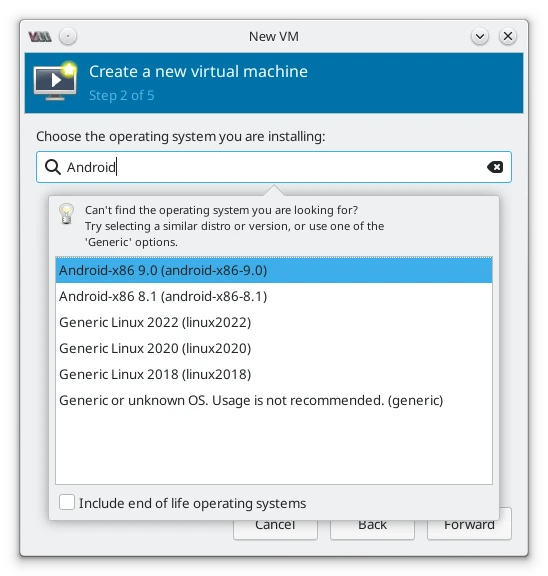
Select Androd-x86 9.0
-
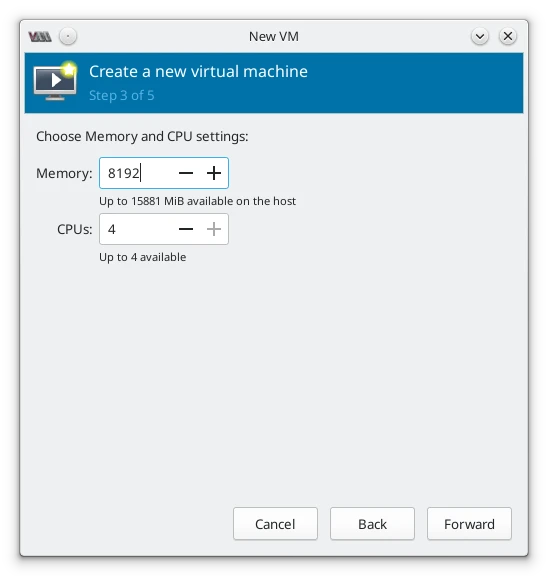
Allocate 8GB RAM (minimum 4GB) and 4 cores.
-
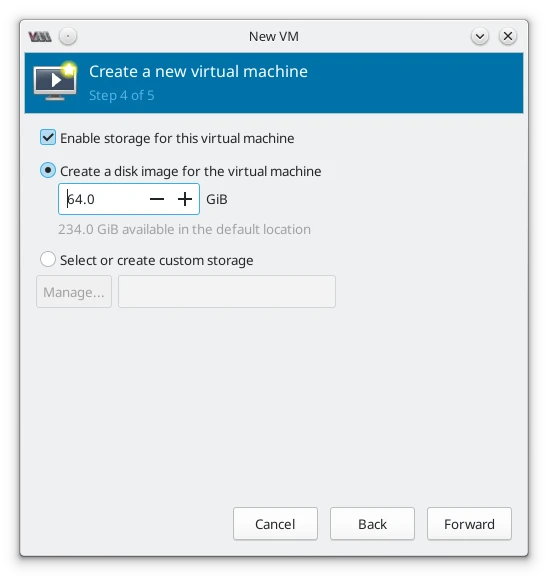
Create a 64GB hard drive
-
Check
Customize configuration before install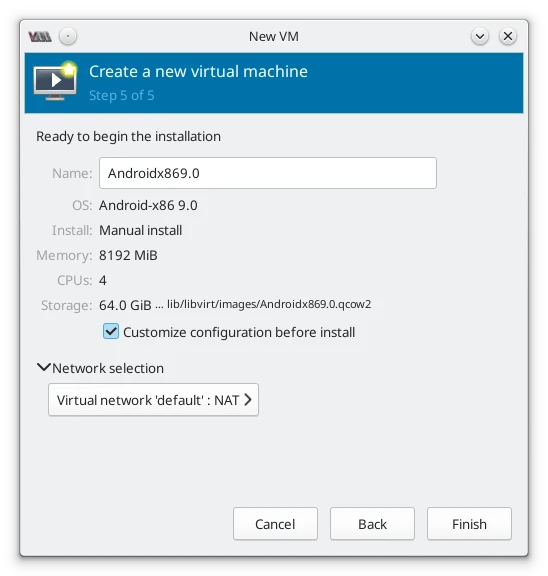
-
Click
Overview. SelectQ35forChipsetandUEFI x64 OVMF_CODEforFirmware. Apply.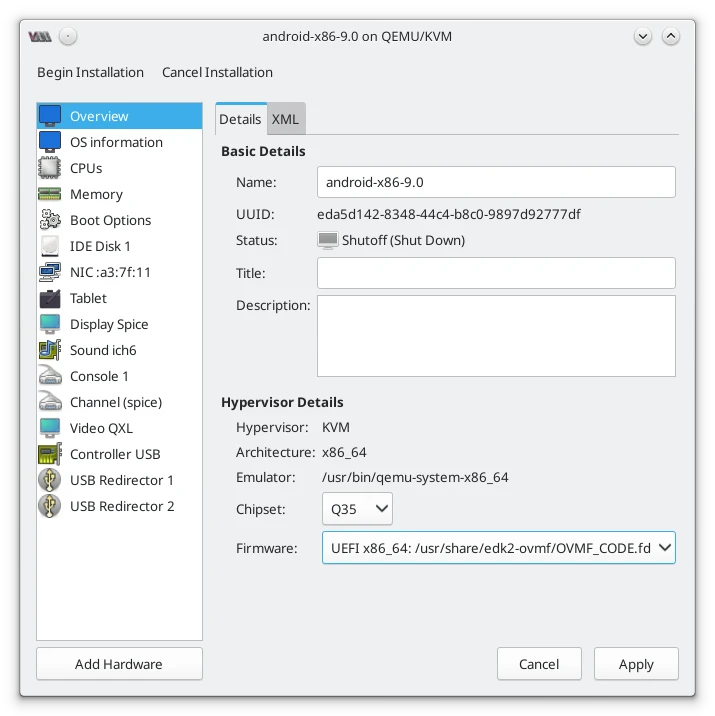
-
Click
IDE Disk, switch Disk bus toVirtIO. Apply.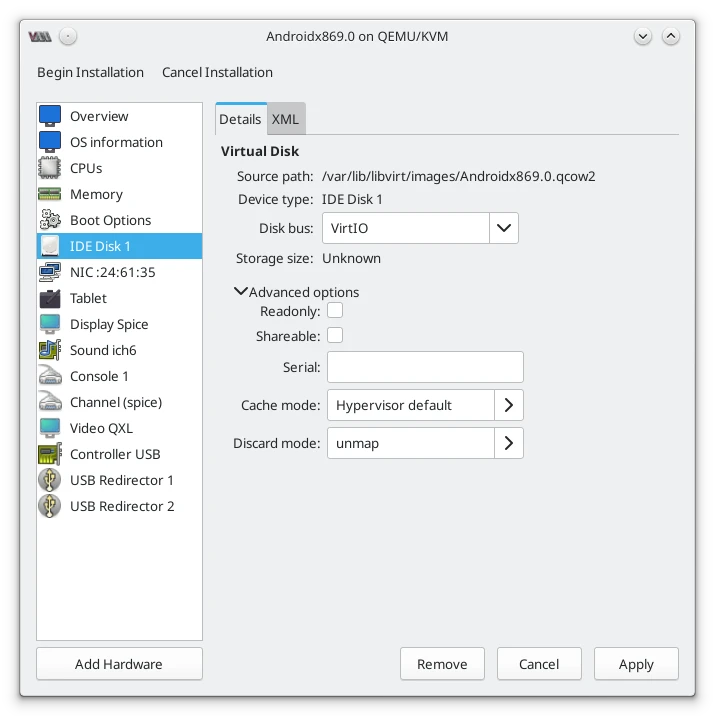
-
Click
NIC, switch Device model tovirtio. Apply.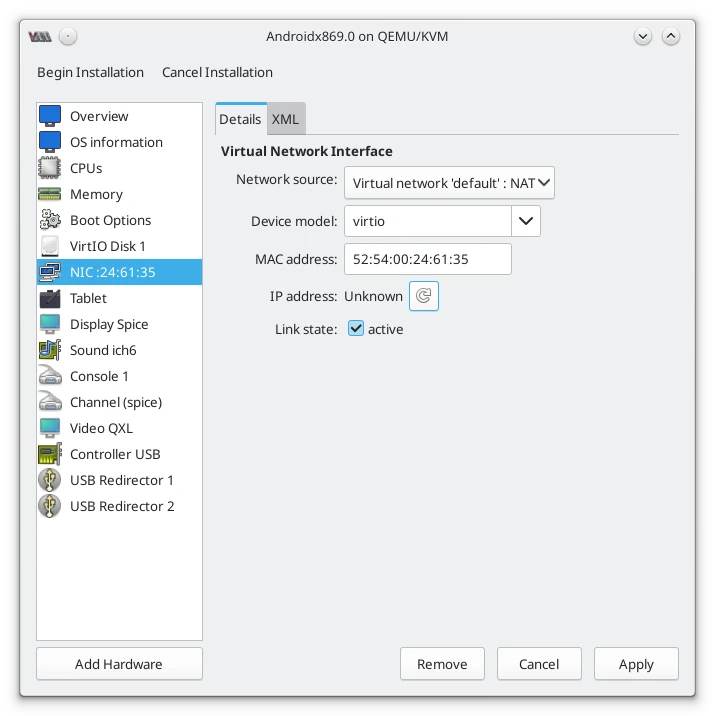
-
Click
Display Spice. SwtichListen TypetoNone. CheckOpenGLand select Intel GPU. Apply.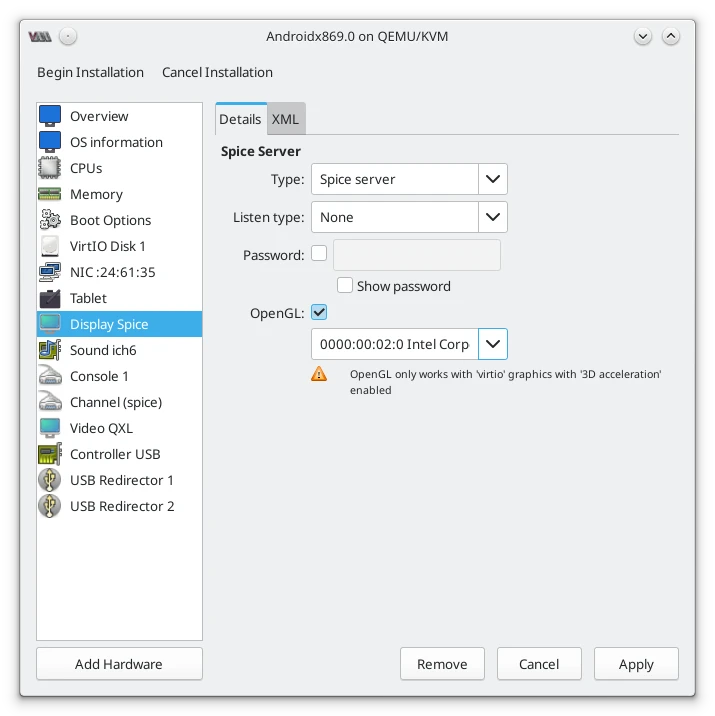
-
Click
Video QXL, switch toVirtio. Check3D acceleration. Apply.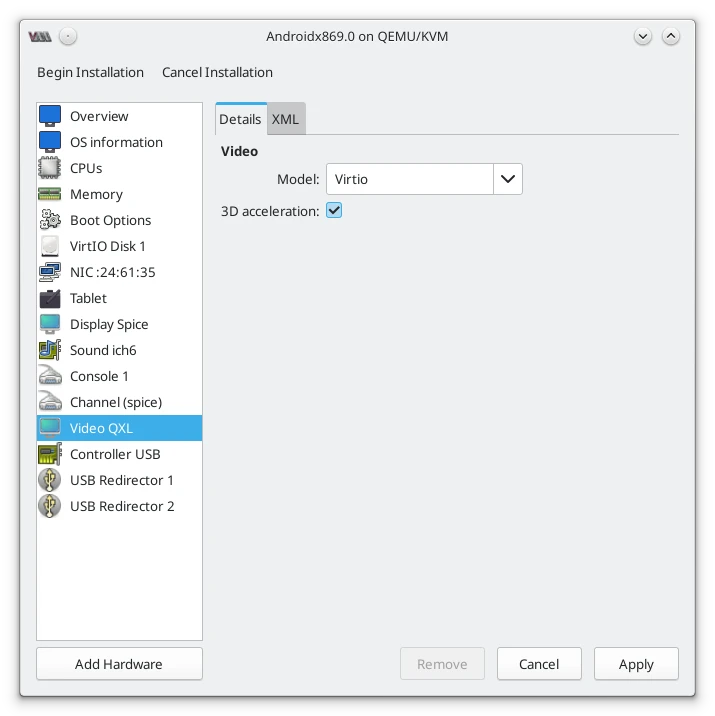
-
Click
Add Hardware, clickStorage, switchDevice TypetoCDROM. SwitchBus TypetoSATA. ClickManageand select Android-x86 ISO. Finish.
-
Click
Boot options. Change boot order toSATA CDROM.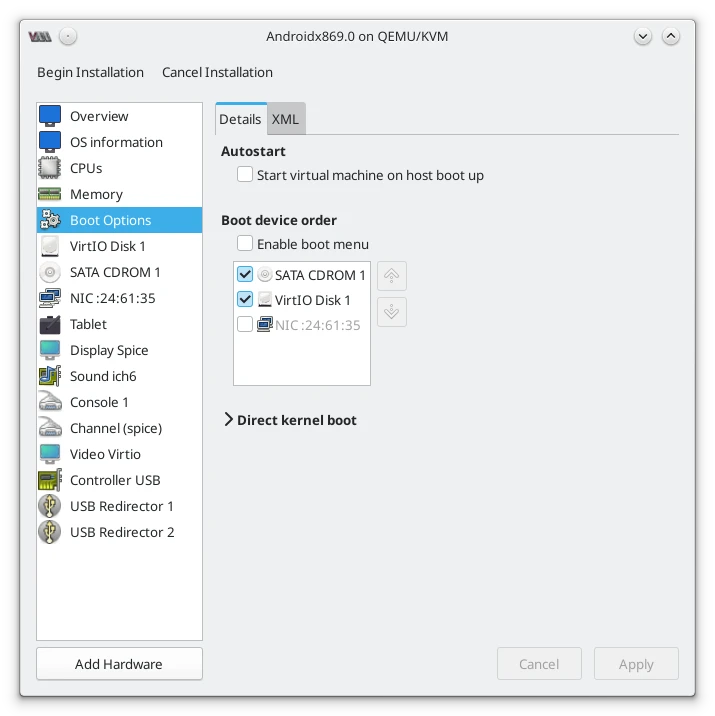
-
Click
Begin Installation. Use keyboard arrows to move selection. First move toInstallation, enter.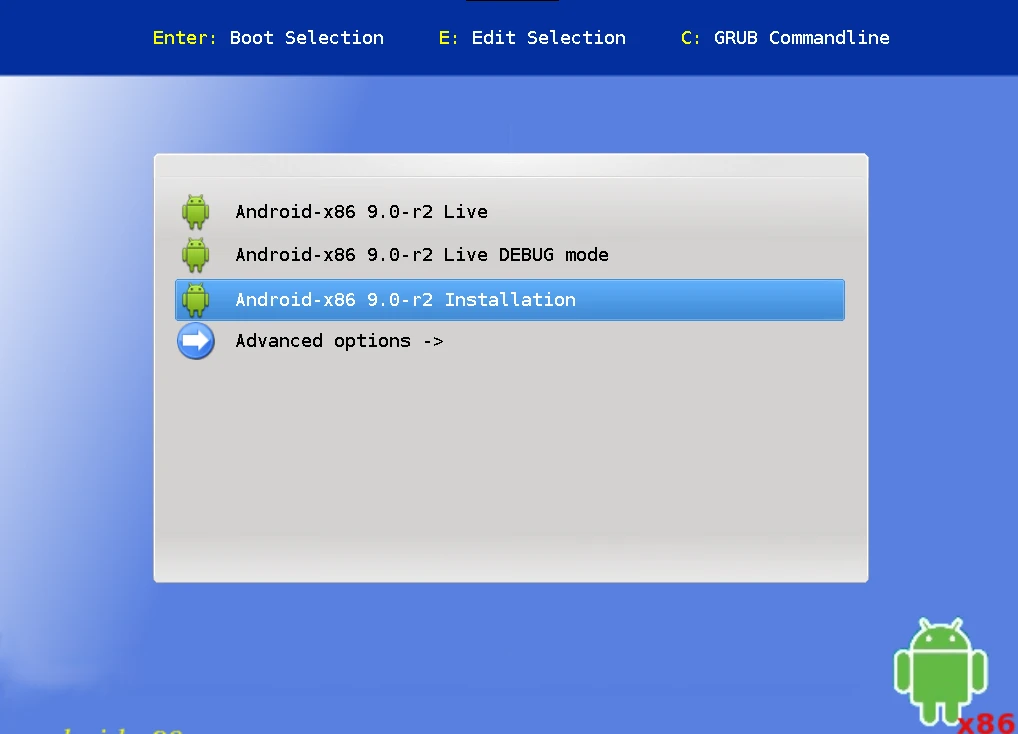
-
Select
Create/Modify partitions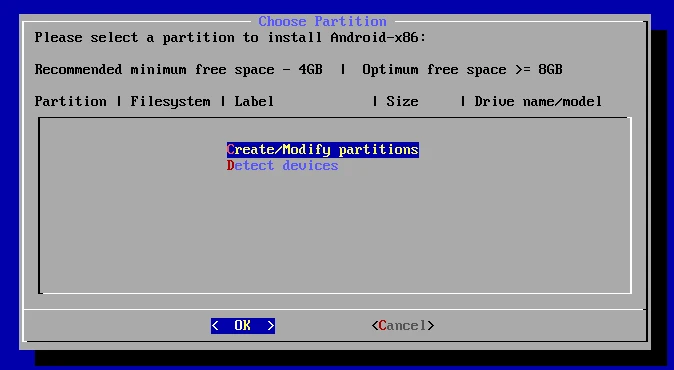
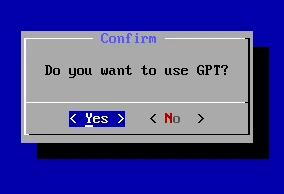
-
Use GPT
-
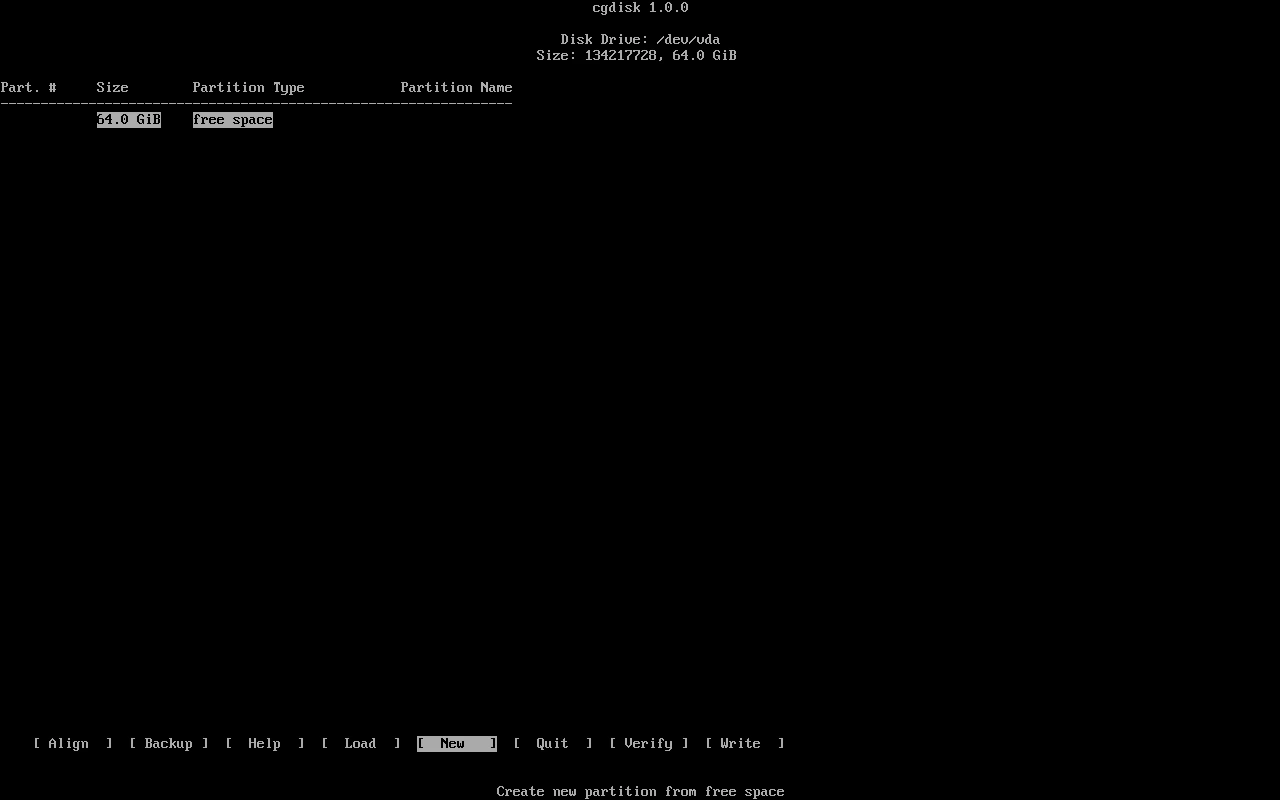
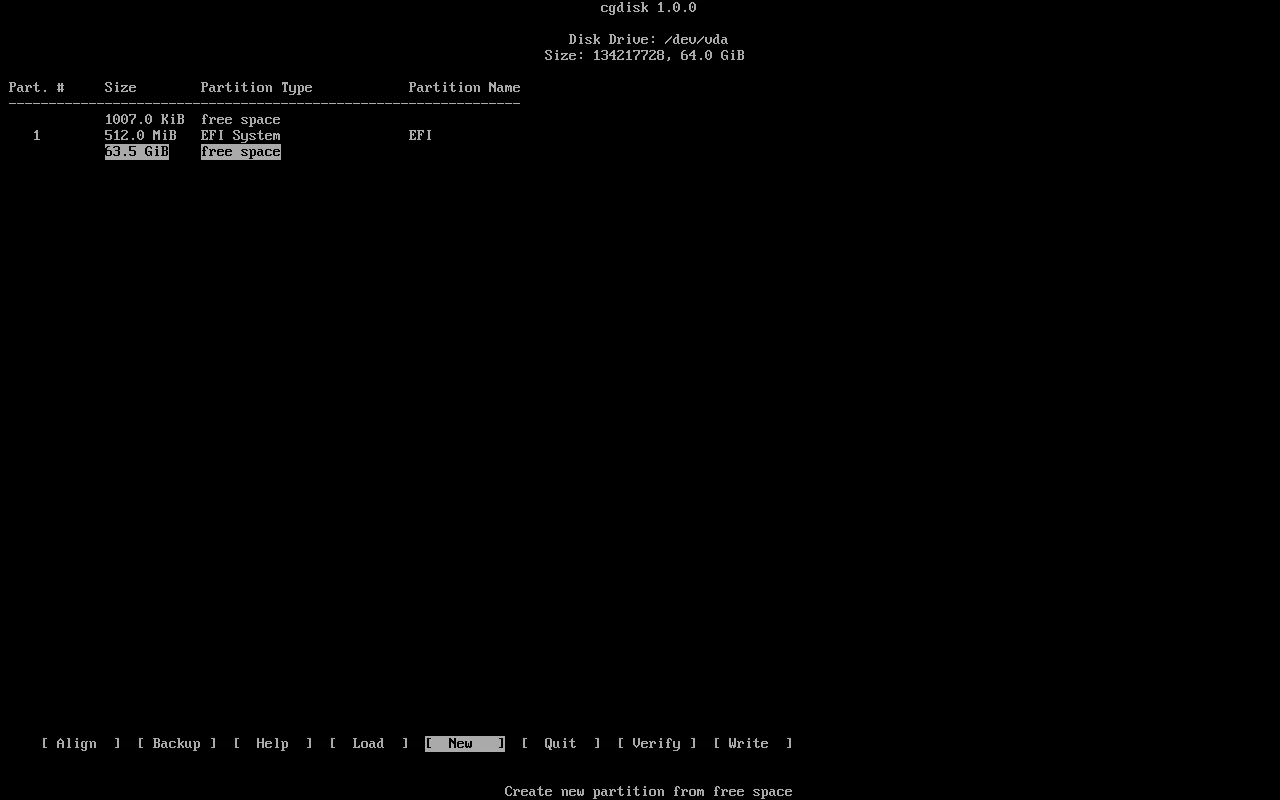
Move selection to [New], enter.
-
Enter. Next type
+512M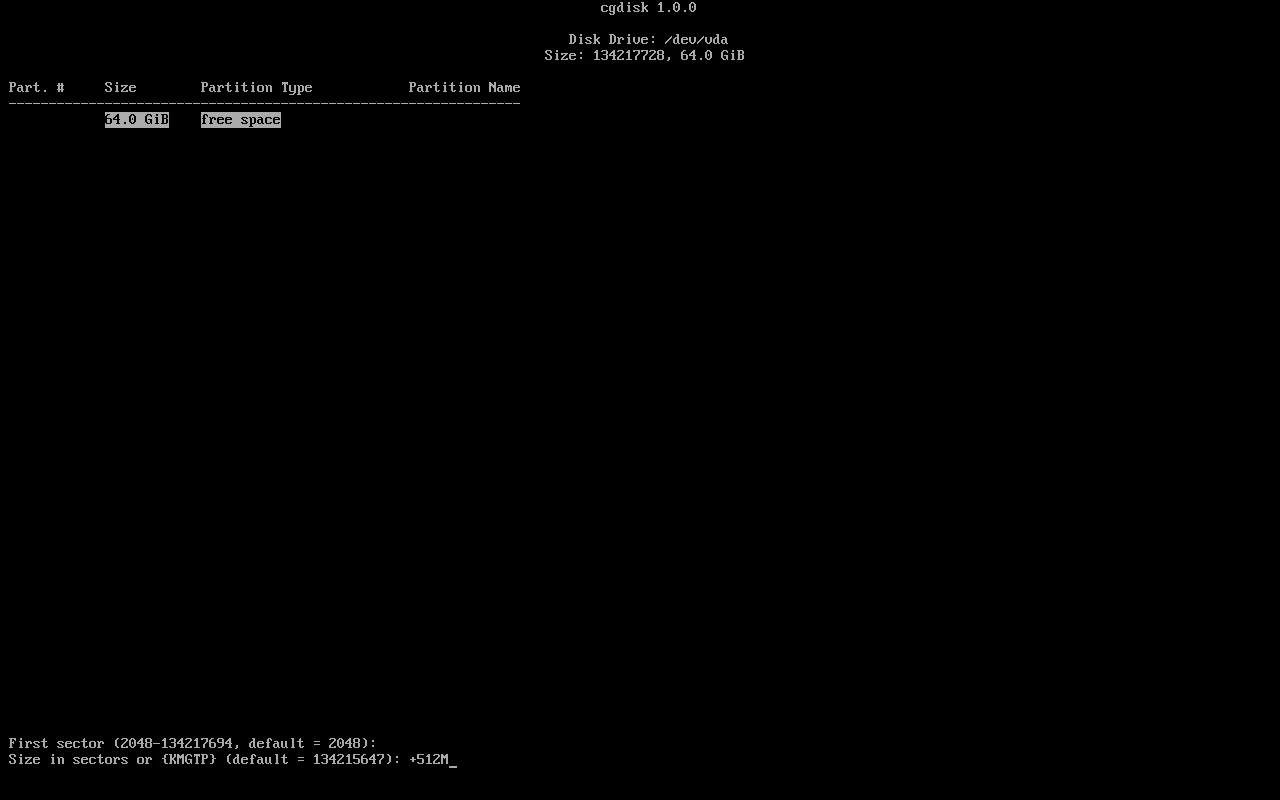
-
Type
ef00then name the paritionEFI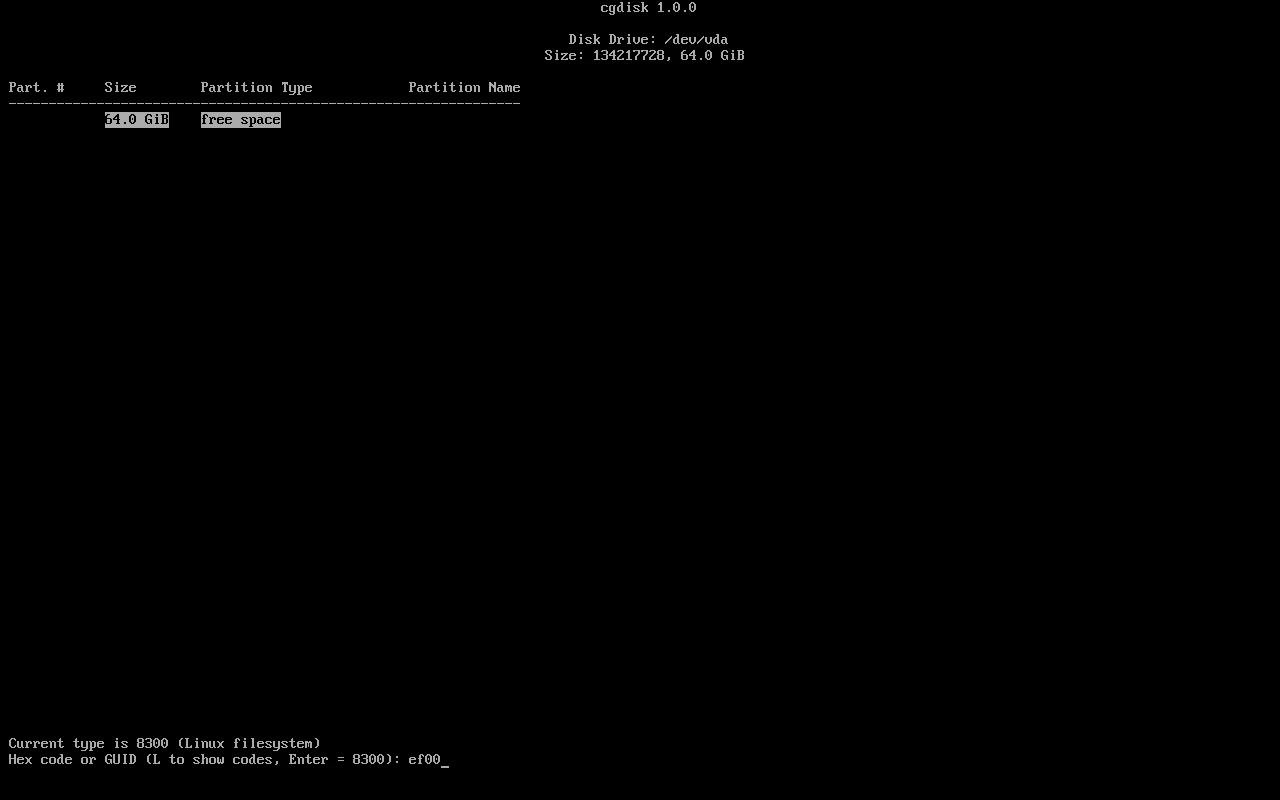
-
Next, move selection to the third one. Select [New], enter for 3 times.
-
Name the partition
Android.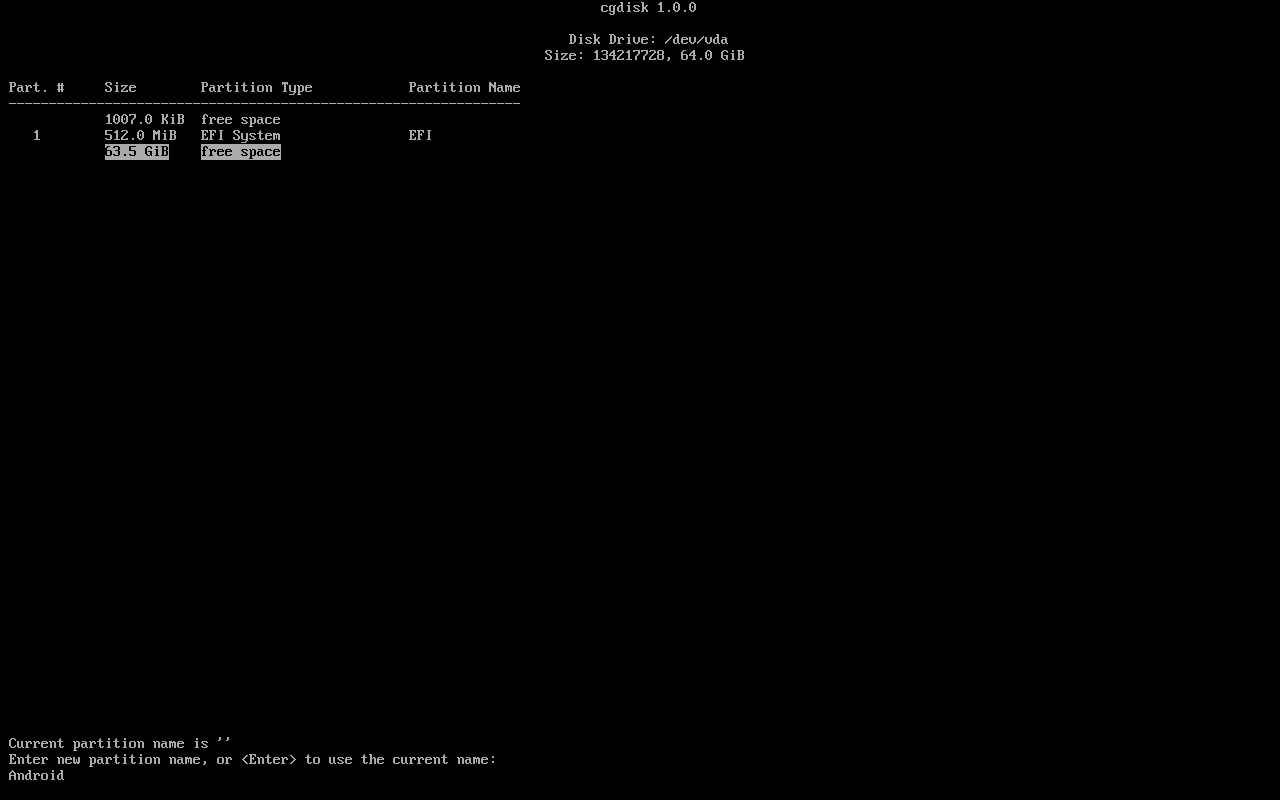
-
Move the selection to [Write], type
yes. Then move to [Quit].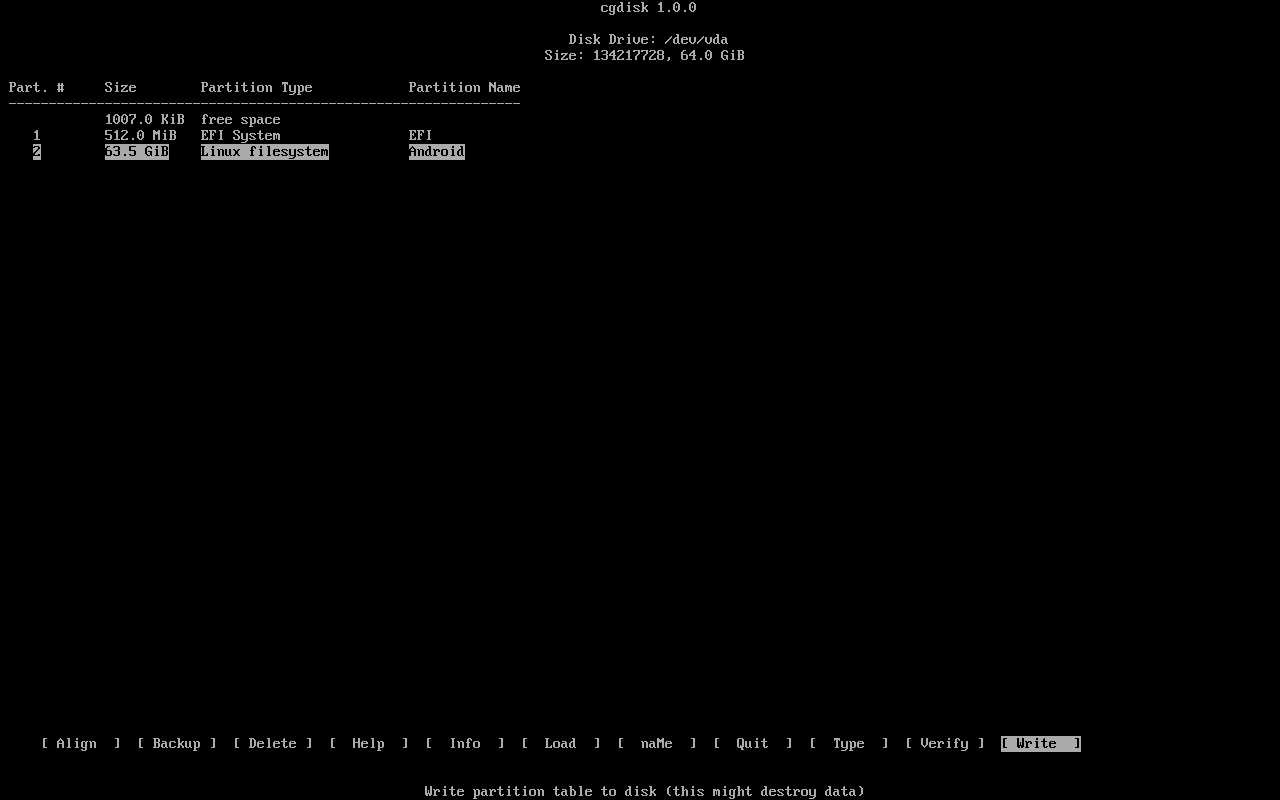
-
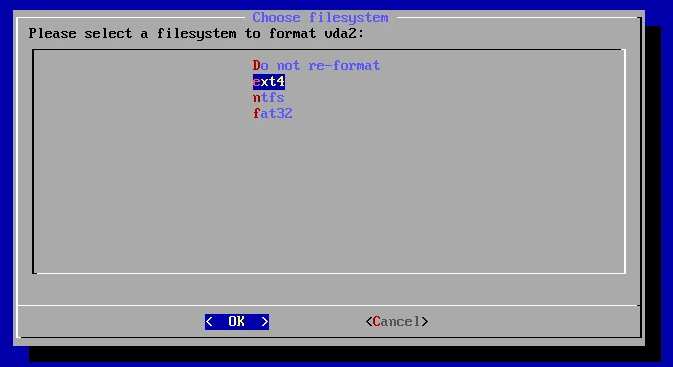
Select
vda2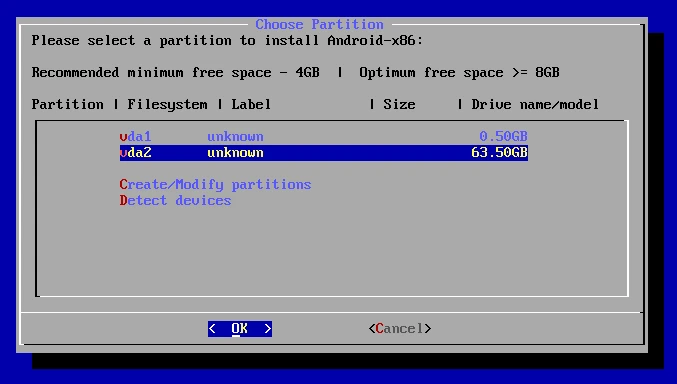
-
Format vda2 to EXT4
-
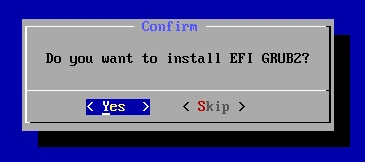
Install EFI GRUB
-
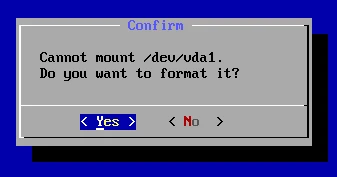
Format the EFI partition
-
Select
Yes. Make /system mounted as Read & Write.
-
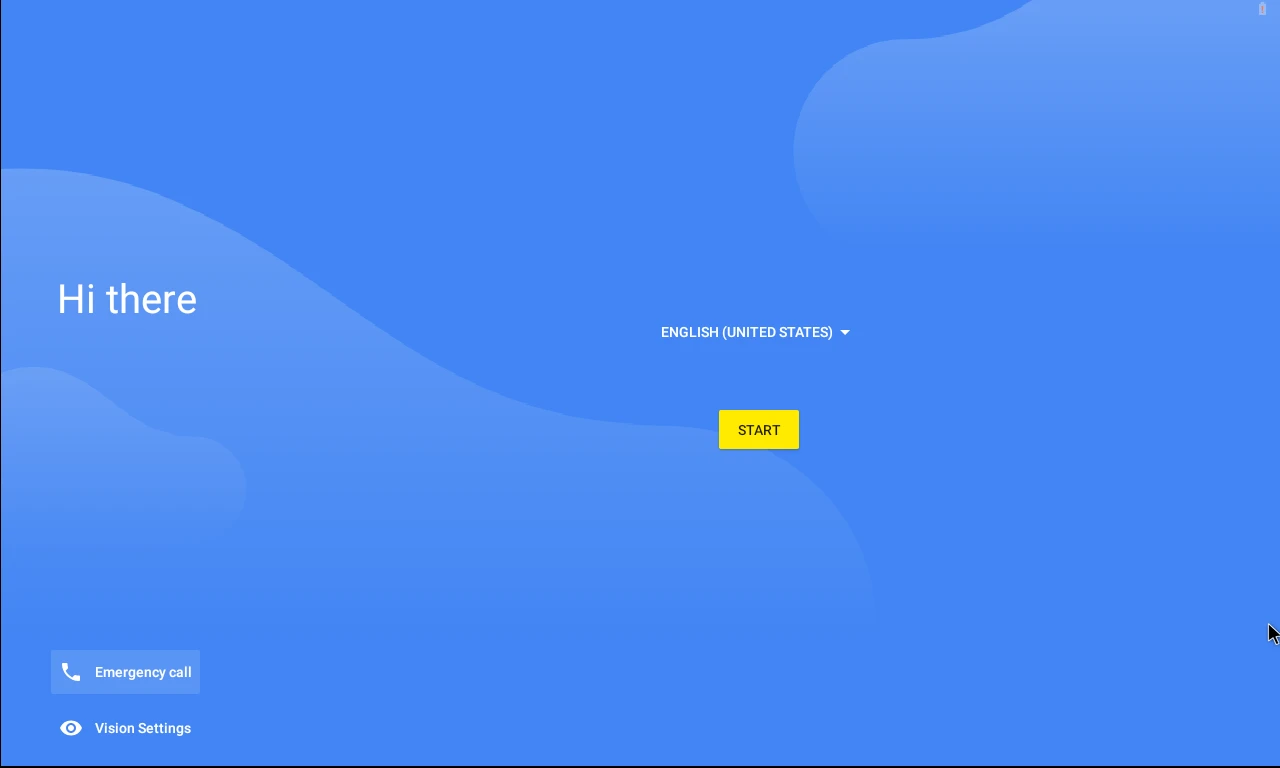
Boot into Android-x86.
-
Conect to
VirtWifi. Setup the Android-x86 device.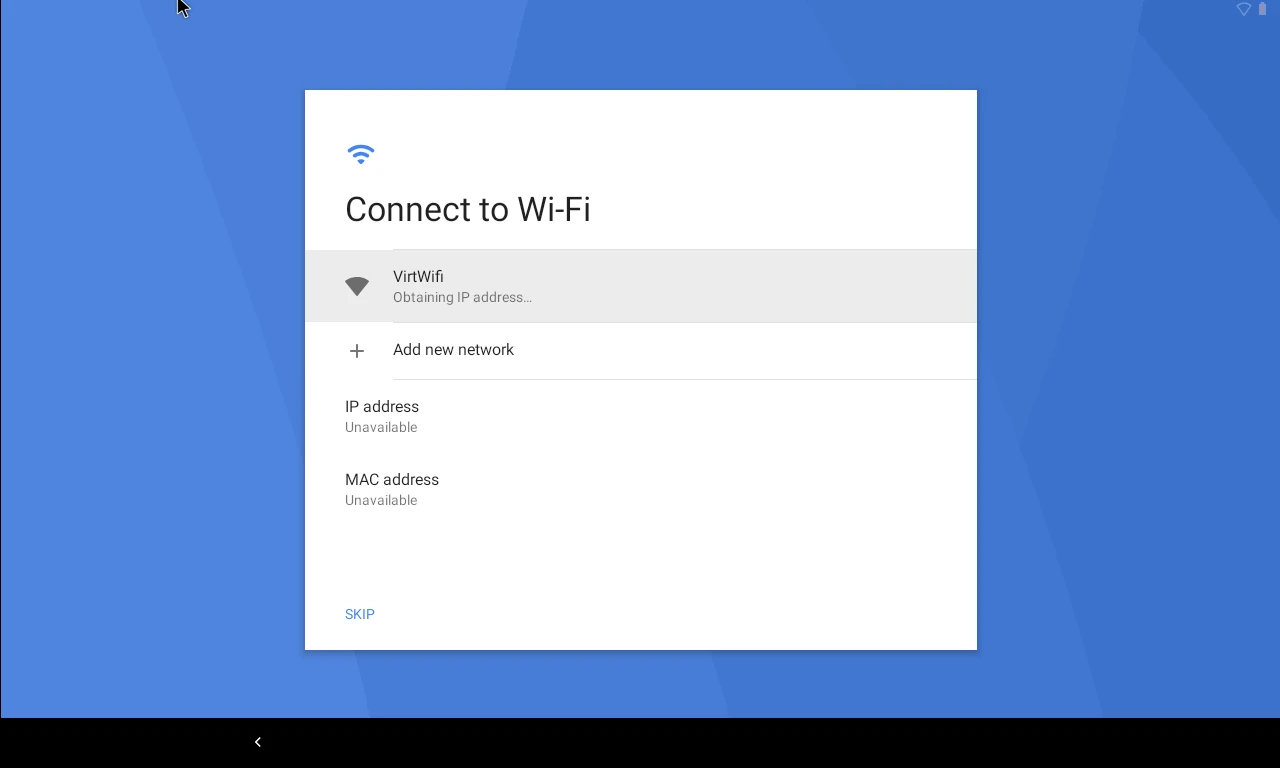
-
Launch
Terminal Emualtorin Android-x86 VM. Typesu, grant root permission: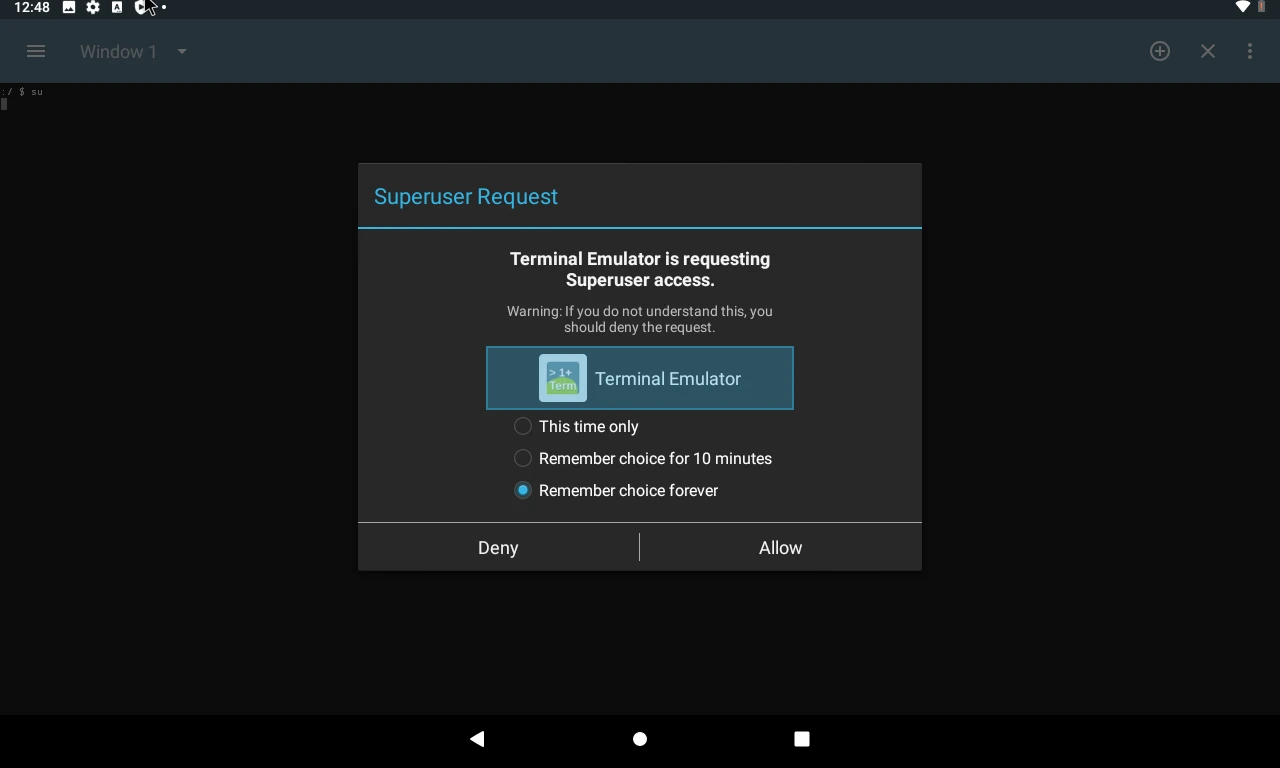
-
Type
dmesg | grep virglto check if VirGL is loaded.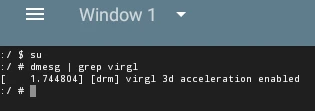
-
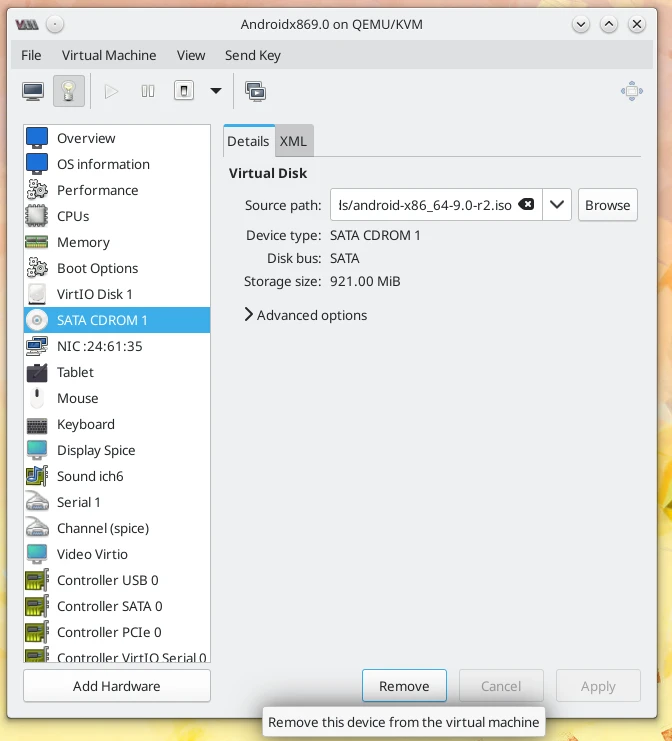
Click bulb icon, remove CDROM from Hardware list.
4. Install libhoudini for Android-x86 #
It’s recommened to install x86 APK for stability, Google Play would filter x86 apps for you. However many games only support ARM architecture. In order to run ARM apps on a x86 machine, we need a ARM translator/Native bridge.
Houdini is an ARM translator developed by Intel. Currently it only supports running ARMv7 (32bit) Android APPs on Android-x86 9.0.
-
Launch System settngs → Android-x86 options, select
Enable native bridge.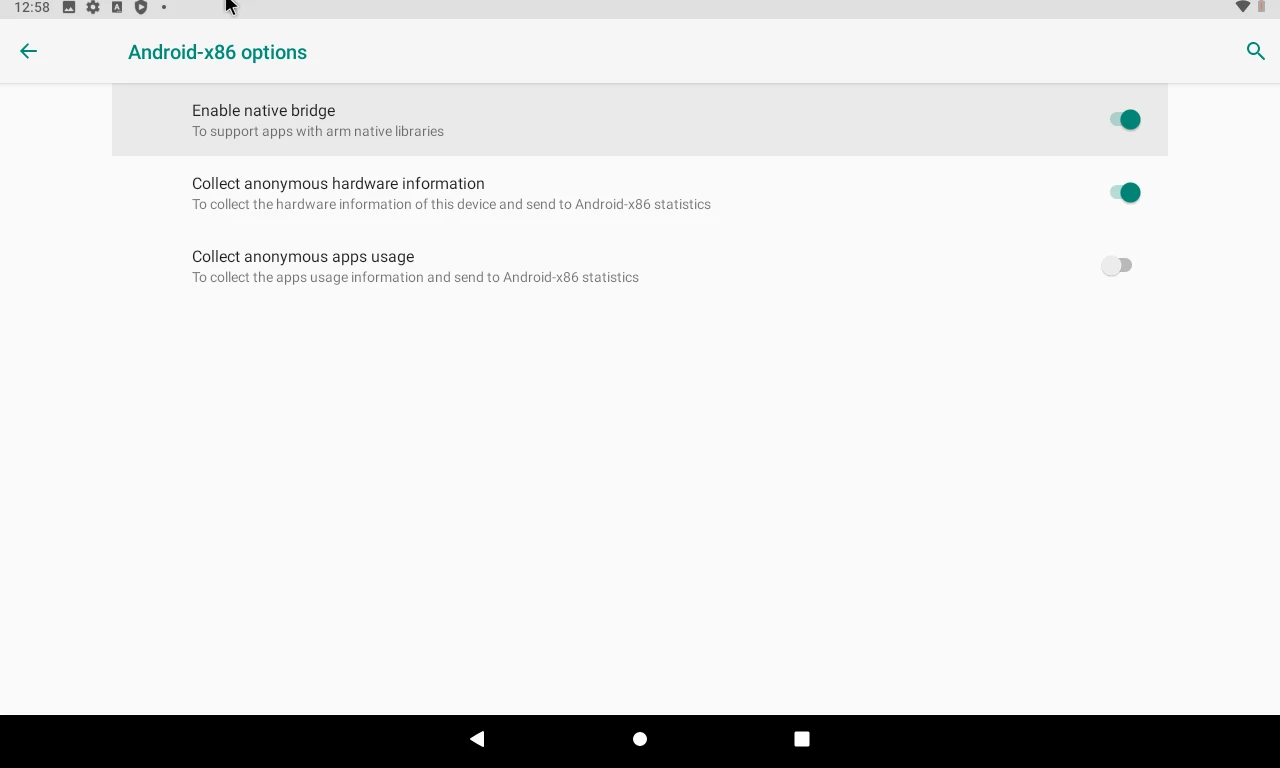
-
It should start downloaing libhoudini. However it will failed to download. So we need to manually install libhoudini.
-
Launch Chrome in Android-x86 VM. Download libhoudini from Android-x86 official website
-
Launch
Terminal Emulator, execute following commands:
su
mkdir /data/arm
cp /sdcard/Download/houdini.sfs /data/arm/houdini9_y.sfs
enable_nativebridge- Reboot the VM. Now you should be able to download ARM apps from Google Play, such as Smash Hit.

P.S. Sometimes you still need to toggle Enable native bridge again in System settings after reboot.
5. Tips for Android-x86 VM #
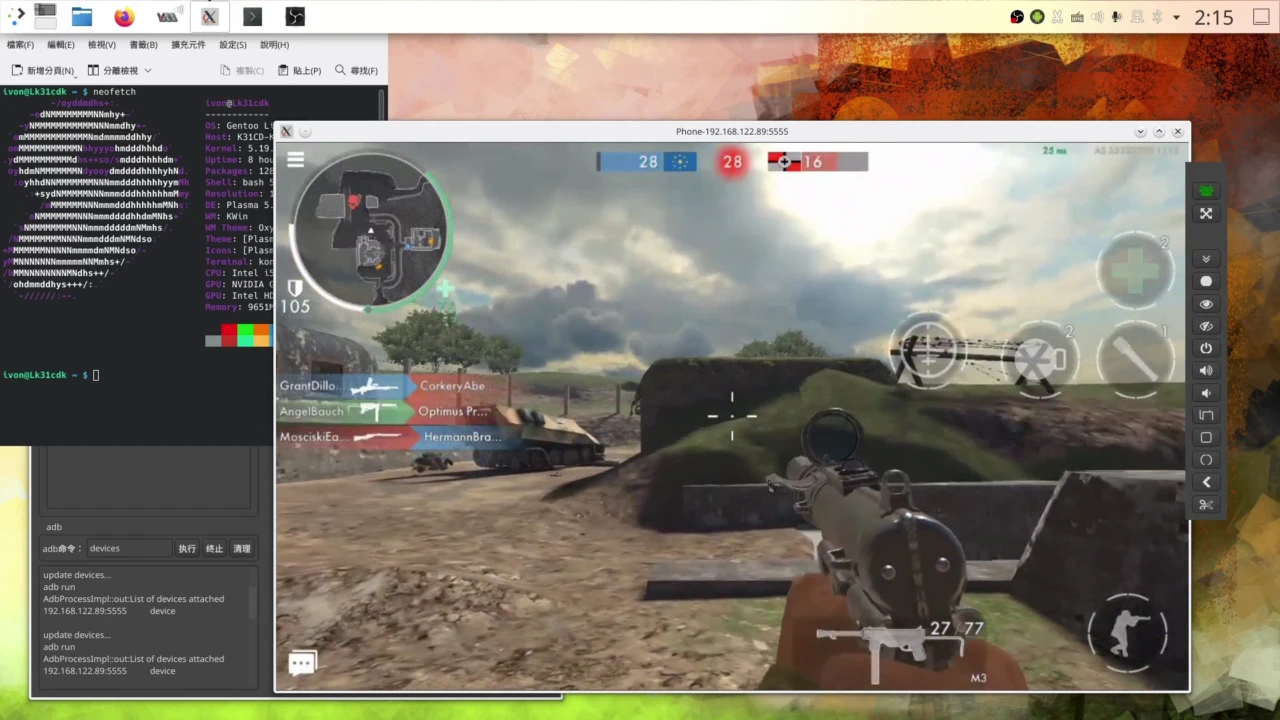
5.1. QtScrcpy games keymapping #
Want to play FPS games in Android-x86 VM?
Games do not response to mouse clicks but only touching events in Android-x86 VM?
QtScrcpy could solve these problems!
- Download QtScrcpy for Linux. Unzipped the archive. Run
qtscrcpy:
./qtscrcpy-
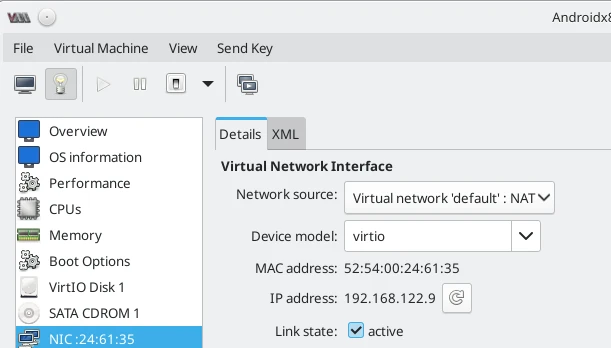
Check IP address of Android-x86 VM from Virt Manager → NIC
-
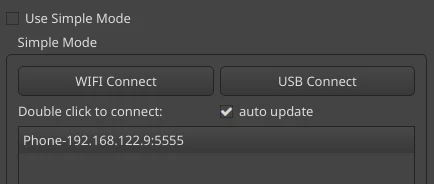
In QtScrcpy, fill in the
Wirelesswith Android-x86’s IP. Clickwireless connect.
-
Double click phone device at left panel
-
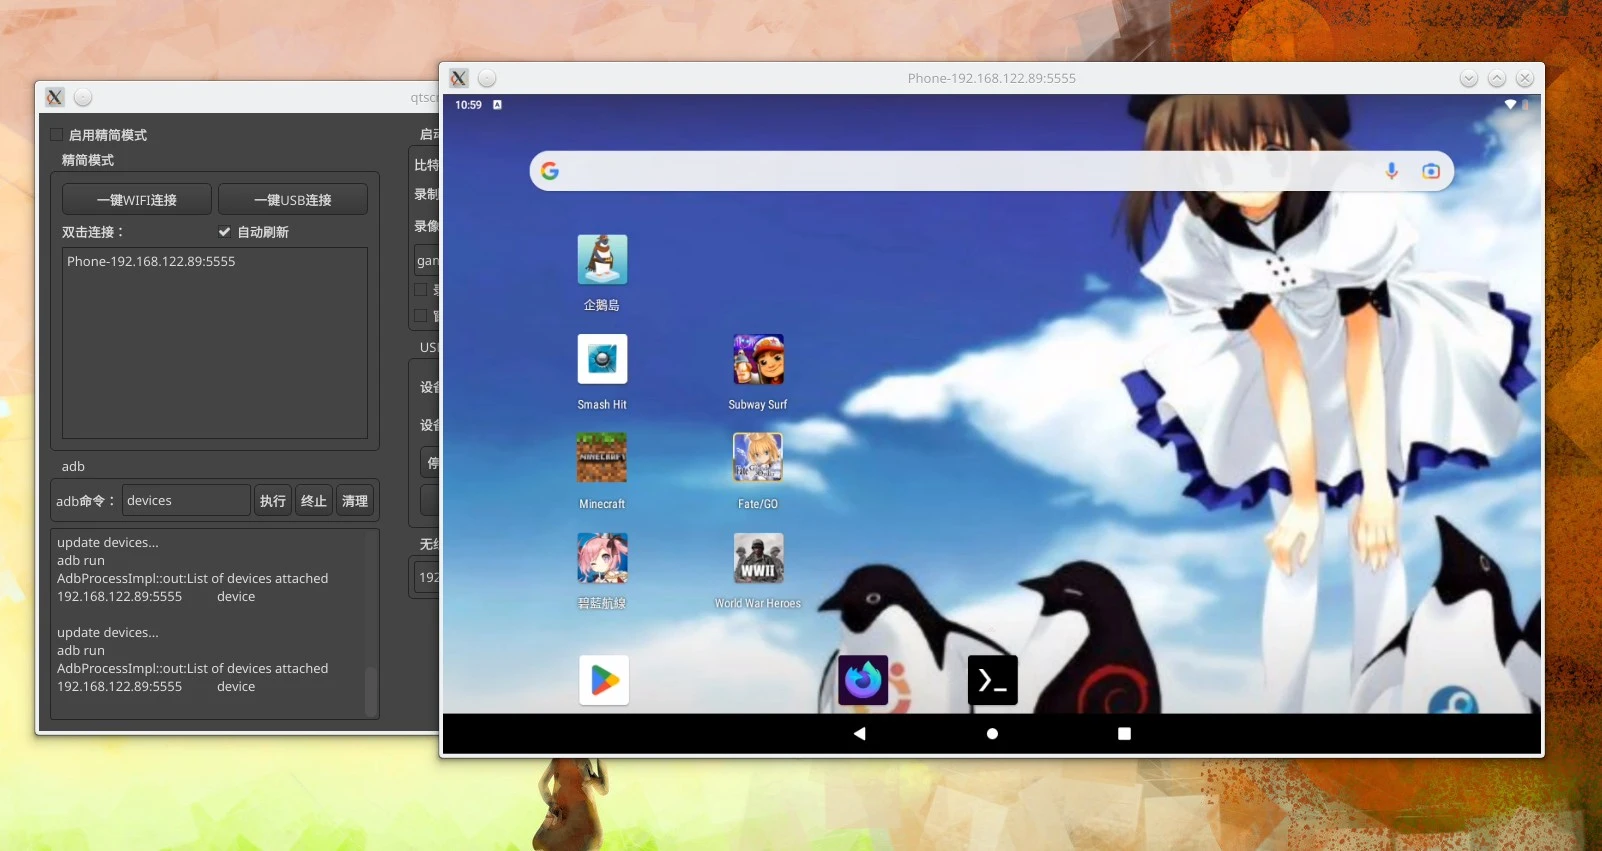
A new window will popup (yeah there are two windows right now). You can emulate touch events in QtScrcpy window.
-
Create a directory named
keymapsat QtScrcpy’s directory.
cd </path/to/qtscrcpy>
mkdir keymap
cd keymap- Download example keymapping scripts from Github.
wget https://raw.githubusercontent.com/barry-ran/QtScrcpy/dev/keymap/test.json-
Click
refresh scriptin QtScrcpy. Clickapply.
-
Press
~key in Android-x86 VM to toggle the script. This script will trigger scrolling events when pressingUp arrowkey in Android-x86 VM. -
Now try to write yout own scripts. See guidelines here. Below is an exmaple for World War Heroes — WW2 PvP FPS:
{
	"switchKey": "Key_QuoteLeft",
	"keyMapNodes": [
		{
			"comment": "Moving",
			"type": "KMT_STEER_WHEEL",
			"centerPos": {
				"x": 0.16,
				"y": 0.75
			},
			"leftOffset": 0.1,
			"rightOffset": 0.1,
			"upOffset": 0.27,
			"downOffset": 0.2,
			"leftKey": "Key_A",
			"rightKey": "Key_D",
			"upKey": "Key_W",
			"downKey": "Key_S"
		},
		{
			"comment": "Moving camera",
			"type": "KMT_STEER_WHEEL",
			"centerPos": {
				"x": 0.8,
				"y": 0.7
			},
			"leftOffset": 0.1,
			"rightOffset": 0.1,
			"upOffset": 0.27,
			"downOffset": 0.2,
			"leftKey": "Key_Left",
			"rightKey": "Key_Right",
			"upKey": "Key_Up",
			"downKey": "Key_Down"
		}
	]
}
5.2. Running multiple Android-x86 VMs #
Shutdown the VM. Right click the Android-x86. Select Clone VM.
5.3. Booting Android-x86 VM with QEMU commandlines #
Wrapping up #
Android-x86 9.0 currently does not support ARM64 only apps, so it is impossible to run some games in Android-x86 VM.