ReDroid (Remote anDroid) is a solution for self-hosting a “cloud phone”. It runs an Android system container through Docker, then uses Scrcpy’s screen mirroring feature to connect to the Android desktop.
ReDroid is also a solution for running Android apps on a computer with open source software. Because never mind cloud phones, many Android mobile gaming emulators are closed source software. By comparison, ReDroid is open source except for the ARM translator. Even better, ReDroid supports GPU acceleration plus an ARM-to-x86 translator, so it can play most 3D mobile games.
For Linux users, this is also an efficient way to run Android apps on a Linux computer besides Waydroid and Android-x86 virtual machines. And it is more suitable than Waydroid as a cloud phone. See Self-hosting a cloud phone
This article discusses how to use ReDroid on an x86 Linux computer to play ARM mobile games. We will add an ARM translator plus the Google services framework to the ReDroid image for the best user experience.
1. ReDroid System Requirements #
Any Linux distribution should work.
This article demonstrates running ReDroid on an x86 computer. As for ARM computers, some netizens have reported successful deployment on Oracle ARM servers, and I have also tested that ReDroid can run on Raspberry Pi 5.
If the computer is x86, it can only run Android apps with x86 architecture. However, many mobile games only have ARM versions, so ReDroid needs to install an ARM translator such as libndk or libhoudini.
For playing mobile games, I recommend at least 8GB RAM, because ARM-to-x86 instruction translation can sometimes consume a large amount of RAM.
For GPU acceleration, I recommend using drivers supported by Linux Mesa, such as Intel and AMD GPUs, where 3D acceleration works out of the box. Nvidia is not recommended.
Regarding Android versions, the redroid:11.0.0-latest and redroid:12.0.0-latest images published by the Redroid author already have Google’s ARM translator libndk built in. I tried them and found that only Android 11 is relatively stable, and GApps also works, so this article uses the Android 11 image.
2. Install ReDroid Prerequisites #
ReDroid’s Github has installation instructions for major Linux distributions. I use Ubuntu as the demonstration system.
- First prepare the binder kernel module. On Ubuntu 24.04, run the following commands to install the necessary binder kernel module:
sudo apt install linux-modules-extra-`uname -r`

sudo modprobe binder_linux devices="binder,hwbinder,vndbinder"- Add the above kernel module to automatic loading on boot
echo 'binder_linux options binder_linux devices="binder,hwbinder,vndbinder"' | sudo tee -a /etc/modules-load.d/redroid.confIf you want a graphical Scrcpy interface integrated with key mapping, you can install QtScrcpy instead. You can also try the web version ws-scrcpy.
3. Install GApps into the ReDroid Image in Advance #
The image published by the ReDroid author is vanilla Android and does not come preinstalled with GApps. You can go to Docker Hub to find ReDroid images prebuilt by others. Some include GApps, so you would not need to build it yourself. Of course, use them at your own risk.
Here we use ayasa520’s Remote-Android Script to automatically pull the ReDroid image and install GApps onto it. It only supports Android 11 images.
This script can also be used to install components such as libndk, libhoudini, Magisk, and Widevine DRM.
- Clone the Remote-Android Script repository and create a Python virtual environment
sudo apt install lzip python3 python3-venv python3-pip

git clone https://github.com/ayasa520/redroid-script.git

cd redroid-script

python3 -m venv venv

venv/bin/pip install -r requirements.txt- Pull the Android 11 image and install GApps
venv/bin/python3 redroid.py -a 11.0.0 -g- This gives you an image with GApps included:
redroid/redroid:11.0.0_gapps.
4. Start the ReDroid Container with docker-compose #
- This step is only needed for Nvidia graphics cards. Intel and AMD graphics card users can skip directly to the next step. ReDroid’s support for Nvidia graphics cards is poor. If possible, I recommend using integrated graphics instead. If you insist on using Nvidia, create a virtual machine to run ReDroid. Because Nvidia’s closed source driver cannot let ReDroid use GPU acceleration, you need to run a QEMU virtual machine and install ReDroid inside it to achieve hardware acceleration through virtio-gpu. But since this is paravirtualization, performance loss will be significant. If you do not create a virtual machine and your computer has no integrated graphics, ReDroid will use software rendering. If you can accept software rendering performance, then you do not need to install a virtual machine.
Create a virtual machine for running ReDroid
Install QEMU + Virt Manager, download Ubuntu 24.04, and create a 64GB Ubuntu virtual machine
qemu-img create -f qcow2 ubuntu.qcow2 64GB

qemu-system-x86_64 -boot d -cdrom "ubuntu-22.04.1-desktop-amd64.iso" -enable-kvm -smp 4 -device intel-hda -device hda-duplex  -device virtio-vga-gl  -net nic -net user,hostfwd=tcp::5555-:5555 -cpu host  -m 4096  -display sdl,gl=on -hda ubuntu.qcow2
Boot into the virtual machine, then install Docker.
qemu-system-x86_64 -enable-kvm -smp 4 -device intel-hda -device hda-duplex -device virtio-vga-gl -net nic -net user,hostfwd=tcp::5555-:5555 -cpu host -m 4096 -display sdl,gl=on -hda ubuntu.qcow2- Create a directory for storing Android data, and add docker-compose
mkdir ~/redroid

cd redroid

vim docker-compose.yml- Fill in the following contents:
services:
  redroid:
    image: redroid/redroid:11.0.0_gapps # Use the ReDroid image with GApps created earlier
    stdin_open: true
    tty: true
    privileged: true
    ports:
      - 127.0.0.1:5555:5555 # ADB port. For stronger security, set it to listen only on the local localhost port
    volumes:
      - ./redroid-11-data:/data # Store data in the current directory
    command:
      - androidboot.redroid_width=720 # Phone resolution
      - androidboot.redroid_height=1280
      - androidboot.redroid_dpi=320
      - androidboot.redroid_fps=60
      - androidboot.redroid_gpu_mode=host # Enable host GPU hardware acceleration. host means GPU acceleration; guest means software rendering
      - ro.product.cpu.abilist0=x86_64,arm64-v8a,x86,armeabi-v7a,armeabi # Settings related to libndk
      - ro.product.cpu.abilist64=x86_64,arm64-v8a
      - ro.product.cpu.abilist32=x86,armeabi-v7a,armeabi
      - ro.dalvik.vm.isa.arm=x86
      - ro.dalvik.vm.isa.arm64=x86_64
      - ro.enable.native.bridge.exec=1
      - ro.dalvik.vm.native.bridge=libndk_translation.so
- ro.ndk_translation.version=0.2.2- Start the service
sudo docker compose up -d- Use ADB to connect to the local ReDroid. Since it is local, fill in localhost for the IP. If ReDroid is deployed remotely, change it to the remote host’s IP.
adb connect localhost:5555

# If it cannot connect, use the following commands to see what happened inside the container
sudo docker ps
sudo docker exec <容器ID> logcat
sudo docker logs <容器ID>- Run Scrcpy and connect to Android:
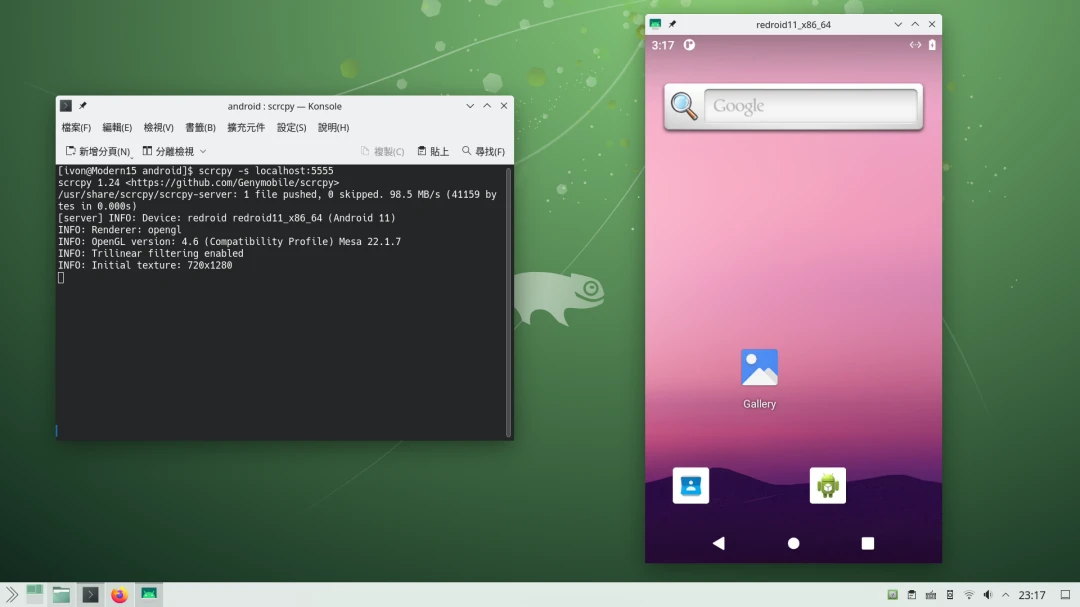
scrcpy -s localhost:5555 --audio-codec=aac-
Then you will see the Android desktop.
-
Google Play services may pop up a “device is not certified” error message.
-
Run the following commands to obtain the Android device ID, register the device on the Google website, wait about 30 minutes, then restart the Redroid container before logging into Google Play.
adb -s localhost:5555 root

adb -s localhost:5555 shell 'sqlite3 /data/data/com.google.android.gsf/databases/gservices.db \
"select * from main where name = \"android_id\";"'-
To confirm whether ReDroid’s 3D acceleration works properly, install AIDA64 and see whether it can recognize your computer’s GPU model.
-
If you want to strengthen security, I recommend setting ReDroid’s docker-compose network to listen only on the local localhost port (
ports: 127.0.0.1:5000:5000). If you want to expose ReDroid to the external network, be careful with firewall settings. Do not expose ADB’s port 5000 directly to the public internet, or there will be serious security concerns.
5. How to Install APKs on ReDroid #
At present, even with libndk installed, the Android 11 Play Store still refuses to download ARM apps. Please use app stores such as APKPure to install apps.
Besides downloading APKs with the browser inside the container, you can also use ADB to install APKs into the ReDroid container. For example, download Line’s APK from ApkMirror, then install it with ADB:
adb -s localhost:5555 install "jp.naver.line.android.apk"Scrcpy supports dragging APKs into the window to install them.
You can also transfer files with ADB’s pull and push commands.
6. How to “Power On and Off” ReDroid #
If you want to power off ReDroid, close the Scrcpy window and then stop the container:
cd ~/redroid

sudo docker compose down
Afterward, you can start ReDroid again with this command. The /data data of the ReDroid container is located in ~/redroid/redroid-11-data, and can be used to back up files from multiple systems.
cd ~/redroid
sudo docker compose up -d
adb connect localhost:5555
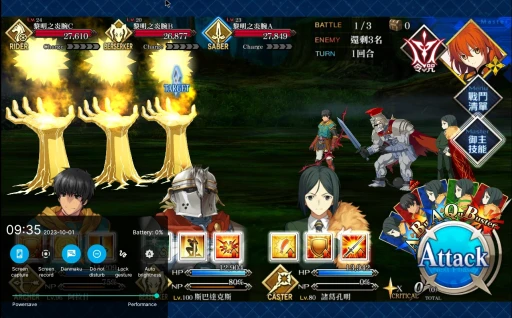
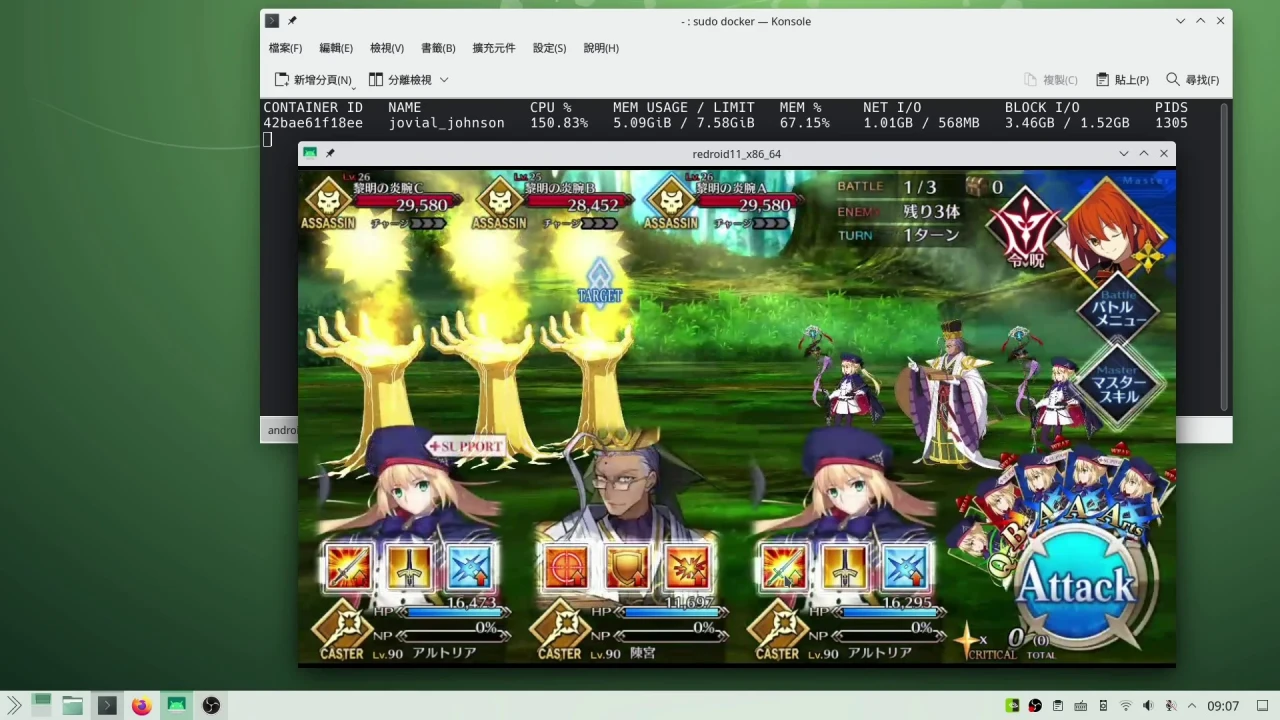
scrcpy -s localhost:5555 --audio-codec=aac7. ReDroid Multi-Instance Example #
Appendix #
Manually install GApps into the ReDroid image
The ReDroid author says Google services framework is proprietary software and cannot be built in, so you have to install it yourself. The first method is recompiling the ReDroid image, and the second is manually installing OpenGApps.
I do not recommend the first method. It is time-consuming, and the GApps compilation tutorial provided by the author also has the problem of other apps being unable to detect it.
Here we use the second method: manual installation.
-
Go to OpenGapps and download Android 11 GApps for x86_64 architecture. Choose the minimal pico version.
-
Extract it, and you will see the following directories
open_gapps-x86_64-11.0-pico-20220503
├── Core
├── GApps
├── META-INF
├── Optional-
Under the extracted directory
open_gapps-x86_64-11.0-pico-20220503, create asystemdirectory. -
Next, extract all
.lzfiles inside theCoreandGAppsdirectories, and place the APK directories inside them into the corresponding installation directories under thesystemdirectory. For example, theGoogleTTSdirectory underGApps/googletts-x86_64/nodpi/app/should be placed under/system/app. -
After placing them, the directory structure under
systemshould look like this:
system
├── app
│   ├── GoogleCalendarSyncAdapter
│   │   └── GoogleCalendarSyncAdapter.apk
│   ├── GoogleContactsSyncAdapter
│   │   └── GoogleContactsSyncAdapter.apk
│   ├── GoogleExtShared
│   │   └── GoogleExtShared.apk
│   └── GoogleTTS
│       └── GoogleTTS.apk
├── etc
│   ├── default-permissions
│   │   ├── default-permissions.xml
│   │   └── opengapps-permissions-q.xml
│   ├── permissions
│   │   ├── com.google.android.dialer.support.xml
│   │   ├── com.google.android.maps.xml
│   │   ├── com.google.android.media.effects.xml
│   │   ├── privapp-permissions-google.xml
│   │   └── split-permissions-google.xml
│   ├── preferred-apps
│   │   └── google.xml
│   └── sysconfig
│       ├── dialer_experience.xml
│       ├── google_build.xml
│       ├── google_exclusives_enable.xml
│       ├── google-hiddenapi-package-whitelist.xml
│       └── google.xml
├── framework
│   ├── com.google.android.dialer.support.jar
│   ├── com.google.android.maps.jar
│   └── com.google.android.media.effects.jar
├── priv-app
│   ├── AndroidAutoPrebuiltStub
│   │   └── AndroidAutoPrebuiltStub.apk
│   ├── AndroidMigratePrebuilt
│   │   └── AndroidMigratePrebuilt.apk
│   ├── CarrierSetup
│   │   └── CarrierSetup.apk
│   ├── ConfigUpdater
│   │   └── ConfigUpdater.apk
│   ├── GoogleBackupTransport
│   │   └── GoogleBackupTransport.apk
│   ├── GoogleExtServices
│   │   └── GoogleExtServices.apk
│   ├── GoogleFeedback
│   │   └── GoogleFeedback.apk
│   ├── GoogleOneTimeInitializer
│   │   └── GoogleOneTimeInitializer.apk
│   ├── GooglePackageInstaller
│   │   └── GooglePackageInstaller.apk
│   ├── GooglePartnerSetup
│   │   └── GooglePartnerSetup.apk
│   ├── GoogleRestore
│   │   └── GoogleRestore.apk
│   ├── GoogleServicesFramework
│   │   └── GoogleServicesFramework.apk
│   ├── Phonesky
│   │   └── Phonesky.apk
│   ├── PrebuiltGmsCore
│   │   └── PrebuiltGmsCore.apk
│   └── SetupWizard
│       └── SetupWizard.apk
└── product
    └── overlay
└── PlayStoreOverlay.apk- Run the following commands to obtain root permission:
adb connect localhost:5555
adb -s localhost:5555 root
adb -s localhost:5555 remount
adb -s localhost:5555 shell "rm -rf system/priv-app/PackageInstaller"- Next, push the
systemdirectory to the ReDroid system and grant permissions:
adb -s localhost:5555 push system /
adb -s localhost:5555 shell "pm grant com.google.android.gms android.permission.ACCESS_COARSE_LOCATION"
adb -s localhost:5555 shell "pm grant com.google.android.gms android.permission.ACCESS_FINE_LOCATION"
adb -s localhost:5555 shell "pm grant com.google.android.setupwizard android.permission.READ_PHONE_STATE"
adb -s localhost:5555 shell "pm grant com.google.android.setupwizard android.permission.READ_CONTACTS"
adb reboot- Restart the ReDroid container:
cd ~/redroid
sudo docker compose down
sudo docker compose up -d- Start Scrcpy
scrcpy -s localhost:5555 --audio-codec=raw- Open system settings → Apps, tap the upper-right corner to show system apps, and enable permissions for Google Play services and Play Store.
Manually extract libndk to build an Android image
libndk is proprietary software developed by Google and included in Android Studio’s emulator. According to the ReDroid author’s instructions, we can manually extract libndk from a newer Android emulator and stuff it into the vanilla ReDroid system.
Here I use Android 13 as an example. Note that the author does not guarantee it will definitely work.
-
Install Android Studio and add an Android 13 virtual machine
-
Connect through ADB
adb devices
adb shell
su- Package libndk
{ find /system -name arm* -type d; find /system -name *ndk_translation*; find /system/etc -name *arm*; } | tar -cf /sdcard/nb.tar -T -- Package libndk.so
find system -type l | tar -cf /sdcard/so.tar -T -- Exit ADB and transfer the above files back to the local machine
exit
exit
adb pull /sdcard/nb.tar .
adb pull /sdcard/so.tar .- Add libndk.so to the libndk archive
tar -xvf so.tar
find system -type l | tar -rf libndk_translation.tar -T -- Add
DOCKERFILEand fill in the following contents:
FROM redroid/redroid:13.0.0-latest

ADD libndk_translation.tar /- Start building the Android 13 image containing libndk. Afterward, this image
redroid:13.0.0-libndkcan be used to run the container.
docker build . -t redroid:13.0.0-libndk