The steps described in this article require root permissions. If your phone is not rooted, please useproot Ubuntu instead (note: proot is slower than chroot).
On a GNU/Linux PC, we can use the chroot to create an isolated Linux environment. This was the earliest container concept before cgroups. Switching into it via the chroot command is like entering another system. Android is based on the Linux kernel, and after some modifications, it can use chroot.
Termux, a temrminal emulator, could be an good Linux Deploy alternative. Although Linux Deploy has an intuitive interface, it is a bit old, especially the version of rootfs, and the default downloading script is not well written and easy to get disconnect. Also some settings are not very satisfactory.
So let’s abandon Linux Deploy and use Termux to manually create a chroot environment!
In this article, I will tell you how to manually install Ubuntu chroot environment on Android phone without using Linux Deploy. And I will provide you an one-click Ubuntu starting script in the end.
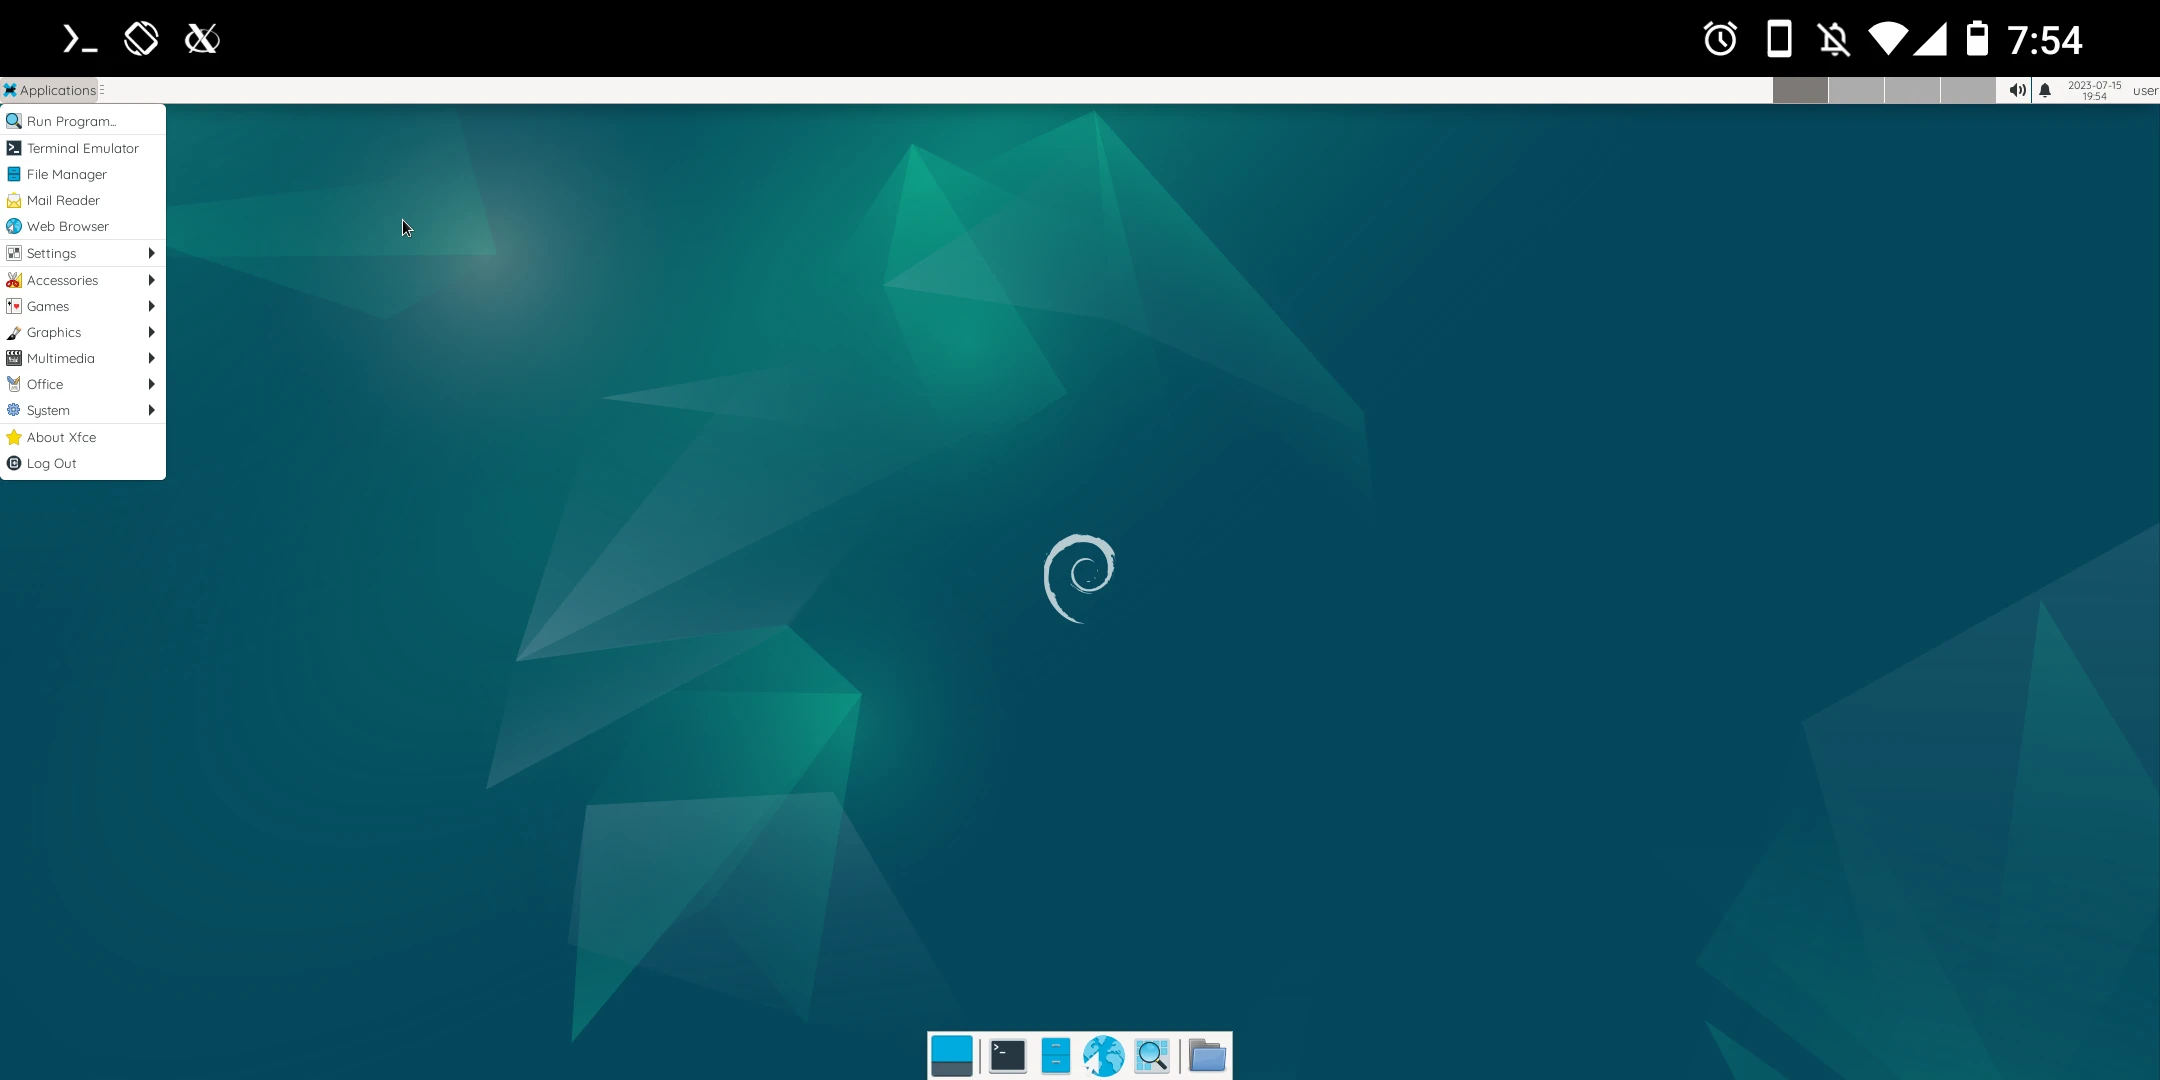
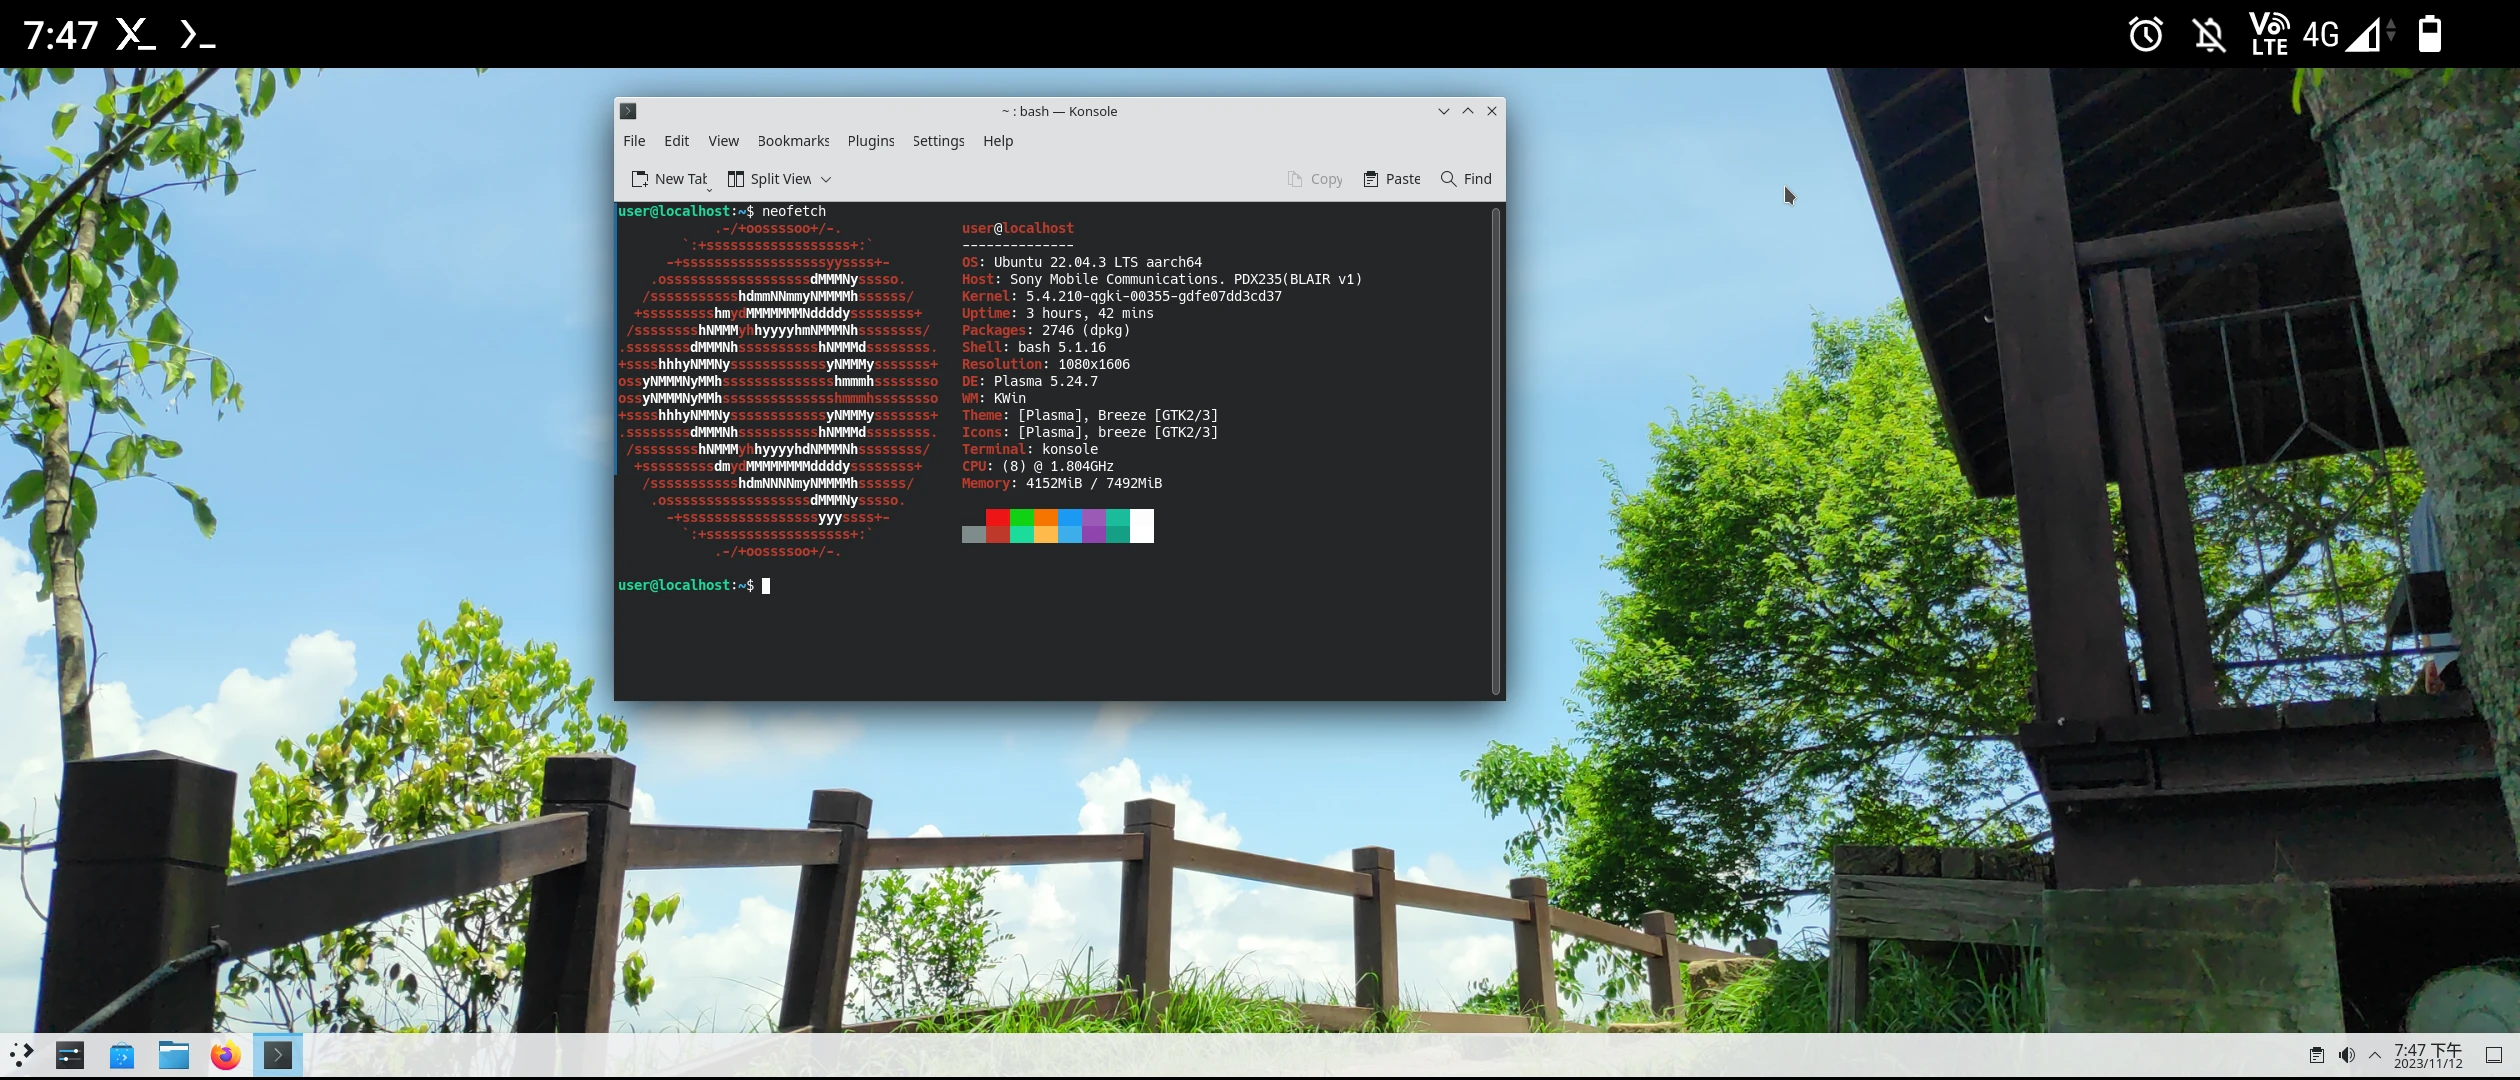
Ubuntu 22.04 LTS in chroot running on Android 13, Sony Xperia 10 V.
1. Hardware requirements #
If you want to run a desktop environment in chroot:
Processor: Qualcomm Snapdragon 845 or above
RAM: 6GB
Minimum storage space: 10GB
2. Install Busybox, Termux, Termux X11 #
-
Use Magisk to flash the Busybox module (Skip this step if you are using Magisk, KernelSU or APatch)
-
Install Termux
-
Install Termux X11
-
Install virglrenderer to enable hardware acceleration
3. Download Ubuntu rootfs #
Please install Termux first.
- Open Termux, install tsu and pulseaudio
pkg update

pkg install tsu pulseaudio- Enter Androud shell
su- Create a directory at
/data/local/tmpfor chroot envrionment
mkdir /data/local/tmp/chrootubuntu

cd /data/local/tmp/chrootubuntu- Download latest Ubuntu rootfs from Ubuntu releases
busybox wget https://cdimage.ubuntu.com/ubuntu-base/releases/noble/release/ubuntu-base-24.04.2-base-arm64.tar.gz- Unzip the archive. And create a mountpoint for sdcard (internal storage)
tar xpvf ubuntu-base-*-base-arm64.tar.gz --numeric-owner

mkdir sdcard

mkdir dev/shm- Create a startup script.
cd ../

vi startu.sh- Type these:
#!/bin/sh

# The path of Ubuntu rootfs
UBUNTUPATH="/data/local/tmp/chrootubuntu"

# Fix setuid issue
busybox mount -o remount,dev,suid /data

busybox mount --bind /dev $UBUNTUPATH/dev
busybox mount --bind /sys $UBUNTUPATH/sys
busybox mount --bind /proc $UBUNTUPATH/proc
busybox mount -t devpts devpts $UBUNTUPATH/dev/pts

# /dev/shm for Electron apps
busybox mount -t tmpfs -o size=256M tmpfs $UBUNTUPATH/dev/shm

# Mount sdcard
busybox mount --bind /sdcard $UBUNTUPATH/sdcard

# chroot into Ubuntu
busybox chroot $UBUNTUPATH /bin/su - root

# Umount everything after exiting the shell. Because the graphical environment will be installed later, they are commented. If you do not want to install a graphics environment, uncomment the following commands.
#busybox umount $UBUNTUPATH/dev/shm
#busybox umount $UBUNTUPATH/dev/pts
#busybox umount $UBUNTUPATH/dev
#busybox umount $UBUNTUPATH/proc
#busybox umount $UBUNTUPATH/sys
#busybox umount $UBUNTUPATH/sdcard- Make the script executable
chmod +x startu.sh- Start the script. Then you should see the prompt becomes
root@localhost. To logout, typeexit.
sh startu.sh- Before updating packages, execute the following commands to solve
apt cannot resolve hosterrors
echo "nameserver 8.8.8.8" > /etc/resolv.conf

echo "127.0.0.1 localhost" > /etc/hosts- Then fix
Download is performed unsandboxed as rootwarning:
groupadd -g 3003 aid_inet

groupadd -g 3004 aid_net_raw

groupadd -g 1003 aid_graphics

usermod -g 3003 -G 3003,3004 -a _apt

usermod -G 3003 -a root- Now you can update packages:
apt update

apt upgrade- Install common tools
apt install vim net-tools sudo git4. Create a regular user and setup language #
- Setup the timezone. For example,
Asia/Taipei
ln -sf /usr/share/zoneinfo/Asia/Taipei /etc/localtime- Add a new user named
user
groupadd storage
groupadd wheel
useradd -m -g users -G wheel,audio,video,storage,aid_inet -s /bin/bash user
passwd user- Execute:
vim /etc/sudoers. Adduserto sudoers
user ALL=(ALL:ALL) ALL- Switch to
user
su user
cd ~- Install locales packages and generate locales for your language.
sudo apt install locales
sudo locale-gen en_US.UTF-8
5. Install a desktop enviromment #
5.1. XFCE4 #
- Install XFCE4 (Xubuntu) desktop environment.
sudo apt install xubuntu-desktop- Then setup default terminal emulator (Enter the number of
xfce4-terminal)
sudo update-alternatives --config x-terminal-emulatorThe command to start XFCE4 is startxfce4. We will discuss this later.
5.2. KDE #
- Install KDE (Kubuntu) desktop environment.
sudo apt install kubuntu-desktop- Then setup default terminal emulator (Enter the number of
konsole)
sudo update-alternatives --config x-terminal-emulatorThe command to start KDE is startplasma-x11. We will discuss this later.
6. Misc settings #
6.1. Start SSH service in chroot #
- Install OpenSSH
sudo apt install openssh-client openssh-server- Change root password
passwd root- Start SSH service manually.
mkdir /run/sshd
/usr/sbin/sshd -D &
You can check the IP address of the phone by executing ifconfig. Then you can SSH into the phone from your PC.
6.2. Disable Snapd #
Do not install Snap packages. When you type sudo apt install firefox, Ubuntu will try to download snap version of Firefox. However, Snap will not work in chroot because there is no systemd on Android. Therefore, you should avoid installing snap packages.
For exmaple, you can add Mozilla’s ppa to install firefox-esr instead of fireofox:
sudo apt install software-properties-common
sudo add-apt-repository ppa:mozillateam/ppa
sudo apt-get update
sudo apt-get install firefox-esr
And you could disable Snap by doing this:
apt-get autopurge snapd

cat <<EOF | sudo tee /etc/apt/preferences.d/nosnap.pref
# To prevent repository packages from triggering the installation of Snap,
# this file forbids snapd from being installed by APT.
# For more information: https://linuxmint-user-guide.readthedocs.io/en/latest/snap.html
Package: snapd
Pin: release a=*
Pin-Priority: -10
EOF
7. Setup the one-click startup script #
Termux could play audio through PulseAudio → OpenGL ES.
Here we use Termux Widget to add a shortcut to start chroot Ubuntu from the phone’s desktop.
- Exit chroot
exit-
Install Termux Widget
-
Open the phone system settings and grant Termux the “Screen overlay” permission.
-
Force stop Termux. Restart Termux.
-
Edit the script we used to start chroot Ubuntu
su -c "vi /data/local/tmp/startu.sh"- Change the line
busybox chroot $UBUNTUPATH /bin/su - rootto the following contents.startxfce4will automatically start XFCE desktop.
busybox chroot $UBUNTUPATH /bin/su - user -c "export DISPLAY=:0 PULSE_SERVER=tcp:127.0.0.1:4713 && dbus-launch --exit-with-session startxfce4"- Add and edit a new shortcut file
touch .shortcuts/start_chrootubuntu.sh
chmod +x .shortcuts/start_chrootubuntu.sh
vim .shortcuts/start_chrootubuntu.sh- Fill in the following:
#!/bin/bash

# Kill all old prcoesses
killall -9 termux-x11 Xwayland pulseaudio virgl_test_server_android termux-wake-lock

## Start Termux X11
am start --user 0 -n com.termux.x11/com.termux.x11.MainActivity

sudo busybox mount --bind $PREFIX/tmp /data/local/tmp/chrootubuntu/tmp

XDG_RUNTIME_DIR=${TMPDIR} termux-x11 :0 -ac &

sleep 3

# Start Pulse Audio of Termux
pulseaudio --start --exit-idle-time=-1
pacmd load-module module-native-protocol-tcp auth-ip-acl=127.0.0.1 auth-anonymous=1

# Start virgl server
virgl_test_server_android &

# Execute chroot Ubuntu script
su -c "sh /data/local/tmp/startu.sh"-
Return to the mobile phone desktop, long press to “add a new widget”, select Termux Widget and drag it to the desktop. The script we just wrote above should be displayed on the list. Press to start chroot Ubuntu.
-
To exit the desktop envrionment, press exit. Then force stop Termux and Termux X11 APP.
8. How to remove chroot directory safely #
Exit chroot and make sure everything is unmounted (no resource is busy message), otherwise you may delete the sdcard data.
The easiest way is to just reboot and everything will be unmounted.
Then remove the chroot directory:
su -c "rm -r /data/local/tmp/chrootubuntu"