Ivon喜歡在家裡的Linux伺服器跑一些自架服務,例如:
- 查看自架的NodeJS網站
- 連線到RustDesk遠端桌面
- 架設Joplin筆記同步伺服器
- 存取Nextcloud雲端硬碟
- 串流Jellyfin影片
- 跑Open WebUI語言模型服務
- 遊玩Minecraft伺服器
要從外部網路存取家中內網的Linux伺服器,Ivon試過二種方式,各有優缺點。
用ZeroTier之類的內網穿透軟體,使用VPN連接。但總覺得連線都要開VPN很麻煩,尤其是手機端,不想一個圖示亮在那兒。
開Port Forwarding加上設定No-IP DDNS,使用固定網域連線,解決浮動公共IP的問題。可是將電腦暴露到公網感覺很危險。
有沒有不需要在客戶端安裝VPN,又能使用網域連線的方案呢?所以Ivon就來嘗試「Cloudflare Tunnel」。
無需將伺服器暴露到公網,也不需要安裝VPN,就能夠從外網存取家中的伺服器。
本文Ivon會討論如何在Linux伺服器架設Cloudflare Tunnel服務,後面再討論如何用「Cloudflare Zero Trust」做一個登入驗證,增強公開伺服器的安全性。
1. Cloudflare Tunnel簡介#
Cloudflare Tunnel是Cloudflare公司推出的免費服務。
原理圖來自官網:
Cloudflare Tunnel會在你的客戶端和伺服端建立一個隧道,客戶端只要使用網域就能連線到伺服器。流量傳輸的時候中間會經過Cloudflare proxy,並使用HTTPS加密。
這樣做有很多優點,由於全球都有Cloudflare伺服器,用他們的網路跑服務速度很快。他們的prxoy能隱藏你伺服器的真實IP位址,順便擋掉一些常見的網路攻擊。
缺點是,你的伺服端資料會明碼傳到Cloudflare伺服器再通過SSL加密。所以如果伺服端沒做任何SSL加密就讓Cloudflare Tunnel轉發流量的話,Cloudflare是能看到你伺服器的所有資料的。這取決於你信不信得過Cloudflare這家美國公司。
另外,你需要購買網域才可以使用Cloudflare Tunnel。儘管Cloudflare提供trycloudflare.com的暫時性網域,讓你能夠把它當作ngrok用,還是建議在Cloudflare Registrar買個便宜的網域,再把它與Cloudflare Tunnel連線比較好。
起碼買網域比申請固定的公共IP要容易多了吧!
最後請注意Cloudflare Tunnel使用規定:根據服務條款,你不可以用來傳輸大流量的檔案,例如串流Jellyfin影片,抓到會被暫時禁止使用服務。
條文如下:
2.8 Limitation on Serving Non-HTML Content
Use of the Services for serving video or a disproportionate percentage of pictures, audio files, or other non-HTML content is prohibited, unless purchased separately as part of a Paid Service or expressly allowed under our Supplemental Terms for a specific Service. If we determine you have breached this Section 2.8, we may immediately suspend or restrict your use of the Services, or limit End User access to certain of your resources through the Services.
說是這樣說啦,但Ivon看Reddit上一堆人這樣用都沒被封了。Ivon調查下來發現,此條款是2023年以前的版本。根據2023年Cloudflare官方貼文,他們修改了用語:
Finally, we made it clear that customers can serve video and other large files using the CDN so long as that content is hosted by a Cloudflare service like Stream, Images, or R2.
這裡他們講清楚了些,允許使用者透過Cloudflare Tunnel傳輸託管在Cloudflare R2等服務的大型檔案。
所以說,你還是不能用Cloudflare串流自己伺服器的影片,因為你不是使用他們的服務託管檔案,流量過高會被ban。後面Ivon會討論避免流量過高的方法。
2. 準備一個網域#
註冊一個Cloudflare帳號
3. 安裝Cloudflared#
負責連線到Cloudflare Tunnel的常駐程式叫做cloudflared,支援Linux、Windows、macOS系統。
根據官方文件,在Linux伺服器安裝cloudflared。例如Ubuntu是新增Cloudflare的套件庫再安裝
sudo mkdir -p --mode=0755 /usr/share/keyrings

curl -fsSL https://pkg.cloudflare.com/cloudflare-main.gpg | sudo tee /usr/share/keyrings/cloudflare-main.gpg >/dev/null

echo "deb [signed-by=/usr/share/keyrings/cloudflare-main.gpg] https://pkg.cloudflare.com/cloudflared $(lsb_release -cs) main" | sudo tee /etc/apt/sources.list.d/cloudflared.list

sudo apt update

sudo apt install cloudflared註:你也可以在Github取得cloudflared的二進位執行檔。
Cloudflared也可以用Docker執行。
4. 架設Cloudflare Tunnel服務#
確認cloudflared已經安裝。
登入Cloudflare帳號驗證,選取要使用的網域
sudo cloudflared tunnel login- 建立一個叫做
default的tunnel,會自動產生一組UUID,然後憑證會儲存到/root/.cloudflared/
sudo cloudflared tunnel create "default"撰寫cloudflared設定檔,我們寫好設定檔之後還要將其安裝為Systemd服務檔,以便透過systemctl指令管理。cloudflared的設定檔可以透過Cloudflare網頁後台編輯,再根據Cloudflare網頁後台提供的指令儲存為Systemd服務檔。或者由使用者自行撰寫。這裡我選擇後者。
cloudflared建議使用Root使用者執行。編輯
/root/.cloudflared/config.yml,填入要轉發的本機服務通訊埠和Cloudflare Tunnel。
# 要轉發的本機服務通訊埠,例如Jellyfin是http://localhost:8096
url: http://localhost:8096

# Tunnel的UUID
tunnel: "Tunnel的UUID"

# 憑證路徑
credentials-file: /root/.cloudflared/Tunnel的UUID.json- 有使用防火牆的,你需要開啟對應服務的通訊埠,才能從Cloudflare Tunnel外部連線進來
sudo ufw allow 8096

sudo ufw reload- 安裝Cloudflared為Systemd服務檔,並設定開機自動啟動:
sudo cloudflared --config /root/.cloudflared/config.yml service install

sudo systemctl enable cloudflared- 啟動服務,開始轉發流量
sudo systemctl start cloudflared

sudo systemctl status cloudflared- 稍等一會之後,你就能用網域存取本機網頁服務了。

5. 轉發多個本機服務#
上面的設定方式只能存取一個服務而已。如果你想讓一個網域成為你伺服器上多個服務的唯一入口,比較簡單的作法是搞子網域,讓一個子網域對應一個服務的通訊埠。
像是打https://jellyfin.example.com就能連線到http://localhost:8096;輸入https://nextcloud.example.com就能連線到http://localhost:80,以此類推。
開啟Cloudflare後台,點選管理網域 → 管理 → DNS紀錄,新增子網域CNAME紀錄,IPV4目標位址設定為
<你的Cloudflare Tunnel UUID>.cfargotunnel.com。
Cloudflare Tunnel支援TCP、HTTP、SSH、RDP等多種協定。這裡我只用HTTP示範,如果你要使用HTTP以外的協定,請參考Non-HTTP applications的部署方式。
編輯設定檔
/root/.cloudflared/config.yml,加入你要轉發的規則。假設我要給每個服務都對應一個子網域,那就如下撰寫。請移除原本檔案最上方的url:,並在最下面加上service: http_status:404的規則。
# Tunnel的UUID
tunnel: "Tunnel的UUID"

# 憑證路徑
credentials-file: /root/.cloudflared/Tunnel的UUID.json

# 各個服務對應的通訊埠
ingress:

  - hostname: nextcloud.example.com
    service: http://localhost:80

  - hostname: jellyfin.example.com
    service: http://localhost:8096

  - hostname: rustdesk.example.com
    service: http://localhost:21118

- service: http_status:404- 測試是否合法
cloudflared tunnel ingress validate- 重新啟動cloudflared服務
sudo systemctl restart cloudflared- 嘗試用子網域存取服務。
6. 停用Cloudflare Tunnel的快取#
這是為了避免太多檔案快取到Cloudflare CDN伺服器,導致流量過高而違反服務條款。想要用Cloudflare Tunnel串流影音內容的建議停用快取。
開啟Cloudflare後台,點選管理網域 → 管理 → Caching → Cache Rules
新增「全部略過快取」的規則,針對網域和子網域停用快取,再點選「部署」。

之後你可以在Cloudflare後台 → Zero Trust → Analytics,查看proxy所傳輸的流量是否有減少。
7. 用Zero Trust加一層網頁登入密碼#
非必要步驟。
由於你的網域是公開的,要是被人得知了就能連線到你的伺服器,密碼可能會被暴力破解。所以加點額外驗證手段,不要讓人知道網域就能無限制存取你的服務。
有很多方法保護公開網域的伺服器,例如使用WARP VPN驗證,但Ivon不想要客戶端弄一堆東西才能連線。所以這裡Ivon結合Cloudflare推出的「Zero Trust」服務,做一個額外的登入驗證,加強公開伺服器安全性。
進入Cloudflare後台,點Zero Trust → Access → Application → Add an application → Self-hosted
填入應用程式名稱和對應的子網域。Session Duration是一次登入後多久會過期。

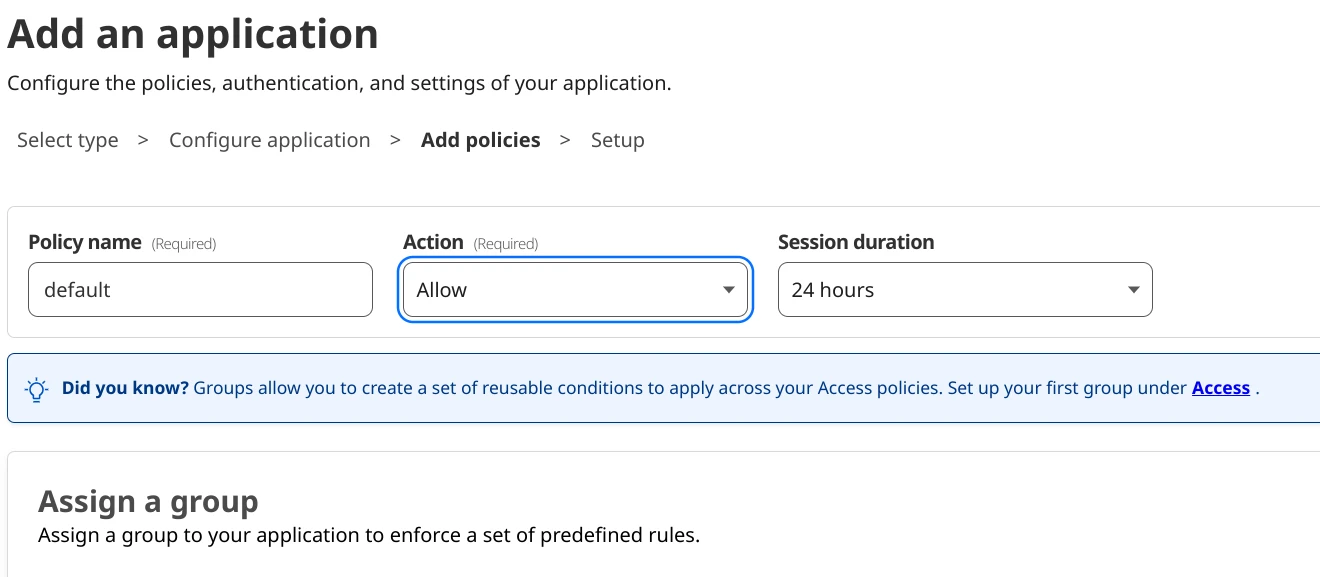
新增一個policy

在Configure Rules這裡設定驗證方式,例如Ivon這裡設定要登入特定的電子郵件才給過

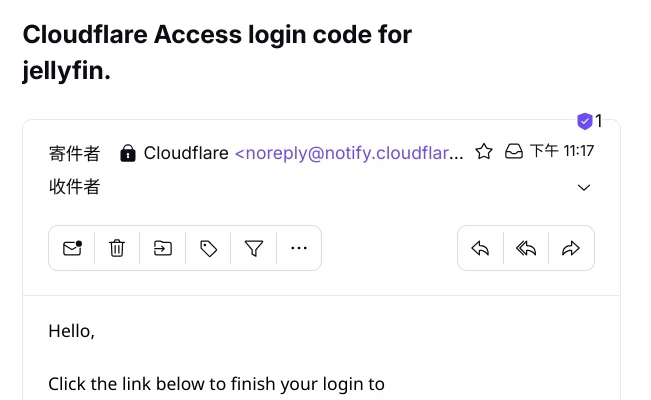
這樣連線到網頁服務的時候,會先看到Cloudflare Zero Trust登入畫面。

必須輸入指定電子郵件收取驗證碼,才能看到背後伺服器的畫面。


