建議先閱讀:GameTest API入門
這篇文章會示範用Gametest來「自訂指令」,並解釋指令如何運作 。
Gametest API Framework Wrapper,暫時翻譯成「遊戲測試API框架包裝」。
名字太長了我就用GFW簡稱。跟中國網路長城沒關係嘿。
1. 為什麼要用GFW #
由於Minecraft的GameTest API還沒有完善的函數,所以要做一些功能很麻煩,例如「新增一個指令並執行」,就要撰寫一系列長長的程式碼來實現。
而GFW是一種函式庫(library),提供了一系列簡便的函數來提供便利的功能。
假設新增指令要自行寫10行程式碼,處理使用者輸入指令、執行指令,則使用函式庫用1行就能解決,因為這些細節的處理部分函式庫都已經寫好了。
而且Gametest的底層方法更新很快,透過這個函式庫,多使用函式庫提供的功能,而不用考慮原始Minecraft的模塊要怎麼匯入。
GFW的library資料夾點進去能看到這些函數具體是怎麼實現的,例如「資料庫」的函數其實就是在玩家身上創建計分板,然後提供存取資料庫的方法。
2. 安裝GFW #
- GFW可從GitHub按綠色的"Code"下載zip,解壓縮後就是一個現成的行為包。
裡面包含函式庫和一些指令範本檔案。

manifest.json裡面已經聲明好entry,所以維持基本架構,主程式就寫在/scripts/minecraft/index.js
不過如果要以這個函式庫為基礎發布作品的話,記得把第14行的modules的UUID改掉避免衝突:
{
    "format_version": 2,
    "header": {
        "description": "Framework Wrapper is a pack that allows you to interact with GameTest FrameWork API easily! This pack will help to keep your code clean and compact. And makes interactions with the API much easier. Pack also includes a lot of cool/useful utils!nnThis pack was created by notbeer!n§9Discord: §fnotbeer#9204n§aXbox Live: §fColoringEmy86nThis pack will provide a basic start with §eGameTest FrameWork§f. Including a good §acommand handler and §afew example commands§f!",
        "name": "Framework Wrapper",
        "uuid": "918f111a-cd35-11eb-b8bc-0242ac130003",
        "version": [0, 0, 1],
        "min_engine_version": [ 1, 14, 0 ]
    },
    "modules": [
        {
            "description": "GameTest FrameWork Module Minecraft",
            "type": "javascript",
            "uuid": "9953c724-cd35-11eb-b8bc-0242ac130003",
            "version": [0, 0, 1],
            "entry": "scripts/minecraft/index.js"
        }
    ],
    "dependencies": [
        {
            "uuid": "b26a4d4c-afdf-4690-88f8-931846312678",
            "version": [ 0, 1, 0 ]
        },
        {
            "uuid": "6f4b6893-1bb6-42fd-b458-7fa3d0c89616",
            "version": [ 0, 1, 0 ]
        }
    ]
}/scripts/minecraft/index.js裡面已經寫好了範例程式:
import '../library/import-library-content.js';
export const config = {
    commandPrefix: '+'
};

//Eh well you can delete the stuff at the bottom whenever you want lol
//This will just execute once the world has loaded
import { Server, setTickTimeout } from '../library/Minecraft.js';

setTickTimeout(() => {
    Server.broadcast(`§bWelcome to the starter pack! nThis pack contains A LOT of stuff for you to use. Content includes: custom commands, cool utils and a lot more!nFor more information read the DOCS inside the pack!n§eDo you need help? Join this Discord server: §fhttps://discord.gg/KyN24Mq73wnn§eGameTest FrameWork API Starter Pack§rn§bCredit: §rThis pack was made by §anotbeern§9Discord: §fnotbeer#9204n§aXbox Live: §fColoringEmy86`);
}, 500);第一行把函式庫的東西都import。除了函式庫外,在/scripts資料夾的任何地方,都可以import ‘Minecraft’的模塊。
第二行的變數,是把config匯出,這裡代表的是要使用的自訂指令的前綴,例如「+」號
因此,這裡的自訂指令不是以「/」開頭,而是用「+」。(嚴格來說,這樣不算自訂指令,因為目前沒有能偵測斜線的事件,所以只好用+號開頭攔截特定聊天訊息)
剩下的就是從函式庫import Server和setTimeout這二個類別,然後使用setTimeout的方法,在玩家進入世界幾秒後,延遲顯示一條歡迎訊息。

3. GFW提供的函數 #
目前GFW提供以下幾種類別:
- Database: 以玩家本身記分板當資料庫使用,可儲存與讀取資料。
- Command: 可以註冊指令、查詢已註冊的指令
- Event: 添加事件監聽器
- Server: 發送訊息、查詢玩家、執行指令
- Entity: 查詢實體、查詢記分板
- Player: 獲取玩家物品數量
還有以下函數:
- Formatter: 格式化文字輸出
- Scheduling: 排程、延遲執行
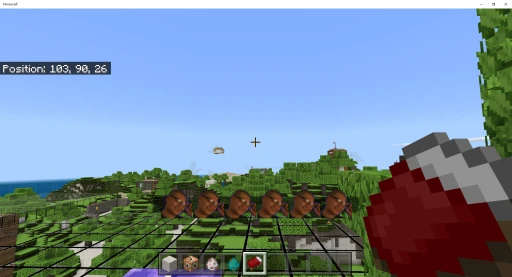
- Miscellaneous: 顯示玩家稱號、在玩家頭上顯示排行
4. 實際來新增指令 #
影片版教學:
由於這個範本包已經有內建一些指令,來看看他是怎麼匯入的:
-
entry是在
/scripts/minecraft/index.js,而自訂的指令放在/scripts/minecraft/commands/裡面。 -
首先遊戲會載入
index.js,這個檔案會匯入commands/import_command.js。 -
而
import_command.js這個檔案會把commands/資料夾裡面的全部指令都匯入,這樣才算是完全載入所有自訂的指令。
由此可知,每一個「自訂指令」都是獨立的js檔案,每新增一個檔案,就要在import_command.js中寫上去,讓其匯入。
使用Gametest操作指令有一個好處,就是執行指令時可以直接代入變數,而不用用固定的選擇子。
關於註冊指令的介面用法,作者寫在Github上的文檔了,這裡實際新增一個新指令,輸入指令後會開始執行畫圓指令。
這段指令用命令方塊串起來也可以執行,而這裡透過存取玩家的變數給予更大彈性。
//匯入要用到的類別
import { Command, Server, Event } from '../../../library/Minecraft.js';

//註冊指令
const registerInformation = {
    private: false,
    cancelMessage: true,
    name: 'circle',
    aliases: ['cricle2'],
    description: '畫圓,最小值5',
    example: ['circle 半徑']
};

//run代表畫圓開始,radius是預設半徑,countdown是畫圓多久後刪除盔甲架,px,y,z是玩家座標
var run = false;
var radius = 5;
var countdown = 90 * radius;
var px, py, pz;

//撰寫指令輸入後會執行的程式碼
Command.register(registerInformation, (data, args) => {
    if (!run) {
        Server.runCommands([
            "execute @p ~ ~ ~ summon armor_stand r ~ ~ ~"
        ]);
        //決定半徑。args預設會把輸入的指令後的參數以空格分開,因此args[0]代表的就是+circle後面空一格的第一個參數
        radius = Number(args[0]) > 5 ? args[0] : 5;
        //從data裡面獲取指令發送者的座標,將其四捨五入(不然圓形畫出來會有瑕疵)
        px = Math.round(data.sender.location.x);
        py = Math.round(data.sender.location.y);
        pz = Math.round(data.sender.location.z);
        Server.broadcast(`在${px},${py},${pz}畫半徑${radius}的圓`);
        run = true;
    }
    else {
        Server.broadcast(`請等目前的圓形畫完`);
    }
});

//訂閱tick事件
Event.on('tick', () => {
    if (run == true) {
        //生成盔甲架,在倒數計時結束前一直轉圈圈並生成玻璃
        Server.runCommands([
            `execute @e[type=armor_stand, name=r, c=1] ~ ~ ~ tp @s ${px} ${py} ${pz} ~1`,
            `execute @e[type=armor_stand, name=r, c=1] ~ ~-1 ~ fill ^ ^ ^ ^ ^ ^${radius} minecraft:glass`,
            `execute @e[type=armor_stand, name=r, c=1] ~ ~-1 ~ fill ^ ^ ^ ^${radius} ^ ^ minecraft:glass`
        ]);
        countdown--;
    }
    if (countdown == 0) {
        Server.runCommands([
            "kill @e[type=armor_stand, name=r]"
        ]);
        countdown = radius * 90;
        run = false;
    }
});我把這個circle.js跟home.js放在一起,也就是commands/misc/資料夾:

不要忘了在import-command.js裡面也要註明匯入:
//Make sure to import your custom command file here
import './information/help.js';

import './misc/home.js';
import './misc/sell.js';
import './misc/circle.js';

import './moderation/ban.js';
import './moderation/unban.js';實際到遊戲中測試,輸入+circle,以預設的半徑5開始。或是+circle 10,畫半徑10的圓。