Add events calendar view to Hugo website.
一直以來,要紀錄自己成長的軌跡,我會去翻Github Activity,就是會在首頁顯示開發活動的歷程的圖表。不過老實說這個一點都不準確,這個圖表是以儲存庫更新的次數計算的,這樣頂多知道哪幾天有推送部落格原始碼更新而已,不能準確的查到我在過去哪天寫了什麼文章。
是的,現在更新Github儲存庫我大多是寫文章而非寫code,萬一哪天我認真參與開發專案,這個活動歷程也就不能當我發文歷史的參考了。
另外,我想要有一個方法,能夠翻閱回味十年以前發的文章(一講到這個,耳邊就響起了南拳媽媽 - 香草把噗的音樂)。我最早在網路上的發文大約可以追溯到2012年左右,做一個顯示所有文章的「Archives」頁面太醜了,需要一個月曆檢視的工具,可以快速帶我回到過去。
因此想到要給Hugo網站加一個日曆/月曆/年曆功能。它必須要有標準日期檢視功能,並且可以快速跳轉月份、年份的按鈕。最為重要的是,該月曆不是手動排行程的行事曆,而是自動抓取Hugo網站所有發表的文章,並將超連結渲染在日期格子上。
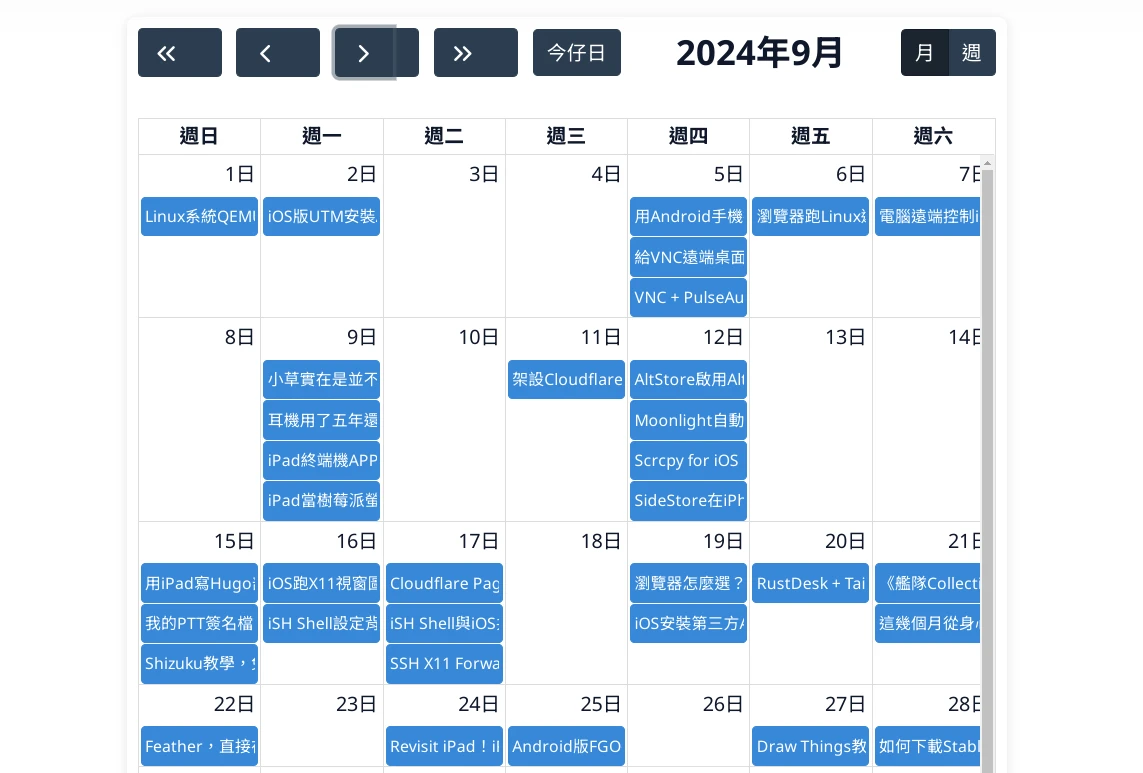
至於要怎麼做月曆,不必手刻,網路上已經有現成的函式庫FullCalendar能用了,只要將Hugo的文章列表作為JSON資料餵給FullCalendar,它就會自動產生一個互動式的月曆。
做出來大概會像是這樣。我主要是做宏觀時間軸,因此只有開月曆與年曆的功能。
1. 建立專門的月曆頁面#
採用page layout的作法來做一個專門放月曆的頁面。
- 新增放月曆的頁面,放在
網站根目錄/content/events-calendar/index.md,程式碼只有以下幾行
---
title: "月曆"
description: ""
layout: "events-calendar"
---- 接著製作真正的layout page,放在
網站根目錄/layouts/page/events-calendar.html
2. 加入FullCalendar元素#
- 首先讓
網站根目錄/layouts/page/events-calendar.html頁面繼承Blowfish主題的header與footer
{{ define "main" }}

//程式碼

{{ end }}- 定義FullCalendar的CSS
<style>
    #calendar {
        max-width: 800px;
        margin: 50px auto;
        padding: 0 10px;
        border-radius: 8px;
        box-shadow: 0 2px 10px rgba(0, 0, 0, 0.1);
    }

    .fc-toolbar-title {
        font-size: 1.5em;
        font-weight: bold;
    }

    .fc-event {
        font-size: 0.8em;
        border-radius: 4px;
        padding: 2px;
    }

    .fc-header-toolbar {
        padding: 10px 0;
    }

    .fc-button {
        background-color: #007bff;
        border: none;
        border-radius: 4px;
        color: white;
        padding: 5px 10px;
        font-size: 0.9em;
        cursor: pointer;
    }

    .fc-button:hover {
        background-color: #0056b3;
    }

    .fc-button:disabled {
        background-color: #e0e0e0;
        color: #757575;
    }

    .event-tooltip {
        position: absolute;
        z-index: 10001;
        background-color:rgba(0, 0, 0, 0.5);
        border: 1px solid #ccc;
        padding: 10px;
        border-radius: 4px;
        box-shadow: 0 2px 10px rgba(0, 0, 0, 0.1);
        font-size: 0.9em;
    }
    }
</style>- 加入FullCalendar的程式碼。官方文件有很多細項可以調整,這裡就只製作基本的功能。
<div id='calendar'></div>
<script src='https://cdn.jsdelivr.net/npm/fullcalendar/index.global.min.js'></script>

<script>
    document.addEventListener('DOMContentLoaded', function () {
        const calendarEl = document.getElementById('calendar');
        const calendar = new FullCalendar.Calendar(calendarEl, {
            initialView: 'dayGridMonth', // 預設檢視模式
            locale: "zh-tw",   // 預設語言
            contentHeight: 800,
            headerToolbar: { // 工具列
                left: 'prevYear, prev, next, nextYear, today',
                center: 'title',
                right: 'dayGridMonth,timeGridWeek'
            },
            buttonText: {  // 自訂翻譯
                today: '今仔日',
                month: '月',
                week: '週'
            },
            events: [
                {{ range .Site.RegularPages }} // 讀取所有已發表的文章,變成JSON陣列
            {
                title: '{{ .Title }}',
                start: '{{ .Date.Format "2006-01-02" }}',
                url: '{{ .RelPermalink }}'
            },
            {{ end }}
        ],
        eventMouseEnter: function (info) { // 加入滑鼠懸浮就顯示完整標題的功能
            const tooltip = document.createElement('div');
            tooltip.className = 'event-tooltip';
            tooltip.innerHTML = `<strong>${info.event.title}</strong>`;
            document.body.appendChild(tooltip);

            tooltip.style.left = info.jsEvent.pageX + 'px';
            tooltip.style.top = info.jsEvent.pageY + 'px';

            info.el.addEventListener('mouseleave', function () {
                tooltip.remove();
            });
        }
    });
    calendar.render();
});
</script>- 嘗試預覽網站。由於這是個獨立頁面,故需要打
http://localhost:1313/events-calendar才能看到月曆。
FullCalendar的隱憂:
- 把所有文章讀取並存成一個超長的陣列很難看,還是嵌在網頁裡的。
- 不適合手機閱讀。


