使用這個JS函式庫做一個網頁相簿出來,方便展示自己的作品。用手機拍了一些大作都悶在硬碟裡面太可惜了,不如放上網吧。想在網上分享自己的照片,一般會直覺丟Flickr吧?別跟我說你寧願讓Facebook壓爛你的圖片。不過,我想說獨立網站應該也要有能夠分享照片的功能才對。
由於我用的是靜態網站Hugo框架,不可能像Wordpress弄複雜的操作,所以我只能用簡單的JavaScript套件來實現。我認為JQuery寫成的nanogallery2是一個輕巧的選擇。你在任意網頁裡面插入幾條JavaScript程式碼,就能將圖片渲染為可以互動的相簿了
Hugo因為採用Markdown寫文章的緣故,使用者可以自由的插入JavaScript程式碼。如果想做單頁式的排版設計,用不著裝全域主題,靠JQuery搞定就行了。
nanogallery2是一款行之有年的JQuery函式庫
短短幾行JavaScript程式碼就能做出漂亮的互動式畫廊,特色如下:
- 多種畫廊排版模式,自動適應手機與電腦的螢幕
- 針對延遲載入最佳化,大量圖片也不怕
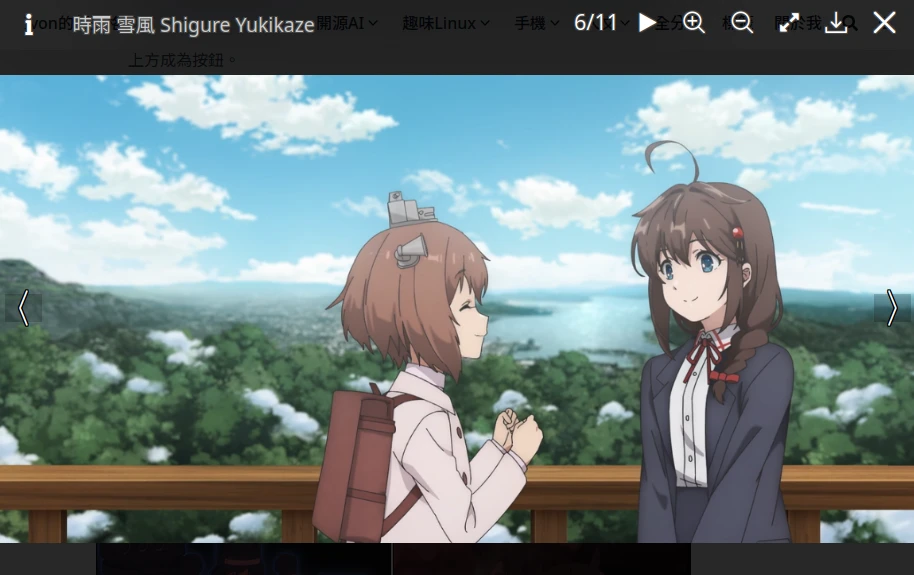
- 全螢幕燈箱圖片
- 簡單旋轉圖片、下載圖片按鈕,全部都可以自定義
- 讀取EXIF資訊顯示照片背後參數
- 標籤篩選模式
不論是想要打造作品集或相簿都很合適,此處為演示圖片,不要點,本文最下面會有Live Demo。

由於nanogallery是讀取網址載入圖片,圖檔放在Hugo的根目錄或是遠端引用都可以。照片檔案如果太大,就放在Cloudflare R2或者相容S3的storage當儲存後端,然後公開bucket外連過來就可以了。
1. 插入nanogallery程式碼#
由於我只想要做單頁式網頁,再加上nanogallery的參數有點多,所以沒有把它寫成shortcode,而是直接插入文章內。這樣不論你主題怎麼換,nanogallery都不會受到影響。
- 開啟Hugo的content目錄,找到你要製作畫廊的文章markdown檔案。在fontmatter之後插入下面內容,引用3.0.5版的nanogallery
<!-- jQuery -->
<script  type="text/javascript"  src="https://cdnjs.cloudflare.com/ajax/libs/jquery/2.1.1/jquery.min.js"></script>
<!-- nanogallery2 -->
<link href="https://unpkg.com/nanogallery2/dist/css/nanogallery2.min.css" rel="stylesheet" type="text/css"></link>
<script type="text/javascript" src="https://unpkg.com/nanogallery2@3.0.5/dist/jquery.nanogallery2.min.js"></script>- nanogallery處理的網頁內容可能會受到你Hugo主題的CSS影響,導致版面被壓縮。如果真是如此的話,做一個inline CSS:
<style>

.table-custom {
  width: 1000px;
}
table {
  width: 100%;
}

@media screen and (max-width: 600px) {
.table-custom {
  width: 100%;
}
  table thead {
    display: none;
    overflow-x:auto;
  }  table td {
    display: flex;
    overflow-x:auto;
  }

  table td::before {
    content: attr(label);
    font-weight: bold;
    width: 120px;
    min-width: 120px;
    overflow-x:auto;
  }
}
</style>- 再做一個div把畫廊包起來。下面這個範例會讓table-custom的元件保持全寬
<div class="table-custom">

<!--nanogallery畫廊程式碼-->

</div>
2. 使用nanogallery#
詳細調整請參考官方文件
- 使用JavaScript,最基本的nanogallery語法長這樣。
<!--每一個畫廊,都要有自己的div id-->
<div id="nanogallery2"></div>

<!--再於這個函數指定要渲染的畫廊-->
<script>
$("#nanogallery2").nanogallery2({

// 首先填寫畫廊的屬性
thumbnailWidth: "auto",
thumbnailHeight: 200,

// 陣列裡面放置圖片(src)與其縮圖(srct)
items: [
{src: '', srct: '',title: '',description: ''}
]
});
</script>- 下面是我常用的配置,layout透過縮圖的長寬數值來控制。圖片和縮圖網址可以一樣,網址部份你可以用圖床的,或者用Hugo Page Bundle的引用網址。
<div id="nanogallery2"></div>
<script>
$("#nanogallery2").nanogallery2({
itemsBaseURL: "https://i.imgur.com/", // 圖片網址前綴
thumbnailWidth: "auto", // 縮圖寬度
thumbnailHeight: 200, // 縮圖高度
galleryDisplayMode: "moreButton", // 圖片多於一定數量就顯示More按鈕
galleryDisplayMoreStep: 3, // 最多顯示幾行
viewerGallery: "none", //不在燈箱顯示縮圖,
imageTransition: "swipe",
//gallerySorting: "random", // 是否開啟圖片隨機排序
thumbnailLabel: {"position": "onBottom", "displayDescription": false, "titleMultiLine": true}, // 是否在畫廊顯示圖片說明,標題似乎關不了
viewerToolbar:{ // 顯示在燈箱檢視畫面工具列的按鈕
display:false,
standard:'minimizeButton, label',
minimized:  'minimizeButton, label, fullscreenButton, downloadButton, infoButton'
},
viewerTools:{ // 顯示在燈箱檢視畫面的按鈕
topLeft:'infoButton, label',
topRight:'pageCounter, playPauseButton, zoomButton, fullscreenButton, downloadButton, closeButton'
},
items: [ // 圖片
{src: '縮圖網址', srct: '縮圖網址2',title: '圖片標題', 'description': '圖片說明'},
{src: '縮圖網址', srct: '縮圖網址2',title: '圖片標題', 'description': '圖片說明'},
{src: '縮圖網址', srct: '縮圖網址2',title: '圖片標題', 'description': '圖片說明'},
{src: '縮圖網址', srct: '縮圖網址2',title: '圖片標題', 'description': '圖片說明'},
{src: '縮圖網址', srct: '縮圖網址2',title: '圖片標題', 'description': '圖片說明'},
{src: '縮圖網址', srct: '縮圖網址2',title: '圖片標題', 'description': '圖片說明'}
]
});
</script>
如果要製作標籤過濾按鈕,加入
galleryFilterTags: 'description'的參數,畫廊就會從圖片的說明抽出標籤(每個標籤需以#開頭,不能填中文),並顯示在畫廊上方成為按鈕。於是程式碼就會變這樣:
<link href="https://unpkg.com/nanogallery2/dist/css/nanogallery2.min.css" rel="stylesheet" type="text/css"></link>
<script  type="text/javascript" src="https://unpkg.com/nanogallery2@3.0.5/dist/jquery.nanogallery2.min.js"></script>
<div id="nanogallery2"></div>
<script>
$("#nanogallery2").nanogallery2({
itemsBaseURL: "https://i.imgur.com/", // 圖片網址前綴
thumbnailWidth: "auto", // 縮圖寬度
thumbnailHeight: 150, // 縮圖高度
galleryDisplayMode: "moreButton", // 圖片多於一定數量就顯示More按鈕
galleryDisplayMoreStep: 3, // 最多顯示幾行就會出現More按鈕
viewerGallery: "none", //不在燈箱顯示縮圖,
imageTransition: "swipe",
gallerySorting: "random", // 是否開啟圖片隨機排序
thumbnailLabel: {"position": "onBottom", "displayDescription": false, "titleMultiLine": true},
galleryFilterTags: 'description',
viewerToolbar:{ // 顯示在燈箱檢視畫面工具列的按鈕
display:false,
standard:'minimizeButton, label',
minimized:  'minimizeButton, label, fullscreenButton, downloadButton, infoButton'
},
viewerTools:{ // 顯示在燈箱檢視畫面的按鈕
topLeft:'infoButton, label',
topRight:'pageCounter, playPauseButton, zoomButton, fullscreenButton, downloadButton, closeButton'
},
items: [ // 圖片
{src: 'kttm8p2.png', srct: 'kttm8p2.png',title: '', 'description': '雪風'},
{src: '79anHDY.png', srct: '79anHDY.png',title: '', 'description': '時雨'},
{src: 'Mjml2zs.png', srct: 'Mjml2zs.png',title: '', 'description': '時雨 雪風 #Shigure #Yukikaze'},
{src: 'fCQadJi.png', srct: 'fCQadJi.png',title: '', 'description': '雪風'},
{src: 'dlhNnEL.png', srct: 'dlhNnEL.png',title: '', 'description': '扶桑 山城 #Fusou #Yamashiro'},
{src: 'JCMZDQT.png', srct: 'JCMZDQT.png',title: '', 'description': '最上'},
{src: 'sRxPU0m.jpg', srct: 'sRxPU0m.jpg',title: '', 'description': '時雨'},
{src: 'zZ0vNvR.png', srct: 'zZ0vNvR.png',title: '', 'description': '山雲 朝雲 #Kazagumo #Asagumo'},
{src: 'd5OXGbJ.jpg', srct: 'd5OXGbJ.jpg',title: '', 'description': '時雨 雪風 #Shigure #Yukikaze'},
{src: 'jV4uhwi.png', srct: 'jV4uhwi.png',title: '', 'description': '扶桑 山城 #Fusou #Yamashiro'},
{src: 'i3Yfo9V.png', srct: 'i3Yfo9V.png',title: '', 'description': '山城'}
]
});
</script>
顯示結果:
關於nanogallery2在本站的Live Demo…你還可以參考艦娘乳圖鑑,了解圖片在100張以上時候的載入效能。

