Connect to headless Raspberry pi Linux server with Rustdesk + X11 Dummy.
無頭(headless)即沒有連接顯示器的Linux電腦。照理說,沒有顯示器輸出,Xorg啟動不了,根本就沒桌面。而RustDesk不是TigerVNC,無法在SSH連線下直接開一個桌面工作階段。
在不使用HDMI Dummy Plug的情況下,Linux可以利用"X11 Dummy"軟體做個假顯示器,由此啟動桌面工作階段,這樣RustDesk就能抓到螢幕啦。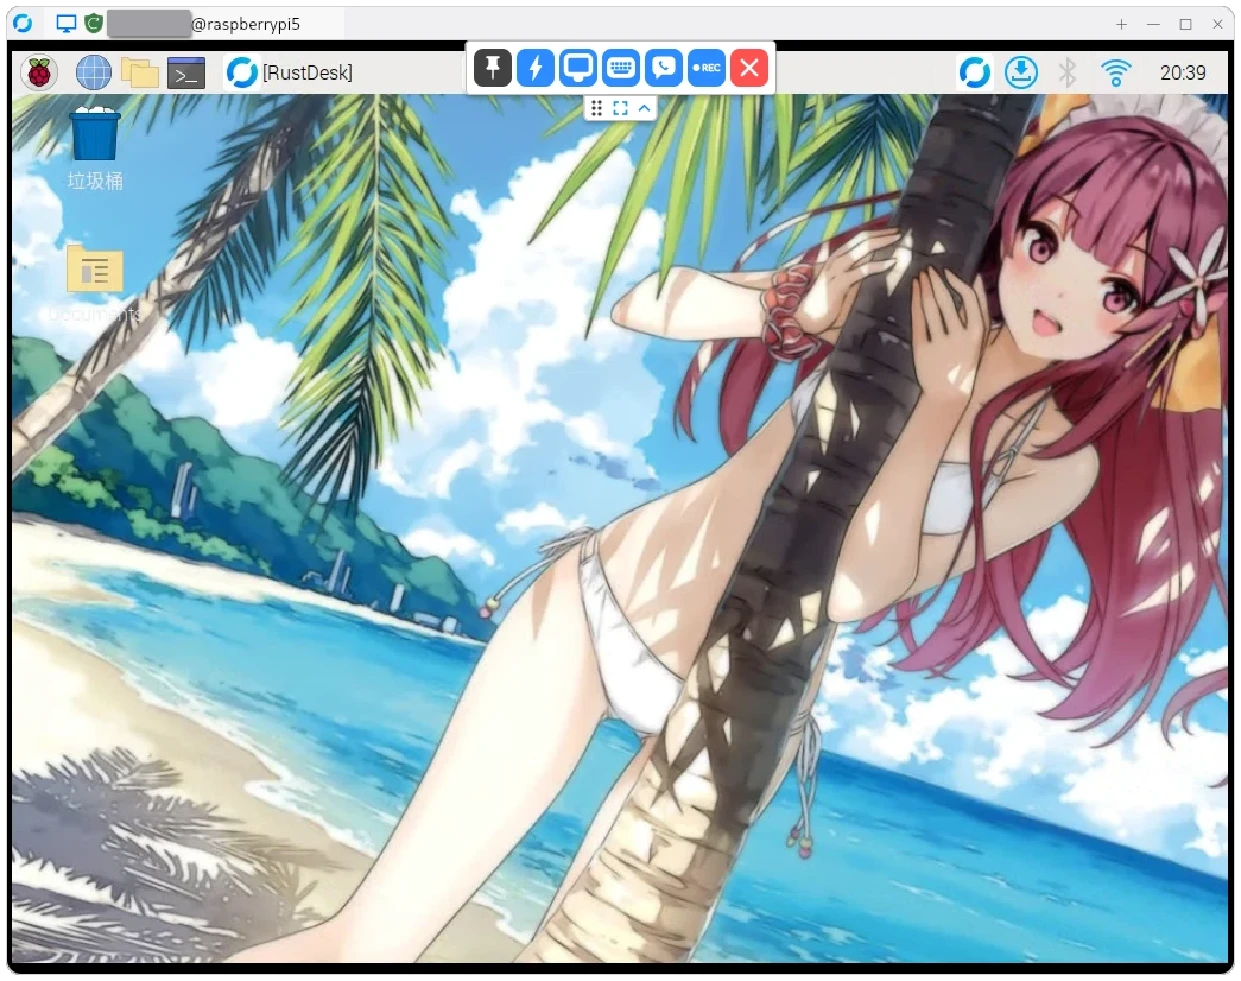
1. 支援的環境#
所有連線的電腦都要安裝Rustdesk。Rustdesk支援x86與ARM架構。
- 相關文章:安裝RustDesk
關於Linux發行版,Rustdesk官方文件只寫在Ubuntu + Gnome測試過,而我使用樹莓派5安裝Debian 12 + LXDE也是可以的。
因為要使用X11 Dummy,只支援X11桌面環境,不支援Wayland。
2. 安裝桌面環境#
Raspberry Pi OS內建Wayfire(Wayland)與LXDE(X11)二種桌面環境,所以不用安裝桌面環境套件。但預設啟動的是Wayland,所以我們要將它切換為X11。
SSH到樹莓派
執行
sudo raspi-config→ Advanced Options → Wayland,將開機啟動的桌面環境設定為X11的LXDE。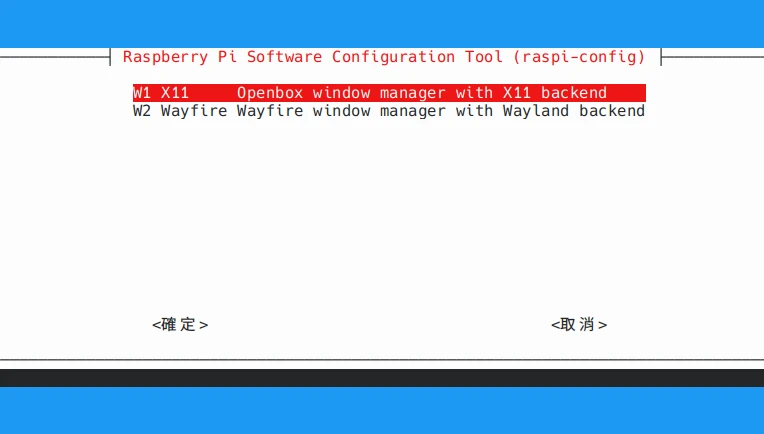
將樹莓派重開機。
確認LightDM設定檔
/etc/lightdm/lightdm.conf,是否會在開機後自動登入使用者並啟動LXDE工作階段
[Seat:*]
user-session=LXDE-pi-x
autologin-user=user
autologin-session=LXDE-pi-x
3. 建立假顯示器#
- 安裝xserver-xorg-video-dummy套件
sudo apt install xserver-xorg-video-dummy- 建立xorg.conf,讓系統以為真的有接上顯示器(如果日後要使用真的顯示器,請移除此檔案)
sudo vim /etc/X11/xorg.conf- 填入以下內容
Section "ServerFlags"
  Option "DontVTSwitch" "true"
  Option "AllowMouseOpenFail" "true"
  Option "PciForceNone" "true"
  Option "AutoEnableDevices" "false"
  Option "AutoAddDevices" "false"
EndSection

Section "InputDevice"
  Identifier "dummy_mouse"
  Option "CorePointer" "true"
  Driver "void"
EndSection

Section "InputDevice"
  Identifier "dummy_keyboard"
  Option "CoreKeyboard" "true"
  Driver "void"
EndSection

Section "Device"
  Identifier "dummy_videocard"
  Driver "dummy"
  Option "ConstantDPI" "true"
  #VideoRam 4096000
  VideoRam 256000
  #VideoRam 192000
EndSection

Section "Monitor"
  Identifier "dummy_monitor"
  HorizSync   5.0 - 1000.0
  VertRefresh 5.0 - 200.0
  #To add your own modes here, use a modeline calculator, like:
  #http://xtiming.sourceforge.net/cgi-bin/xtiming.pl
  #or using the "gtf" command line tool (http://gtf.sourceforge.net/)

  #This can be used to get a specific DPI, but only for the default resolution:
  #DisplaySize 508 317
  #NOTE: the highest modes will not work without increasing the VideoRam
  # for the dummy video card.
  Modeline "32768x32768" 15226.50 32768 35800 39488 46208 32768 32771 32781 32953
  Modeline "32768x16384" 7516.25 32768 35544 39192 45616 16384 16387 16397 16478
  Modeline "16384x8192" 2101.93 16384 16416 24400 24432 8192 8390 8403 8602
  Modeline "8192x4096" 424.46 8192 8224 9832 9864 4096 4195 4202 4301
  Modeline "6400x2160" 160.51 6400 6432 7040 7072 2160 2212 2216 2269
  Modeline "5680x1440" 142.66 5680 5712 6248 6280 1440 1474 1478 1513
  Modeline "5496x1200" 199.13 5496 5528 6280 6312 1200 1228 1233 1261
  Modeline "5280x1080" 169.96 5280 5312 5952 5984 1080 1105 1110 1135
  Modeline "5280x1200" 191.40 5280 5312 6032 6064 1200 1228 1233 1261
  Modeline "5120x3200" 199.75 5120 5152 5904 5936 3200 3277 3283 3361
  Modeline "4800x1200" 64.42 4800 4832 5072 5104 1200 1229 1231 1261
  Modeline "4720x3840" 227.86 4720 4752 5616 5648 3840 3933 3940 4033
  Modeline "3840x2880" 133.43 3840 3872 4376 4408 2880 2950 2955 3025
  Modeline "3840x2560" 116.93 3840 3872 4312 4344 2560 2622 2627 2689
  Modeline "3840x2048" 91.45 3840 3872 4216 4248 2048 2097 2101 2151
  Modeline "3840x1200" 108.89 3840 3872 4280 4312 1200 1228 1232 1261
  Modeline "3840x1080" 100.38 3840 3848 4216 4592 1080 1081 1084 1093
  Modeline "3864x1050" 338.00 3864 4112 4520 5176 1050 1053 1063 1089
  Modeline "3600x1200" 106.06 3600 3632 3984 4368 1200 1201 1204 1214
  Modeline "3600x1080" 91.02 3600 3632 3976 4008 1080 1105 1109 1135
  Modeline "3520x1196" 99.53 3520 3552 3928 3960 1196 1224 1228 1256
  Modeline "3360x1050" 293.75 3360 3576 3928 4496 1050 1053 1063 1089
  Modeline "3288x1080" 39.76 3288 3320 3464 3496 1080 1106 1108 1135
  Modeline "3120x1050" 272.75 3120 3320 3648 4176 1050 1053 1063 1089
  Modeline "2728x1680" 148.02 2728 2760 3320 3352 1680 1719 1726 1765
  Modeline "2048x2048" 49.47 2048 2080 2264 2296 2048 2097 2101 2151
  Modeline "2048x1536" 80.06 2048 2104 2312 2576 1536 1537 1540 1554
  Modeline "2048x1152" 197.97 2048 2184 2408 2768 1152 1153 1156 1192
  Modeline "2560x1600" 47.12 2560 2592 2768 2800 1600 1639 1642 1681
  Modeline "2560x1440" 42.12 2560 2592 2752 2784 1440 1475 1478 1513
  Modeline "1920x1440" 69.47 1920 1960 2152 2384 1440 1441 1444 1457
  Modeline "1920x1200" 26.28 1920 1952 2048 2080 1200 1229 1231 1261
  Modeline "1920x1080" 23.53 1920 1952 2040 2072 1080 1106 1108 1135
  Modeline "1680x1050" 20.08 1680 1712 1784 1816 1050 1075 1077 1103
  Modeline "1600x1200" 22.04 1600 1632 1712 1744 1200 1229 1231 1261
  Modeline "1600x900" 33.92 1600 1632 1760 1792 900 921 924 946
  Modeline "1440x900" 30.66 1440 1472 1584 1616 900 921 924 946
  ModeLine "1366x768" 72.00 1366 1414 1446 1494  768 771 777 803
  Modeline "1280x1024" 31.50 1280 1312 1424 1456 1024 1048 1052 1076
  Modeline "1280x800" 24.15 1280 1312 1400 1432 800 819 822 841
  Modeline "1280x768" 23.11 1280 1312 1392 1424 768 786 789 807
  Modeline "1360x768" 24.49 1360 1392 1480 1512 768 786 789 807
  Modeline "1024x768" 18.71 1024 1056 1120 1152 768 786 789 807
  Modeline "768x1024" 19.50 768 800 872 904 1024 1048 1052 1076
EndSection

Section "Screen"
  Identifier "dummy_screen"
  Device "dummy_videocard"
  Monitor "dummy_monitor"
  DefaultDepth 24
  SubSection "Display"
    Viewport 0 0
    Depth 24
    #Modes "32768x32768" "32768x16384" "16384x8192" "8192x4096" "5120x3200" "3840x2880" "3840x2560" "3840x2048" "2048x2048" "2560x1600" "1920x1440" "1920x1200" "1920x1080" "1600x1200" "1680x1050" "1600x900" "1400x1050" "1440x900" "1280x1024" "1366x768" "1280x800" "1024x768" "1024x600" "800x600" "320x200"
    Modes "5120x3200" "3840x2880" "3840x2560" "3840x2048" "2048x2048" "2560x1600" "1920x1440" "1920x1200" "1920x1080" "1600x1200" "1680x1050" "1600x900" "1400x1050" "1440x900" "1280x1024" "1366x768" "1280x800" "1024x768" "1024x600" "800x600" "320x200"
    #Virtual 32000 32000
    #Virtual 16384 8192
    #Virtual 8192 4096
    #Virtual 5120 3200
    Virtual 1024 768
  EndSubSection
EndSection

Section "ServerLayout"
  Identifier   "dummy_layout"
  Screen       "dummy_screen"
  InputDevice  "dummy_mouse"
  InputDevice  "dummy_keyboard"
EndSection
將樹莓派重開機
用xrandr指令確認假顯示器有長出來
export DISPLAY=:0

xrandr -q- 這個假顯示器的解析度可透過xrandr調整
export DISPLAY=:0

xrandr --output DUMMY0 --mode 1024x768
4. 設定RustDesk#
- 在樹莓派安裝RustDesk。ARM架構手動從Github下載nightly版本的deb套件
wget https://github.com/rustdesk/rustdesk/releases/download/nightly/rustdesk-1.3.0-aarch64.deb

sudo apt install ./rustdesk-1.3.0-aarch64.deb- 啟用Linux headless支援
sudo rustdesk --option allow-linux-headless Y- 執行RustDesk,取得連線ID
sudo rustdesk --get-id- 設定連線密碼
sudo rustdesk --password "密碼"然後,在另一台電腦開啟RustDesk連線。
查看樹莓派的RustDesk系統服務執行情況,正常來說Xorg有啟動就不會有
Can't open display的錯誤訊息
sudo systemctl status rustdesk- RustDesk預設禁止遠端客戶端修改設定,故需要開放權限:
sudo rustdesk --option allow-remote-cm-modification Y- 預設情況下RustDesk是走relay server連線,欲提昇速度,請嘗試將其更改為P2P。
5. 討論#
RustDesk Github關於樹莓派的討論有寫到啟用vc4.force_hotplug=1選項,或許這是讓樹莓派強制啟用GPU,/etc/X11/xorg.conf.d/99-v3d.conf也確實有生成,但我測試是沒用的。還是得手動寫xorg.conf設定檔。
其實headless遠端桌面連線,TigerVNC和X11 Forwarding就能做到了。而Rustdesk僅是在連線的時候少打一些指令罷了。況且X11 Dummy會影響到連接其他螢幕的設定,實際操作上不如買個HDMI Dummy Plug方便。
由於我使用的xorg.conf僅為偽裝用,不能提供GPU加速(xorg.conf需要針對不同GPU手動設定核心模組),所以Rustdesk程式吃不到GPU硬體加速。
故有3D需求的還是搞個HDMI dummy plug這類比較「正常的」螢幕,插在樹莓派,再搭配RustDesk使用吧,起碼連線的時候能無縫吃到GPU加速。