LoRA (Low-rank adaptation)是用來微調大型模型的技術,其生成的模型訓練時間短,檔案更小。
DreamBooth內含LoRA,可作為SD WebUI的擴充功能安裝。
本機訓練還可以用LoRA_Easy_Training_Scripts,支援Linux和Windows系統。
有用Google Colab的採用Linaqruf/kohya-trainer會比較好上手。Reddit有一圖流教學。
1. 安裝環境#
“LoRA Easy Training Scripts"這個Python程式Linux和Windows都可以用,下面以Ubuntu為例。
- 安裝Anaconda,建立虛擬環境
conda create --name loratraining python=3.10.6
conda activate loratraining- 複製儲存庫
git clone https://github.com/derrian-distro/LoRA_Easy_Training_Scripts.git
cd LoRA_Easy_Training_Scripts
git submodule init
git submodule update
cd sd_scripts
pip install torch torchvision --extra-index-url https://download.pytorch.org/whl/cu116
pip install --upgrade -r requirements.txt
pip install -U xformers- 設定加速選項
accelerate config
#依序回答:
#- This machine
#- No distributed training
#- NO
#- NO
#- NO
#- all
#- fp16
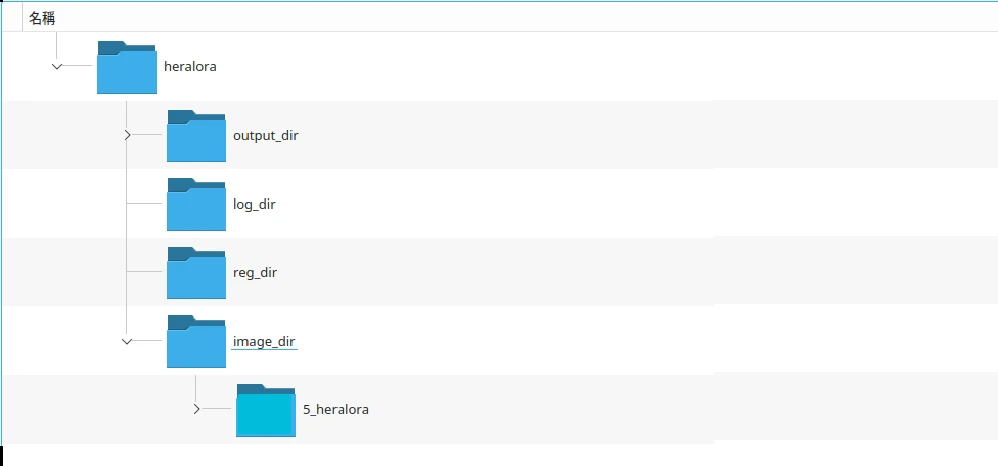
LoRA的訓練資料目錄結構不太一樣,需建立目錄結構如下。已經上好提示詞的訓練資料要放在
img_dir下面,將目錄名稱取名為數字_概念,目錄名稱前面加上數字代表要重複的步數。
新增訓練設定檔
trainingconfig.json
vim trainingconfig.json- 填入以下內容(雙斜線的註解記得刪除) LoRA的總訓練步數計算公式為: 訓練圖片數量 × 重複次數 ÷ train_batch_size × epoch
{
  //基於何種模型訓練
  "pretrained_model_name_or_path": "/home/user/桌面/heralora/anything-v4.5-pruned.ckpt",
  "v2": false,
  "v_parameterization": false,
  //紀錄檔輸出目錄
  "logging_dir": "/home/user/桌面/heralora/log_dir/",
  //訓練資料目錄
  "train_data_dir": "/home/user/桌面/heralora/image_dir/",
  //註冊目錄
  "reg_data_dir": "/home/user/桌面/heralora/reg_dir/",
  //輸出目錄
  "output_dir": "/home/user/桌面/heralora/output_dir",
  //訓練的圖片最大長寬
  "max_resolution": "512,512",
  //學習率
  "learning_rate": "1e-5",
  "lr_scheduler": "constant_with_warmup",
  "lr_warmup": "5",
  "train_batch_size": 3,
  //訓練時期
  "epoch": "4",
  "save_every_n_epochs": "",
  "mixed_precision": "fp16",
  "save_precision": "fp16",
  "seed": "",
  "num_cpu_threads_per_process": 32,
  "cache_latents": true,
  "caption_extension": ".txt",
  "enable_bucket": true,
  "gradient_checkpointing": false,
  "full_fp16": false,
  "no_token_padding": false,
  "stop_text_encoder_training": 0,
  "use_8bit_adam": true,
  "xformers": true,
  "save_model_as": "safetensors",
  "shuffle_caption": true,
  "save_state": false,
  "resume": "",
  "prior_loss_weight": 1.0,
  "text_encoder_lr": "1.5e-5",
  "unet_lr": "1.5e-4",
  "network_dim": 128,
  "lora_network_weights": "",
  "color_aug": false,
  "flip_aug": false,
  "clip_skip": 2,
  "mem_eff_attn": false,
  "output_name": "",
  "model_list": "",
  "max_token_length": "150",
  "max_train_epochs": "",
  "max_data_loader_n_workers": "",
  "network_alpha": 128,
  "training_comment": "",
  "keep_tokens": 2,
  "lr_scheduler_num_cycles": "",
  "lr_scheduler_power": "",
  "persistent_data_loader_workers": true,
  "bucket_no_upscale": true,
  "random_crop": false,
  "caption_dropout_every_n_epochs": 0.0,
  "caption_dropout_rate": 0
}
2. 開始訓練#
- 有些系統需要指定CUDA安裝路徑
export PATH=/usr/local/cuda/bin${PATH:+:${PATH}}
export LD_LIBRARY_PATH=/usr/local/cuda/lib64:${LD_LIBRARY_PATH:+:${LD_LIBRARY_PATH}}- 輸入以下指令,載入json設定檔。
libnvinfer.so.7: cannot open shared object file的警告可以暫時忽略。
accelerate launch main.py --load_json_path "/home/user/trainingconfig.json"- 之後會自動開始訓練。訓練好的模型位於訓練設定檔所寫的
output_dir目錄。將.safetensors檔移動至SD WebUI根目錄下的/models/Lora。
3. LoRA模型使用方式#
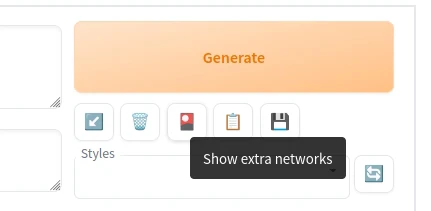
點選SD WebUI右上角,Show extra networks

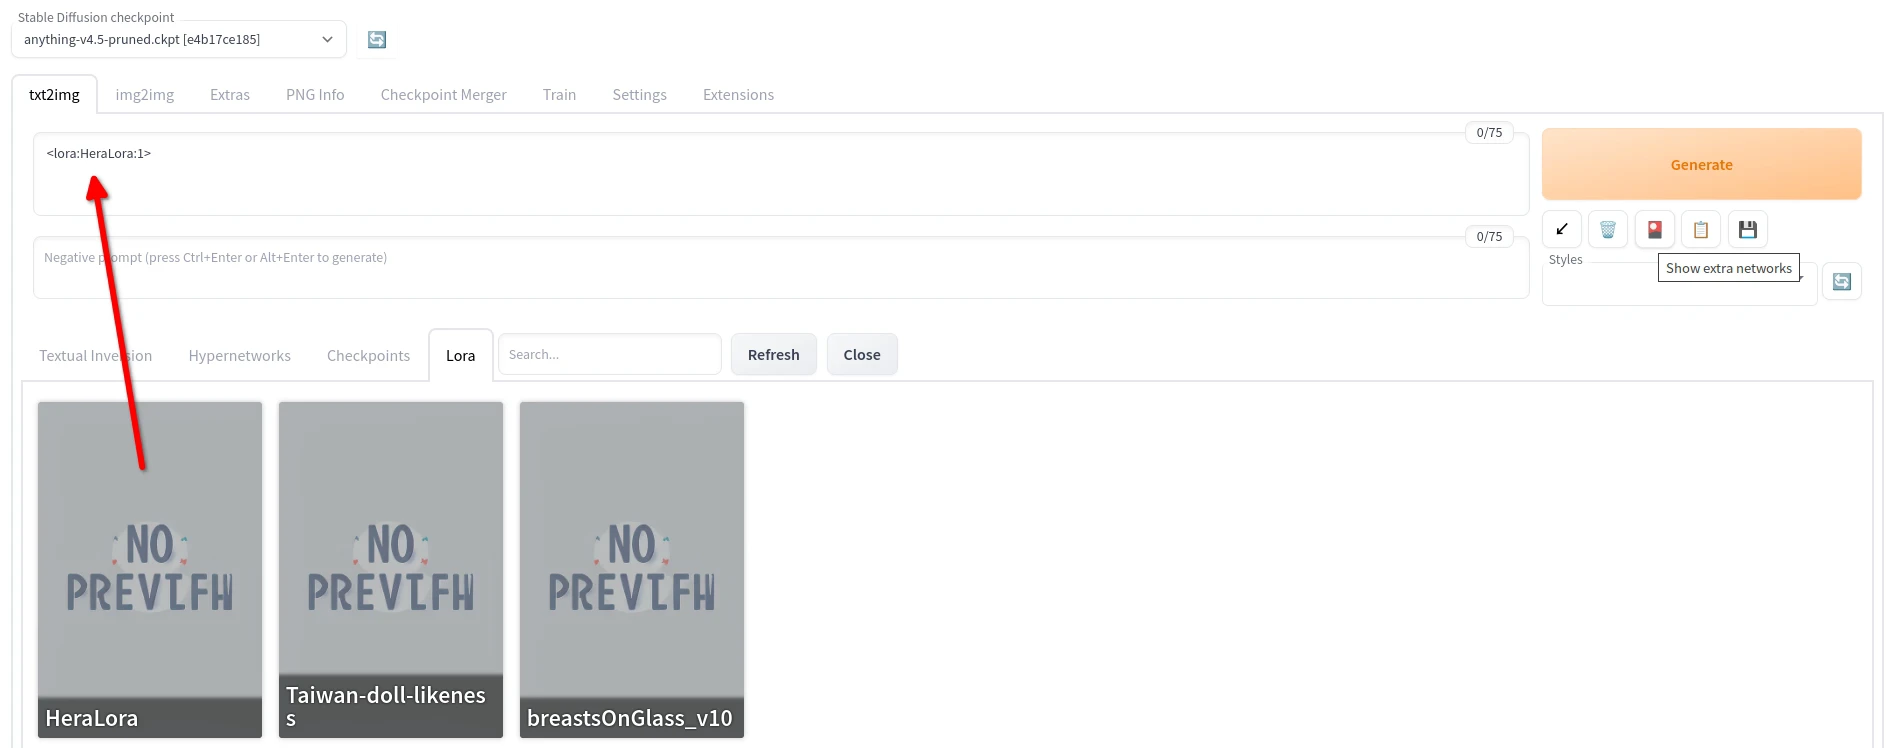
點選要使用的LoRA,將其加入至提示詞欄位

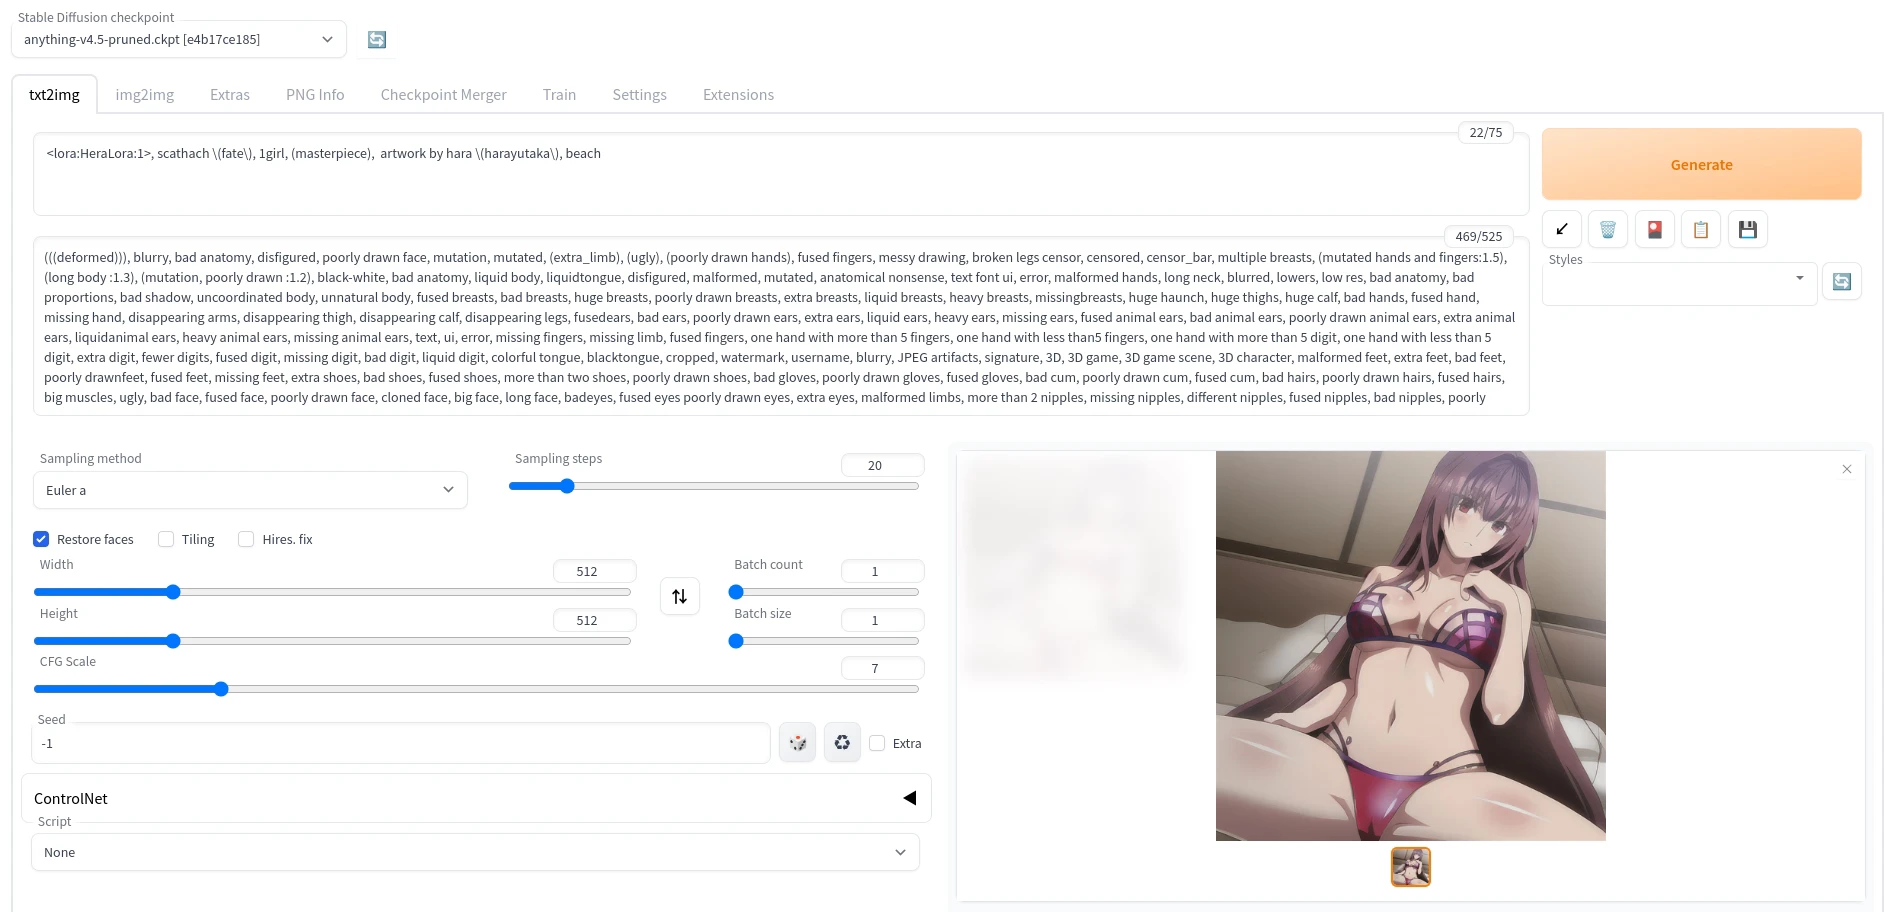
再加上訓練時使用的提示詞,即可生成使用LoRA風格的人物。


