這篇文章記錄我自行移植postmarketOS的過程。「目前是未完成狀態」。
移植的教學postmarketOS Wiki的Porting to a new device和Mainlining Guide寫的很清楚了,這篇文章就是把Wiki寫的內容中文翻譯,再加上我的一點註解。
1. 硬體需求#
- 要移植的手機:Sony Xperia 5 II (XQ-AS72,代號sony-pdx206),已經解鎖Bootloader。
此機型postmarketOS Wiki有登錄資料,也可以用somainline開發的mainline kernel開機。但是因為UFS有bug(後述)所以尚未有正式移植。
- 電腦:必須為64位元Linux,虛擬機也可以。我的CPU為i5-7400,RAM為16GB。
postmarketOS系統檔案很小,不用下載好幾十G的原始碼,編譯也不用花上好幾個小時。
2. 安裝pmbootstrap#
pmbootstrap這個工具可用於建立postmarketOS的安裝檔和進行移植工作。
- 在系統上安裝Pytohn3、openSSL、Pip、Git:
sudo apt install python3 openssl python-pip3 git
- 用pip安裝pmbootstrap並重新整理:
pip3 install --user pmbootstrap
source ~/.profile
- 安裝自動補完,加到
~/.bashrc:
 pip3 install --user argcomplete
 echo 'eval "$(register-python-argcomplete3 pmbootstrap)"' >> ~/.bashrc
source ~/.bashrc
- 如果安裝後輸入
pmbootstrap還是顯示找不到指令,重新開機。
3. 初始化機型設定#
將pmbootstrap初始化,按照問題輸入機型的設定值。以下問題的設定檔位於~/.config/pmbootstrap.cfg。
~ $ pmbootstrap init
# 工作目錄
Work path [/home/ivon/.local/var/pmbootstrap]: Enter
# 更新頻道輸入穩定版或edge,edge有時後會因為Alpine上游更新導致依賴毀損
Channel [edge]:  v22.06
# 選擇廠牌
Vendor [qemu]: sony
# 輸入Sony官方的機型代號
Device codename: pdx206
# 確認移植新機型
You are about to do a new device port for 'sony-pdx206'.
Continue? (y/n) [y]: y
# 輸入處理器的架構
Device architecture (armv7/aarch64/x86_64/x86) [armv7]: aarch64
# 輸入生產商
Who produced the device (e.g. LG)? sony
# 輸入完整手機名字
What is the official name (e.g. Google Nexus 5)? Sony Xperia 5 II
# 手機發售年份
In what year was the device released (e.g. 2012)? 2020
# 設定裝置類型為手持設備
What type of device is it?  handset
# 無鍵盤,回答n
Does the device have a hardware keyboard? (y/n) [n]: n
# 有無SD卡槽,回答y
Does the device have a sdcard or other external storage medium? (y/n) [n]: y
# 刷機方式選fastboot
Which flash method does the device support?
Flash method (0xffff/fastboot/heimdall/none/rkdeveloptool/uuu) [0xffff]: fastboot
# 讓pmbootstrap分析boot.img的開機參數,我是使用第三方ROM的boot.img
[11:15:10] You can analyze a known working boot.img file to automatically fill out the flasher information for your deviceinfo file. Either specify the path to an image or press return to skip this step (you can do it later with 'pmbootstrap bootimg_analyze').
Path: /home/ivon/下載/Evo/extracted_20220826_113410/boot.img
# 預設使用者名稱
Username [user]: user
# 選擇圖形界面。在未確定硬體加速可用前,先選XFCE4
User interface [weston]: xfce4
# 維持預設boot分區設定,輸入n
Additional options: extra free space: 0 MB, boot partition size: 256 MB, parallel jobs: 9, ccache per arch: 5G, sudo timer: False, mirror: http://mirror.postmarketos.org/postmarketos/
Change them? (y/n) [n]: n
# 是否安裝額外軟體套件
Additional packages that will be installed to rootfs. Specify them in a comma separated list (e.g.: vim,file) or "none"
Extra packages [none]: none
# 設定系統時區
Your host timezone: Asia/Taipei
Use this timezone instead of GMT? (y/n) [y]: y
# 設定系統語言,建議先用英文
Choose default locale for installation: en_US.UTF-8
# 設定裝置名稱
Device hostname (short form, e.g. 'foo') [sony-pdx206]: Enter
# 是否拷貝本機SSH金鑰至postmarketOS系統
Would you like to copy your SSH public keys to the device? (y/n) [n]: n
# 自動編譯過時的軟體套件
After pmaports are changed, the binary packages may be outdated. If you want to install postmarketOS without changes, reply 'n' for a faster installation.
Build outdated packages during 'pmbootstrap install'? (y/n) [y]: y
4. 設定kernel的編譯選項#
pmbootstrap會自動建立ARM的chroot環境,因此記得要適時輸入密碼。編譯時開另一個終端機執行pmbootstrap log看錯誤訊息。
首先要取得手機kernel(核心)原始碼,postmarketOS建議從LineageOS的Github找kernel,但目前LineagOS還沒有Xperia 5 II的。所以就只好採用XDA上第三方的kernel,例如我使用是XperiaBricker的版本。此外Sony官方也有釋出kernel。
切換到工作目錄:
cd /home/$USER/.local/var/pmbootstrap/cache_git/pmaports/device/testing/linux-sony-pdx206
裡面會有一個
APKBUILD檔案,這是編譯kernel的設定檔。#Source區塊的是kernel的來源儲存庫。因為這裡不使用LineageOS官方的repo,所以將
#Source區塊修改如下。最後一行$_config下方的代表編譯時要套用這些patch。
# Source
_repository="android_kernel_sony_sm8250"
_commit="8bdbbde86f74be117281c82f4181d1f938659ce0"
_config="config-$_flavor.$arch"
source="
	$pkgname-$_commit.tar.gz::https://github.com/XperiaBrickers/$_repository/archive/$_commit.tar.gz
	$_config
	gcc10-extern_YYLOC_global_declaration.patch
    gcc7-give-up-on-ilog2-const-optimizations.patch
    gcc8-fix-put-user.patch
    kernel-use-the-gnu89-standard-explicitly.patch
"
- 在kerenl原始碼的儲存庫找到
Makefile檔案,按照裡面寫的VERSION和PATCHLEVEL和SUBLEVEL,在APKBUILD的pkgver填入版本號,例如這裡是4.19.195。接著儲存檔案。
pkgver=4.19.195
- 從kerenl原始碼的儲存庫找到
defconfig,這是用來產生kernel設定檔的檔案。例如該kernel使用的config設定檔位於arch/arm64/configs,將其下載到工作目錄再重新命名為config-機型名稱-代號-位元:
wget https://raw.githubusercontent.com/XperiaBrickers/android_kernel_sony_sm8250/base/arch/arm64/configs/pdx206_defconfig
mv pdx206_defconfig  config-sony-pdx206.aarch64
- 下載kernel原始碼並產生校驗碼。APKBUILD檔案有變更過皆須執行此指令。
pmbootstrap checksum linux-sony-pdx206
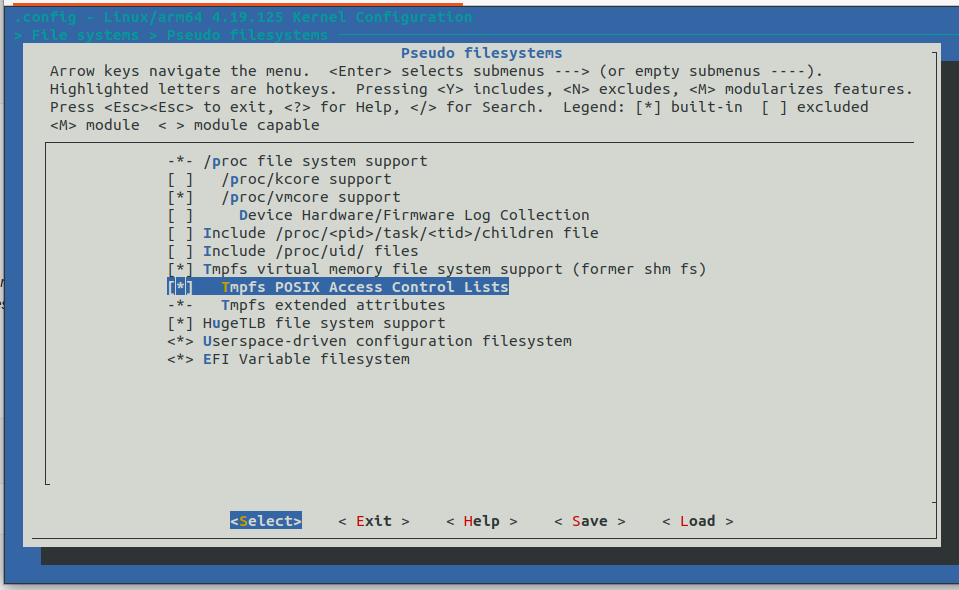
- 開始編譯前, 編輯kernel 的設定檔(config)。在kernel編輯頁面用左右鍵移動到Exit,Enter,儲存kernel設定檔。
pmbootstrap kconfig edit
新移植的機型預設會加入4個patch,如果kconfig顯示cannot apply patch就從APKBUILD的
$config刪除patch檔名。如果出現"Please don’t include linux directly"就在APKBUILD最前面加入REPLACE_GCCH=0。再產生一次校驗碼,並編輯kernel設定檔
pmbootstrap checksum linux-sony-pdx206
pmbootstrap kconfig edit
在kernel編輯頁面用左右鍵移動到Exit,Enter,儲存kernel設定檔。

接著pmbootstrap會檢查kernel缺少哪些設定檔,接著顯示黃色的WARNING:
[12:15:36] (native) generate checksums for linux-sony-pdx206
[12:15:37] WARNING: linux-sony-pdx206/config-sony-pdx206.aarch64: CONFIG_ANDROID_PARANOID_NETWORK should *not* be set. See <https://wiki.postmarketos.org/wiki/kconfig#CONFIG_ANDROID_PARANOID_NETWORK> for details.
[12:15:37] WARNING: linux-sony-pdx206/config-sony-pdx206.aarch64: CONFIG_DEVTMPFS should be set. See <https://wiki.postmarketos.org/wiki/kconfig#CONFIG_DEVTMPFS> for details.
[12:15:37] WARNING: linux-sony-pdx206/config-sony-pdx206.aarch64: CONFIG_SYSVIPC should be set. See <https://wiki.postmarketos.org/wiki/kconfig#CONFIG_SYSVIPC> for details.
[12:15:37] WARNING: linux-sony-pdx206/config-sony-pdx206.aarch64: CONFIG_VT should be set. See <https://wiki.postmarketos.org/wiki/kconfig#CONFIG_VT> for details.
[12:15:37] WARNING: linux-sony-pdx206/config-sony-pdx206.aarch64: CONFIG_USER_NS should be set. See <https://wiki.postmarketos.org/wiki/kconfig#CONFIG_USER_NS> for details.
- 把這些WARNING複製下來。接著點WARNING後面的網址到Wiki上查看要開關哪些設定檔。然後開啟kernel編輯頁面將其開啟或關閉(用空白鍵選取或取消選取):
pmbootstrap kconfig edit
- 調整好之後Exit儲存。檢查kernel的設定檔是否符合postmarketOS的需求,成功的話會回傳
kconfig check succeeded!。
pmbootstrap kconfig check
5. 編譯kernel#
接著要開始編譯kernel,這可能會是最漫長的一步。編譯時記得開另一個終端機執行pmbootstrap log查看錯誤訊息。
pmbootstrap編譯kernel是按照APKBUILD寫的步驟。首先按#Sources的網址下載kernel原始碼,接著套用config-sony-pdx206.aarch64當kernel的conifg。然後按照build()區塊的指令開始make,因此可以在這裡加上make -j8加快編譯速度。
5.1. 開始編譯kernel#
- 執行以下指令開始編譯
pmbootstrap build linux-sony-pdx206
#如果想自己改kernel的原始碼,在build的時候加上src的參數改從自己解壓縮的檔案來編譯:
pmbootstrap build linux-sony-pdx206 --src=/home/ivon/下載/android_kernel_sony_sm8250/
- 順利的話半小時應該會編譯完成:
>>> linux-sony-pdx206*: Tracing dependencies...
>>> linux-sony-pdx206*: Package size: 55.0 MB
>>> linux-sony-pdx206*: Compressing data...
>>> linux-sony-pdx206*: Create checksum...
>>> linux-sony-pdx206*: Create linux-sony-pdx206-4.19.195_p20220910214444-r0.apk
>>> linux-sony-pdx206: Build complete at Sat, 10 Sep 2022 14:03:42 +0000 elapsed time 0h 18m 58s
>>> linux-sony-pdx206: Updating the pmos/aarch64 repository index...
>>> linux-sony-pdx206: Signing the index...
然而通常事情不會那麼簡單,編譯遇到error就會停下來。這個時候就要看pmbootstrap log或~/.local/var/pmbootstrap/log.txt檔案的錯誤訊息,開始除錯。
5.2. 除錯#
編譯出現的warning可以先無視,要先解決的是error。
可以嘗試的選項:
- 用
grep指令於其他postmarketOS機型找相似錯誤訊息,將其patch檔加到這台手機的APKBUILD,執行pmbootstrap checksum linux-sony-pdx206後重新build。
grep -r 'perf_trace_counters\.c' ~/.local/var/pmbootstrap/cache_git/pmaports/device/testing/
換編譯器。pmbootstrap預設是使用最新版GCC,有些Android kernel要用舊版GCC才編的過,或者考慮用CLANG。
改用其他問題較少的kernel原始碼
到postmarketOS的Matrix頻道尋求支援。
6. 設定機型參數和編譯機型專屬套件#
這個步驟要設定和編譯該機型的專屬套件(device specific package)。
- kernel編譯成功後,切換到機型套件的目錄:
cd /home/$USER/.local/var/pmbootstrap/cache_git/pmaports/device/testing/device-sony-pdx206
- 此時你可以再讓pmbootstrap分析一次boot.img的開機參數,並將結果加到
deviceinfo。
pmbootstrap bootimg_analyze /home/ivon/下載/Evo/extracted_20220826_113410/boot.img
- 編輯
deviceinfo,設定螢幕解析度:
deviceinfo_screen_width=1080
deviceinfo_screen_height=2520
根據postmarketOS Wiki上sony-pdx206的說明,Sony的軟體實作有問題,啟用UFS會導致bootloader被清除,因此不將rootfs刷入到手機。
再檢查一次檔案有沒有問題,並編譯機型專屬的套件:
pmbootstrap checksum device-sony-pdx206
pmbootstrap build device-sony-pdx206
這樣Sony Xperia 5 II專用的postmarketOS kernel和機型套件就建立好了,接著要建立安裝檔。
7. 刷入至手機#
- 建立postmarketOS安裝檔,約10分鐘。期間會要求建立使用者密碼。
pmbootstrap install
- 由於UFS無法使用,只能將安裝檔刷到手機SD卡:
pmbootstrap install --sdcard=/dev/sdX
- 讓手機進入fastboot模式,從kernel開機。
pmbootstrap flasher boot
# 因為上述Sony的軟體原因,除非真要刷入到手機boot分區,否則不要使用此指令
pmbootstrap flasher flash_kernel
- 將電腦上的pmbootstrap關閉:
pmbootstrap shutdown
8. 成果#
螢幕沒畫面的話,還是可以用USB連線到電腦,再透過ssh連線到手機看能不能進入系統。
結果這支Sony還是沒畫面。
如果能進入桌面,就到GItlab上提交merge吧,並將成果圖片放在Wiki上。
下一步驟就是將downstream kernel改成mainline kernel。原廠的Android kernel通常是downstream kernel,會有一堆額外patch和封閉韌體。將kernel換成mainline kernel才符合postmarketOS的終極目標。