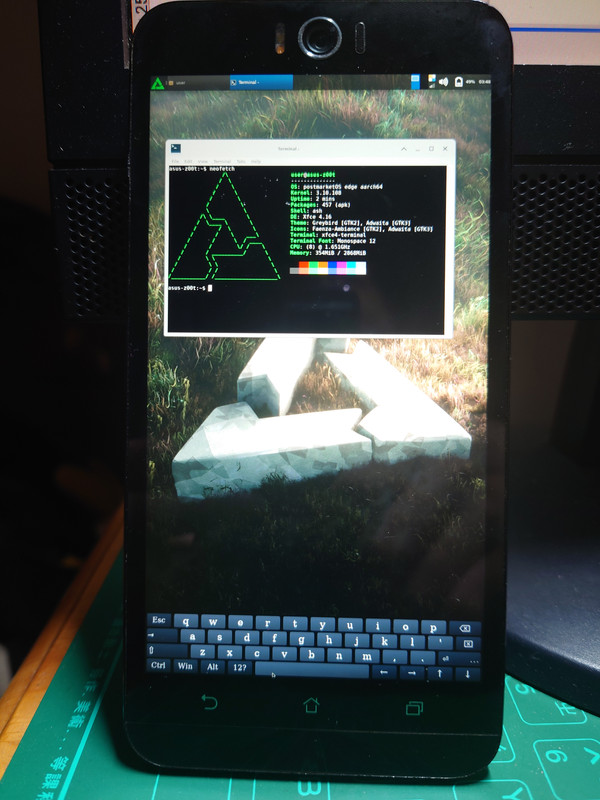
Model: ASUS Zenfone 2 Selfie (ZD551KL)
The Zenfone 2 generation did not have a great reputation. The Laser and Selfie escaped the Intel processor, only to land on the s615, a fire-breathing dragon with lousy performance. This was my second time testing postmarketOS. Support for this phone is actually not bad; at least Wifi works.
1. Compile and Install #
#Install pmbootstrap with pip
pip3 install --user pmbootstrap
source ~/.profile
sudo apt install python3-argcomplete
echo 'eval "$(register-python-argcomplete3 pmbootstrap)"' >> ~/.bashrc
#Choose the device model and desktop environment
pmbootstrap init
#Use the default work directory (/home/user/.local/var/pmbootstrap)
Work path: Enter
Channel: edge
Vendor: asus
#z00t is Zenfone 2 Laser, also used by Selfie
Device codename: z00t
Username: user
User Interface: xfce4
#Press Enter for everything else
#Start building the flashable package. It will ask you to create a user password. Compilation takes about 10 minutes.
pmbootstrap install --android-recovery-zip
#Shut down pmbootstrap
pmbootstrap shutdown
#Copy the generated flashable package (~/.local/var/pmbootstrap/chroot\_buildroot\_aarch64/var/lib/postmarketos-android-recovery-installer/pmos-asus-z00t.zip) to the phone and flash it with TWRP.
By default it installs to the data partition. Alternatively, install it to an SD card and start it with a command from the computer.
2. Basic Settings #
By default, touch input works as the mouse. When you tap somewhere to type, the keyboard pops up automatically.
This phone supports WIFI, so connect to the internet from the terminal first. Or just use OTG with an Ethernet adapter:
#View nearby WIFI networks
sudo nmcli device wifi list ifname wlan0
#Connect to WIFI (SSID is the displayed WIFI name, PASSWORD is the password; remember to use quotes)
sudo nmcli device wifi connect "$SSID" password "$PASSWORD" ifname "wlan0"
#Set automatic connection on boot
sudo nmcli device set "wlan0" autoconnect yes
Start the ssh service automatically on boot and disable DNS:
#View the local IP
ifconfig
sudo rc-service sshd start
echo “UseDNS no” >>  /etc/ssh/sshd_config
sudo rc-update add sshd
Now you can connect to the phone from the computer.
The shutdown command is sudo poweroff now.
3. Connect to the Desktop #
This phone’s MicroUSB makes connecting an external display annoying, so using VNC Viewer on a desktop PC to connect to the phone is easier.
sudo apk add x11vnc
#Create a password
x11vnc -storepasswd
#Start vnc
x11vnc
Download RealVNC Viewer on the computer, enter IP+5900 and the password, and you can see the desktop. It is fixed in portrait orientation.
4. Test Apache Server #
After starting it, connect from the computer to the phone’s IP. You should see the text It works!.
sudo apk add apache2
sudo rc-service apache2 start
#Start automatically on boot
sudo rc-update add apache2
5. Summary #
After using the XFCE4 desktop for a while, touch stops responding. After another while, the screen turns black (but the screen is not actually turned off).
The screen refresh rate is locked at 26Hz.
At least Wifi works. That already makes it much better than the Redmi Note 5 situation.