What is postmarketOS? For an introduction to postmarketOS, see this article.
This article explains how to install postmarketOS with pmbootstrap. As long as your device is on the official support list, you can follow these steps and install postmarketOS onto the device.

pmbootstrap is the official tool provided by postmarketOS. It can build a postmarketOS system from scratch, with fully customizable package contents, so you can control exactly which packages are installed and build your own system.
Besides building installation files, pmbootstrap is also used for porting new devices.
In this article, Ivon demonstrates manually building postmarketOS installation files on a computer and then flashing them to a phone. My computer runs Ubuntu LTS. The phone is a Xiaomi Pocophone F1 with the latest stock firmware installed, an unlocked bootloader, and TWRP installed as the recovery.
1. Install pmbootstrap #
Refer to the instructions on pmbootstrap - postmarketOS Wiki.
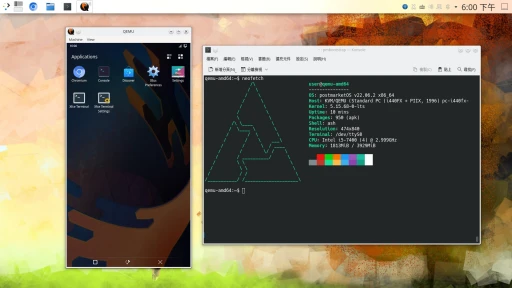
Because it needs to create a QEMU virtual machine, pmbootstrap only supports x86_64 computers.
The first method, and the recommended one, is to install it with Git and a symbolic link. This gets you the latest version of pmbootstrap.
cd ~

git clone https://gitlab.postmarketos.org/postmarketOS/pmbootstrap.git

mkdir -p ~/.local/bin

ln -s "$PWD/pmbootstrap/pmbootstrap.py" ~/.local/bin/pmbootstrap

echo 'PATH="$HOME/.local/bin:$PATH"' >> ~/.bashrc

source ~/.bashrc
The second method is to install pmbootstrap with your Linux package manager. This is only suitable for rolling-release distributions, because the postmarketOS development team keeps changing things. If your pmbootstrap package is too old, trouble tends to find you.
# Alpine Linux, postmarketOS
apk add pmbootstrap

# Arch Linux
pacman -S pmbootstrap

# Debian
apt install pmbootstrap

# Fedora
dnf install pmbootstrap
2. Choose a Device and Configure Options #
- Run the
pmbootstrap initcommand:
pmbootstrap init- Follow the prompts. During initialization, pmbootstrap downloads the latest device configuration files from GitLab.
# Press Enter to use the default work directory (~/.local/var/pmbootstrap)
Work path: Enter

# For the update channel, choose edge, or enter the stable release number marked Recommended for best stability.
Channel: edge

# Choose the phone vendor.
Vendor: xiaomi

# Choose the phone's device codename.
Device codename: beryllium

# Create the postmarketOS user account.
Username: User

# Choose the desktop environment. XFCE4 (X11) is suitable for devices without hardware acceleration; Phosh (Wayland, requires 3D acceleration) is suitable as a phone UI. You can install other desktop environments later after booting.
User Interface: phosh

# Use systemd as the init system? Recommended. Older postmarketOS releases used OpenRC.
Install systemd? (default/always/never) [default]: always

# Press Enter for everything else.- This is the setup you need to do before building installation files for a specific device. You have to tell pmbootstrap what your postmarketOS system should look like before it can start building the files.
3. Choose How to Install postmarketOS on the Phone #
If this is an Android phone, make sure you install the latest stock firmware and unlock the bootloader before flashing.
This step is where the installation files are built. There are three main ways to install postmarketOS:
- Flash with fastboot (wipes data, recommended)
- Install to an SD card (does not affect the phone’s existing system, not recommended)
- Flash with a recovery ZIP (wipes data, too slow, not recommended)
There are also some stranger installation methods, listed later.
Flash with fastboot #
This method wipes all data on the phone.
- Build the installation files:
pmbootstrap install- Put the phone into fastboot mode, connect it to the computer, and flash it:
pmbootstrap flasher flash_rootfs

# If the target partition is too small, add the --partition option and flash to another partition:
pmbootstrap flasher flash_rootfs --partition userdata- Then flash the kernel to the boot partition and reboot:
pmbootstrap flasher flash_kernel

fastboot reboot
Install to an SD Card #
This method does not modify the phone’s data and can be used for a dual-boot setup, but booting into postmarketOS requires running a command from the computer. Note that some phones may not support booting a boot.img from fastboot.
- Insert the SD card into the computer. Use
lsblkto confirm the SD card device name and mount point:
sdb 8:16 1 29.7G 0 disk /media/ivon/E8D8-4246- Unmount it first:
umount /media/ivon/E8D8-4246- Then start the installation:
pmbootstrap install --sdcard=/dev/sdb-
pmbootstrap automatically formats the SD card and installs the system onto it. During the process, it asks you to create a user password and confirms again whether you want to format the SD card.
-
Next, insert the SD card into the phone, put the phone into fastboot mode, connect it to the computer, and enter this command to boot:
pmbootstrap flasher bootInstall with a Recovery ZIP #
This method wipes all data on the phone. You can sideload the ZIP or transfer it to the phone and install it with TWRP. However, building the ZIP takes a lot of time.
- Build the recovery ZIP. This takes about five minutes.
pmbootstrap install --android-recovery-zip

# If you want to install to another larger partition, add the --partition option.

pmbootstrap install --android-recovery-zip --recovery-install-partition=data-
Connect the phone to the computer and reboot into TWRP. Find the generated
pmos-*.zippackage in the computer’s work directory. For example, my file is under~/.local/var/pmbootstrap/chroot_buildroot_aarch64/var/lib/postmarketos-android-recovery-installer. -
Transfer the file to the phone, install it with TWRP, and then reboot.
-
Shut down pmbootstrap on the computer:
pmbootstrap shutdownOther Flashing Methods #
- Netboot: temporarily boot with the postmarketOS
boot.img, then mount the filesystem from the computer without wiping the phone’s data. - Boot with Netcat
- Boot with NFS
4. Post-install Tweaks for postmarketOS #
Even if the phone fails to boot into the desktop, you can still SSH into it while it is connected to the computer with a USB cable:
# This IP is fixed. Just change the part before "@" to your username.
ssh user@172.16.42.1
Assuming your device boots successfully into the postmarketOS desktop environment, and GPU acceleration, touch, networking, and audio all work, see this article next: postmarketOS tips. It covers postmarketOS configuration details and how to use postmarketOS as a phone operating system.