Using AVD of Android Studio on Linux as a Android gaming emulator.
This article shares how to use Android Studio’s AVD emulator to play games on Ubuntu Linux, and how to configure it so only the AVD emulator starts without also launching the bulky IDE.
Android Studio is an IDE released by Google. It supports Linux, Windows, and macOS, and is used for developing Android apps. Its license is proprietary software.
Its biggest feature is that it has built-in Android emulators for various Android versions (Android Virtual Devices, abbreviated AVD below). Can this emulator play games? In theory, yes. Android Studio’s emulator can emulate phone models, has built-in GAPPS, supports GPU acceleration, has built-in ARM translator libndk, and can dynamically resize the window.
Example: using the AVD emulator to play the Google Play game Umamusume on Linux
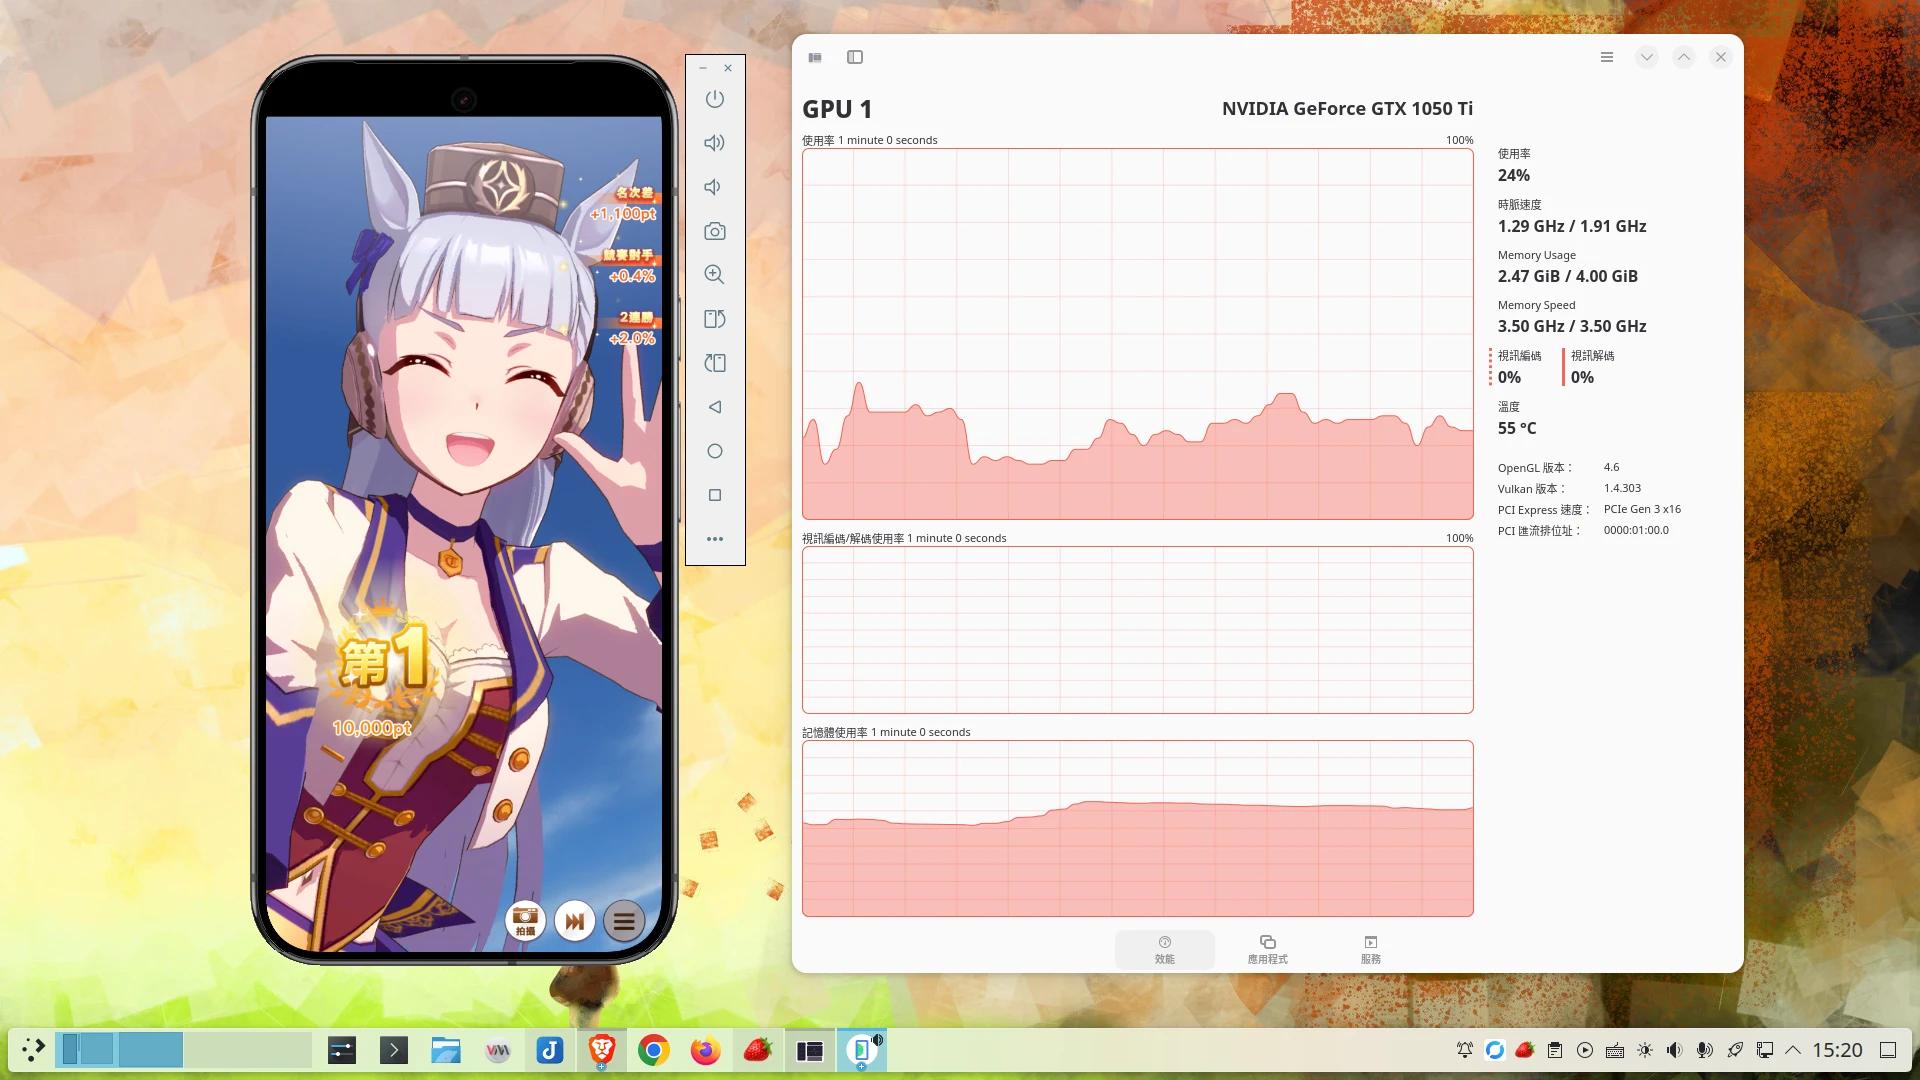
So why use Android Studio’s AVD? Ivon has shared Linux Android Emulators. Among them, Android Studio’s AVD may be the only emulator besides Genymotion that can normally use an Nvidia GPU to play Android mobile games on Linux. Since it is officially released by Google, it must have gone through plenty of testing before being made available to everyone. Its quality should be trustworthy.
If you want to run Android mobile games on Linux, Waydroid is the more commonly recommended solution, and some people use it on the Steam Deck too. However, if you want an experience similar to the Bluestacks emulator on Windows, AVD is closer.
Originally, Waydroid should have been the better solution. It is fully maintained by the open source community, and Waydroid (LXC container) performs better than the AVD emulator (QEMU/KVM virtual machine). The AVD emulator is always a bit laggy.
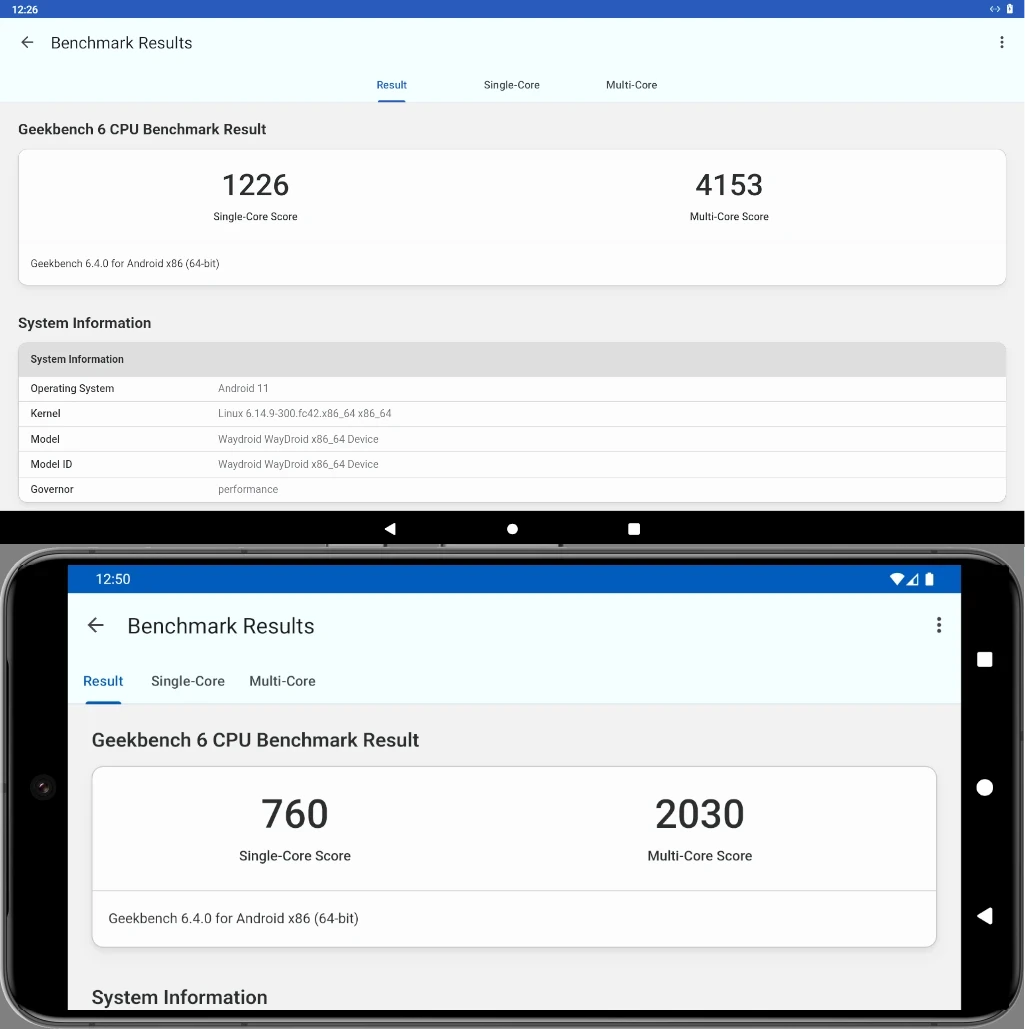
In my actual Geekbench benchmark test, with the same Intel i5-10210U CPU and the same number of cores allocated, Waydroid (top) really does perform better than the AVD emulator (bottom). Waydroid runs Android apps almost at native speed. AVD has performance loss caused by virtualization.
But Waydroid’s fatal weakness is that it only supports Intel and AMD GPUs. The developers say the reason they temporarily do not support Nvidia is that Nvidia does not provide an open source Android-side driver, and the Linux-side Mesa driver also has issues. Meanwhile, Google used some kind of OpenGL ES translation magic to get the Nvidia driver running.
Inside the AVD emulator, you can see it successfully displays the Nvidia GPU of the Linux host. Whether it is Intel, AMD, or Nvidia, the AVD emulator can translate it into OpenGL ES.
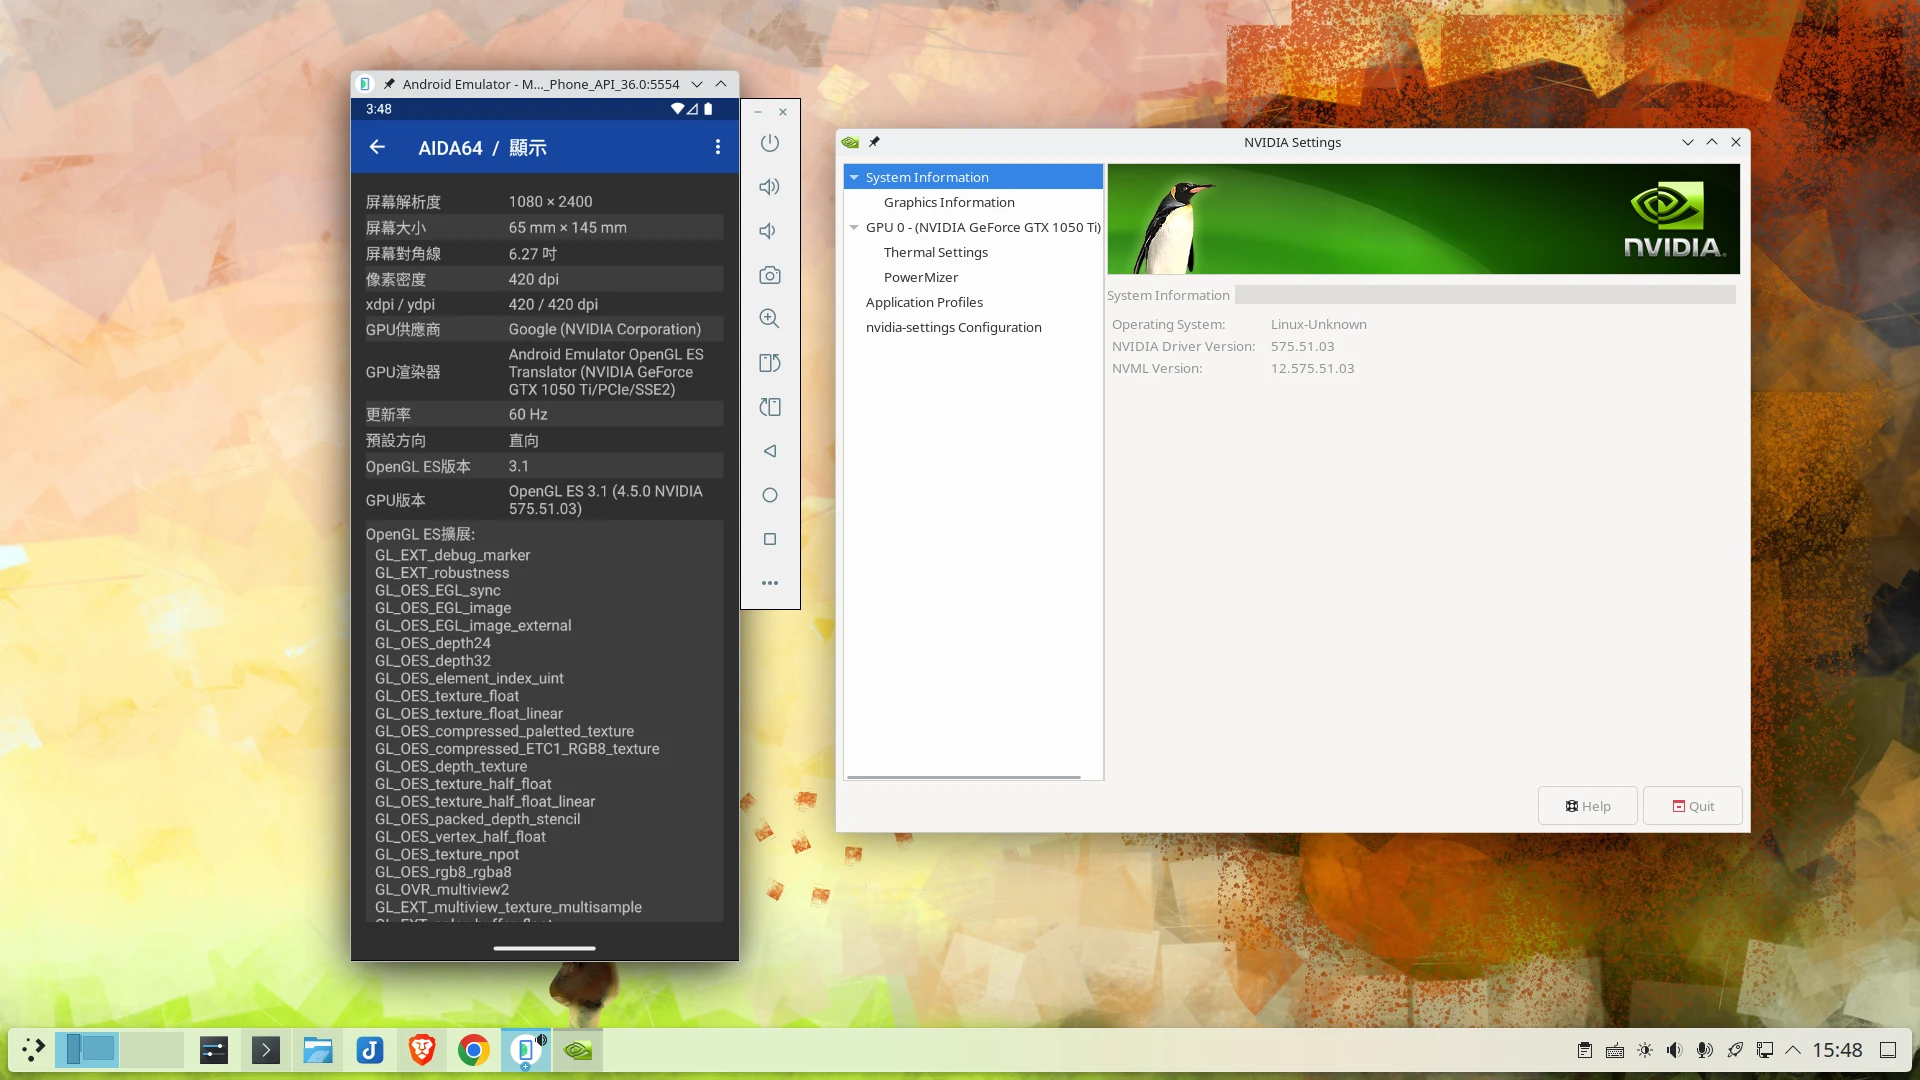
Therefore, for Nvidia users, AVD is the only feasible Android emulator solution with GPU acceleration.
1. Confirm Virtualization and Graphics Drivers #
- Android Studio uses QEMU/KVM to accelerate the emulator, so first confirm whether virtualization is enabled on your Ubuntu computer. Confirm whether the CPU supports virtualization; the return value should not be 0:
sudo grep -E -c '(vmx|svm)' /proc/cpuinfo- Confirm whether the KVM kernel module is loaded:
sudo lsmod | grep kvm- If using an Nvidia graphics card, remember to install Nvidia’s closed source driver.
2. Install Android Studio #
Android Studio only supports x86_64 Linux computers. I recommend at least 64GB disk space, 8GB RAM, and a CPU with 4 cores or more.
-
Download it from the official website. Do not install it with Flatpak.
-
Extract the tar file and place it in any directory. I personally put it under
~/Applications -
Double-click
android-studio/bin/studioto start Android Studio and wait for the initialization packages to finish. -
Click New Project and create any project
-
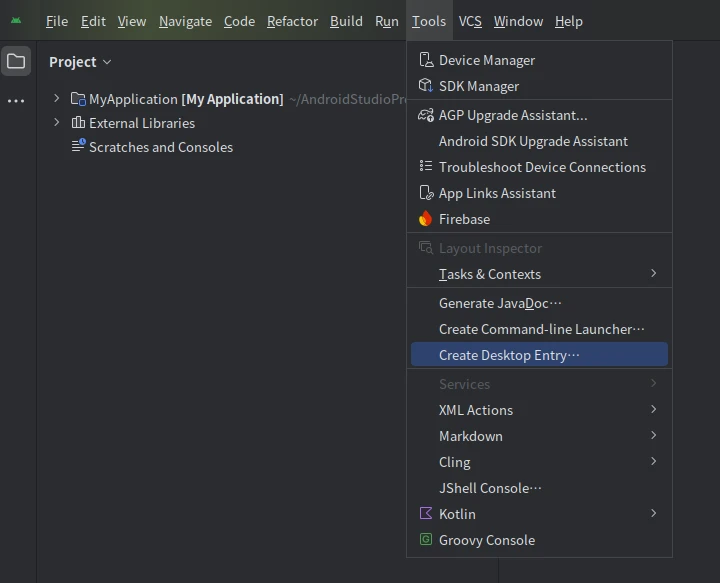
Click Tools → Create Desktop Entry in the upper-left corner to create a Linux desktop icon
3. Add an AVD Emulator #
-
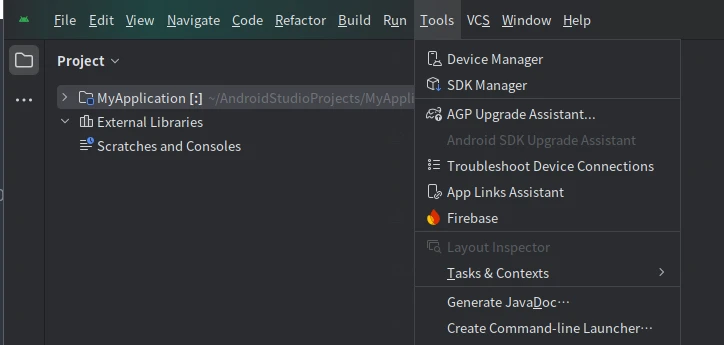
Click the upper-left corner → Tools → Device Manager
-
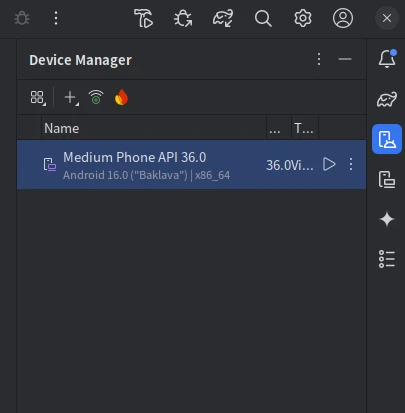
The downloaded emulator should appear on the left side of the screen. At the time of writing, it is the Android 16 image
-
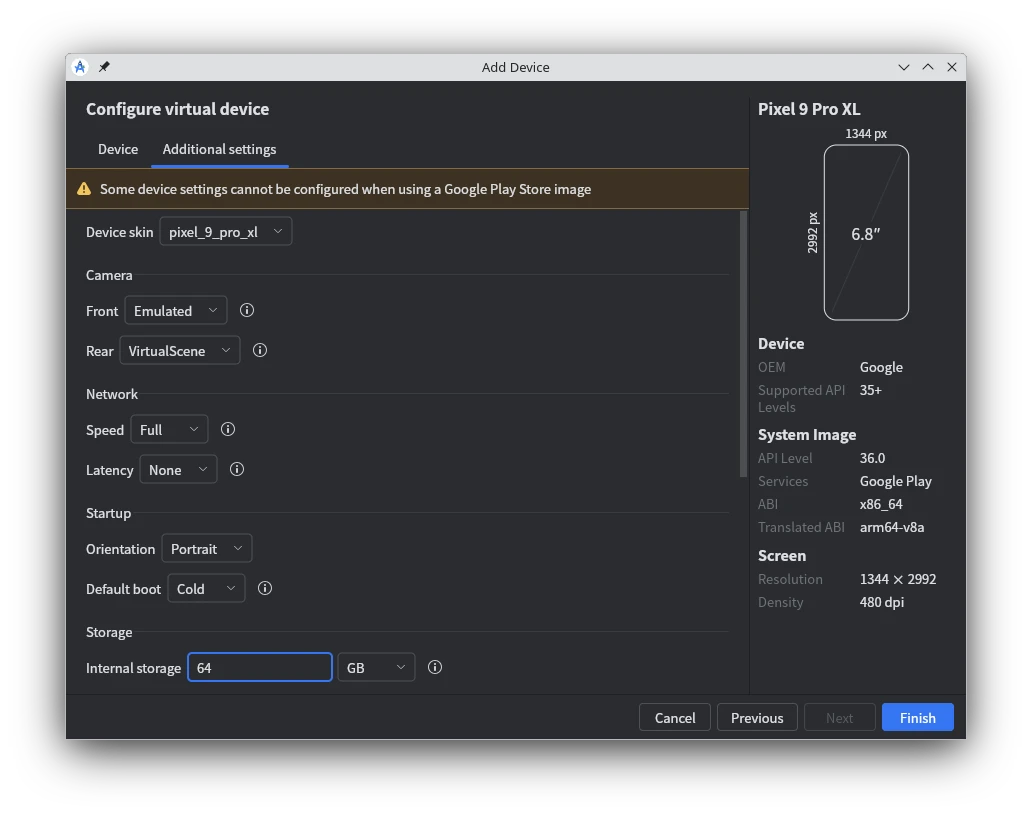
If you need another version, click the plus sign and Create New Virtual Device. For example, I choose Pixel 9 Pro XL, set the Android 16 version, and select the image with built-in Google Play. (Note: this phone has a hole-punch screen, and the AVD emulator will also emulate the hole-punch screen. If you want a complete screen, choose an older model.)
-
Click Additional Settings to adjust emulator performance. Allocate at least 64GB storage, at least 4GB RAM, and 4 CPU cores. However, images with Google Play cannot run at full speed, so we need to manually modify the configuration file.
-
After downloading, click Show on disk and edit the configuration file
config.ini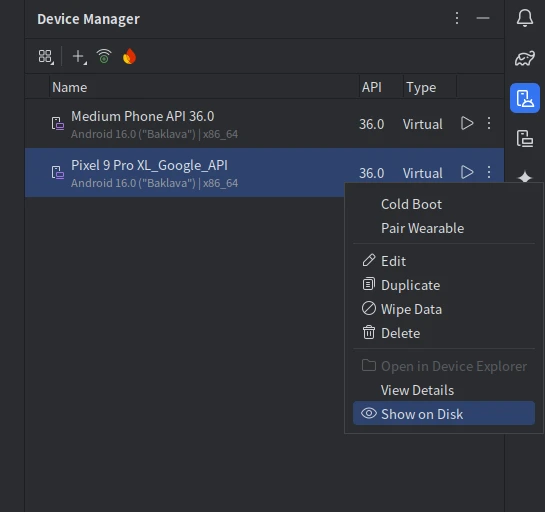
-
Modify the following contents (add them yourself if they do not exist)
disk.dataPartition.size=64G # Emulator virtual disk capacity
hw.audioInput=yes # Audio input
hw.audioOutput=yes # Audio output
hw.cpu.ncore=4 # Number of emulator cores; adjust according to computer performance
hw.ramSize=6144 # Emulator RAM

PlayStore.enabled=true # Force-enable Google Play
tag.display=Google Play
tag.id=google_apis_playstore

# Delete the following three lines if you do not want the emulator to show the phone frame
skin.name=
skin.path=- Then boot it, log in to your Google account, finish initialization, and shut it down.
4. Start the AVD Emulator Alone Without Starting the IDE #
Android Studio’s problem is that it is too bulky. Running the IDE consumes a lot of resources. We can run AVD alone without opening the IDE.
-
Android Studio’s dependencies will be placed under
~/Android/ -
List the emulator list, such as
Pixel_9_Pro_XL
~/Android/Sdk/emulator/emulator -list-avds- If you only want to start AVD without opening the IDE, start it with this command:
~/Android/Sdk/emulator/emulator -avd "模擬器機型"If you have two GPUs, you can use Nvidia PRIME to specify using the Nvidia GPU for emulator graphics acceleration.
- We make it into a Linux desktop shortcut and add it to the Linux application list
vim ~/.local/share/applications/emulator_pixel_9_pro_xl.desktop- Fill in the following commands. If AVD acts weird under Wayland, add the environment variable
env WAYLAND_DISPLAY=afterExec=so it starts with XWayland instead.
[Desktop Entry]
Categories=Development;IDE;
Exec="/home/user/Android/Sdk/emulator/emulator" -avd "Pixel_9_Pro_XL"
Icon=/home/user/Android/Sdk/skins/pixel_9_pro_xl/back.png
Name=Pixel 9 Pro Emulator
NoDisplay=false
Type=Application-
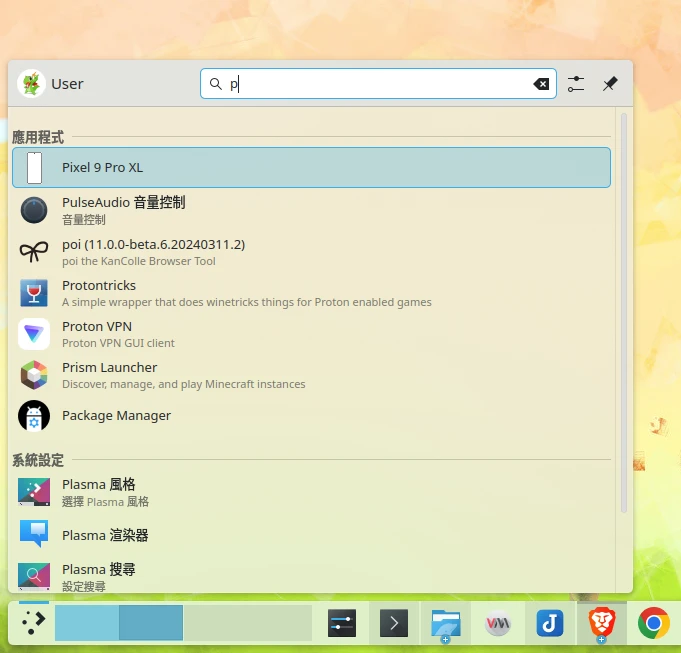
After that, you can click this shortcut on the Linux desktop to start the AVD emulator.
-
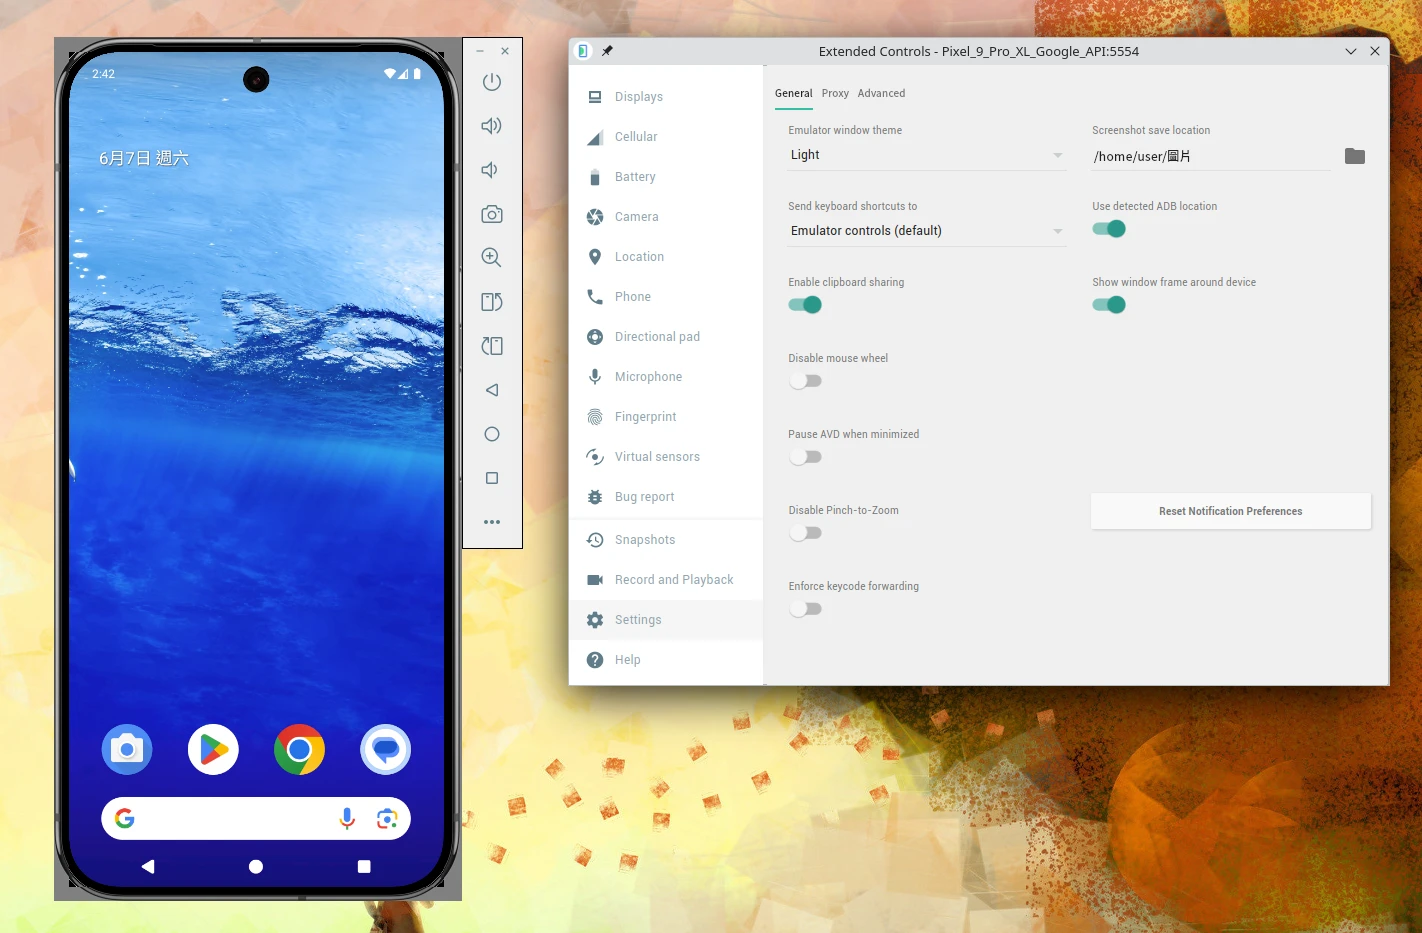
Click the three dots in the upper-right corner of the AVD emulator to open settings, then click Show window frame around device. The frame will appear, allowing you to resize the AVD emulator window.
5. Use QtScrcpy for Keyboard Mapping #
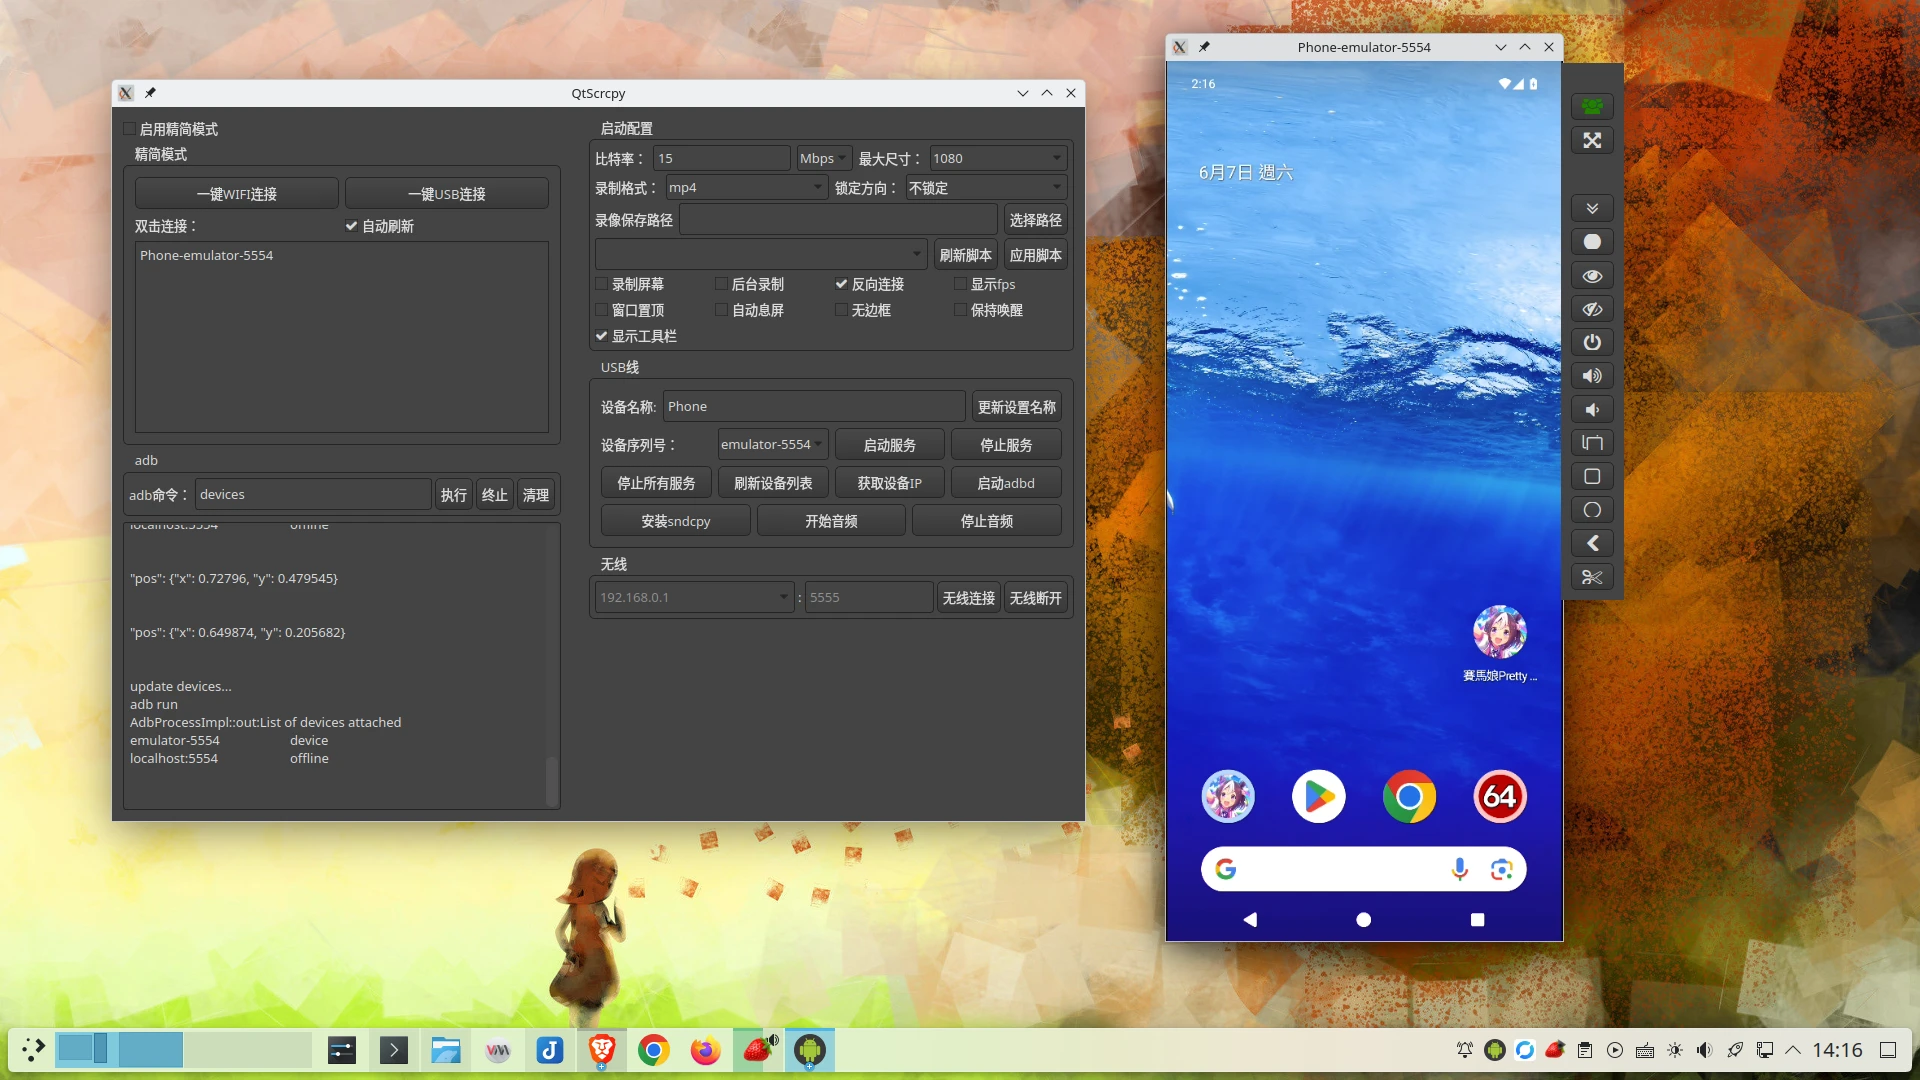
Switch to Scrcpy as the main connection method. QTScrcpy supports keyboard mapping, controlling touch taps with the keyboard.
We can add the -no-window -gpu host parameters to the AVD emulator startup command, so the emulator will not pop up a window while keeping GPU acceleration.
~/Android/Sdk/emulator/emulator -avd "模擬器機型" -no-window -gpu hostThen use ADB to list the devices currently on the computer
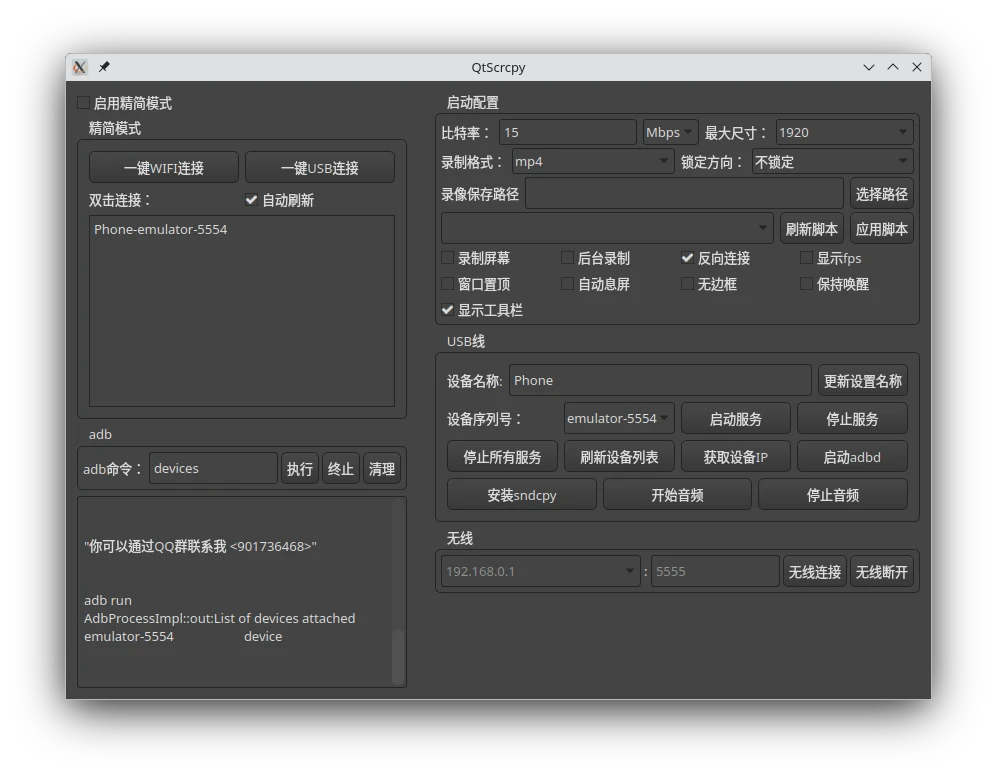
Click connect
6. Run Multiple Apps #
We do not need to run multiple AVDs at the same time. That eats too many resources.
Just use Android 15’s virtual dual-screen feature.
Click the AVD emulator’s settings → Display, and add another screen.
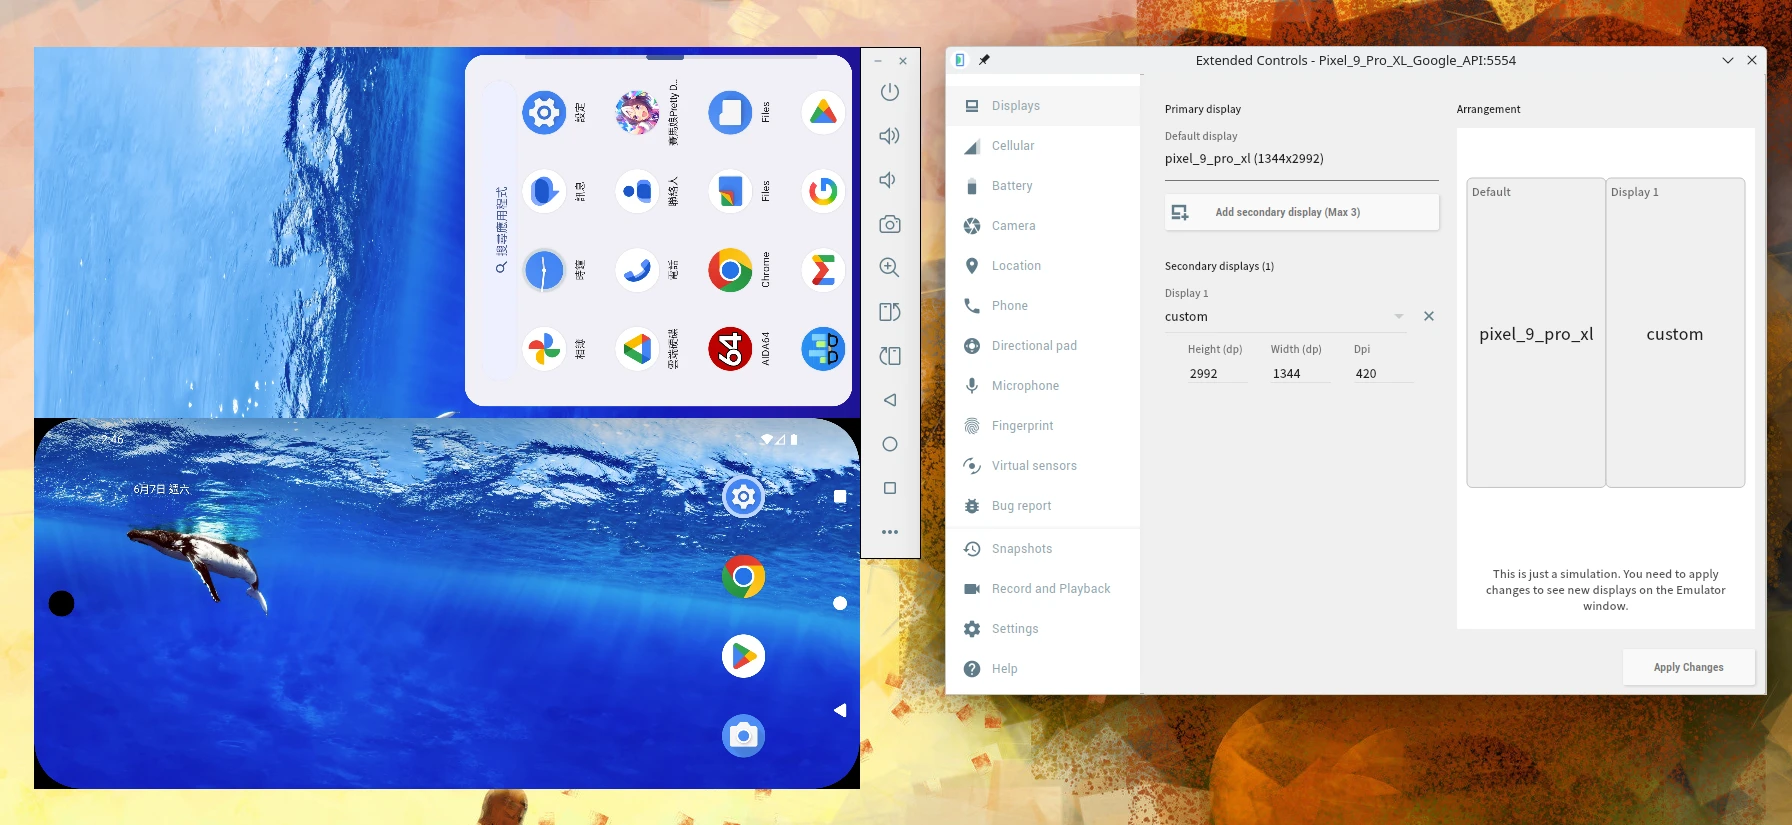
The extra screen can be used to run other apps. However, running large games still requires considering whether the RAM allocated to the emulator is sufficient. The secondary screen does not seem to rotate along with the orientation.
7. If an App Crashes #
AVD has built-in libndk, and it may crash because of ARM translation issues.
Try to find x86_64 APKs as much as possible to reduce the chance of crashes caused by the ARM translator.
It may also be that the game detects the emulator and crashes. AVD is just a development emulator. If a game detects a suspected emulator and refuses to let you play, there is not much you can do~
The Play Integrity API requires hardware support and cannot possibly pass inside an emulator.