To run Android apps on Linux, Ivon mentioned several approaches in Linux Android Emulators. In this article, Ivon introduces the Android-x86 branch “Bliss OS”.

Bliss OS is basically an improved version of Android-x86. It can be installed on physical machines and virtual machines, and it supports many newer hardware platforms, such as GPUs after Intel 10th-generation processors. Its Android version is also updated more quickly.
It has a built-in Google Play Store, and you can play 64-bit 3D games without installing an extra translator. That is a major improvement.
This article discusses installing a Bliss OS QEMU/KVM virtual machine on Linux, using virglrenderer for VM GPU acceleration so it can play mobile games.
Refer to the video version of the installation process:
1. Why Choose Bliss OS? #
Related article: Android-x86 alternative - Bliss OS Introduction
Bliss OS is an Android system based on Android-x86, designed specifically for running Android on x86 computers and tablets. On top of Android-x86, it preloads many practical tools and maintains an active open source update model.
A quick comparison shows that the latest version on Android-x86’s official website is Android 9.0, while the latest Bliss OS test version has reached Android 13.
An old Android version may not look like a big problem, but there is a big gap in ARM translation. Android-x86 9.0 depends on Intel’s “liboudini” technology to run ARM APKs on Android systems with x86 architecture, but it only supports 32-bit ARM-v7eabi APKs. Nowadays more and more developers only provide 64-bit ARM-v8a APKs. Therefore we have to switch to libhoudini from Android 11 or later to be compatible with 64-bit ARM APKs.
Besides being newer and compatible with more computer hardware, Bliss OS also adds some features that make Android feel more like a computer, such as forced rotation, key mapping, gaming mode, simulated touch taps, KernelSU (root permission that is harder to detect), and other useful features. It also replaces traditional Android recovery with “Gearlock”.
By the way, the Bliss OS development team also develops Waydroid, so the two have some similar features.
2. Software and Hardware Needed to Install the Virtual Machine #
My system specifications:
- CPU: Intel i5-10210U
- GPU: Intel® UHD Graphics 620
- Android-x86 version: 11.0
- QEMU version: 8.1.1
- virglrenderer version: 0.10.4
Please confirm that CPU virtualization is enabled and that the KVM kernel module is loaded.
Install the QEMU, Libvirt, and Virt Manager packages on Linux. For Ubuntu, refer to this article. For Arch Linux, refer to this article.
Next, prepare a compatible graphics card. virglrenderer is a paravirtualized GPU technology that allows QEMU/KVM virtual machines to obtain 3D hardware acceleration without GPU passthrough.
For virglrenderer, Intel and AMD graphics cards are recommended. Nvidia’s closed source driver is not very stable with virglrenderer.
If you want to do GPU passthrough, Nvidia’s Android driver has issues, so you must use an Intel or AMD GPU instead.
If you have an Nvidia graphics card, I recommend giving up hardware acceleration and booting Bliss OS in No HW Acceleration mode.
3. Start Installing Bliss OS and Partition the Disk #
The Bliss OS official website provides ISOs for various versions, and the installation methods are broadly similar.
Bliss OS 14 (Android 11) and Bliss OS 15 (Android 12L) use Intel libhoudini to translate ARM APKs. Later versions switch to Google libndk.
Here I use Bliss OS 15 as the demonstration.
-
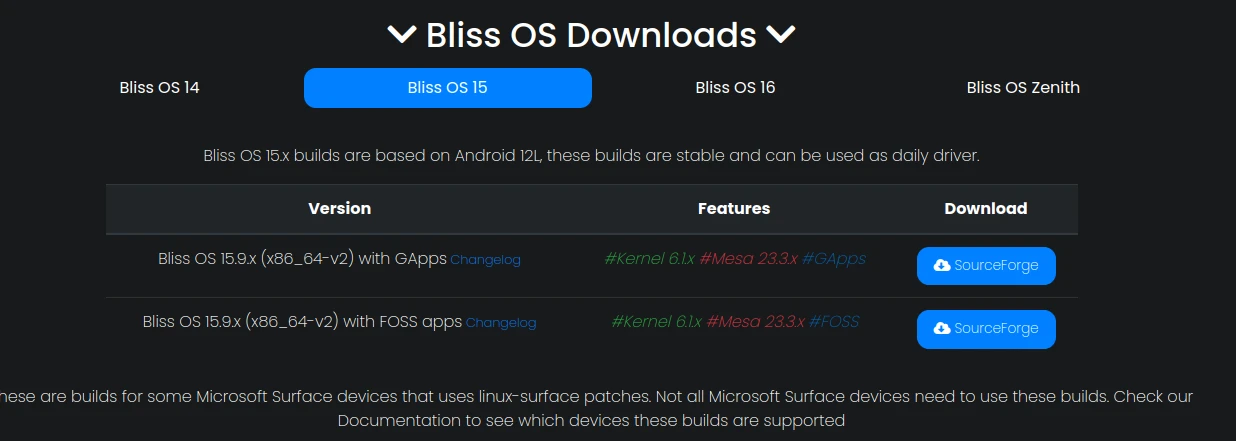
Download the ISO from the official website or SourceForge. Choose the version with built-in GApps (Bliss OS 15.9.x (x86_64-v2) with GApps). Then check file integrity to prevent file corruption.
-
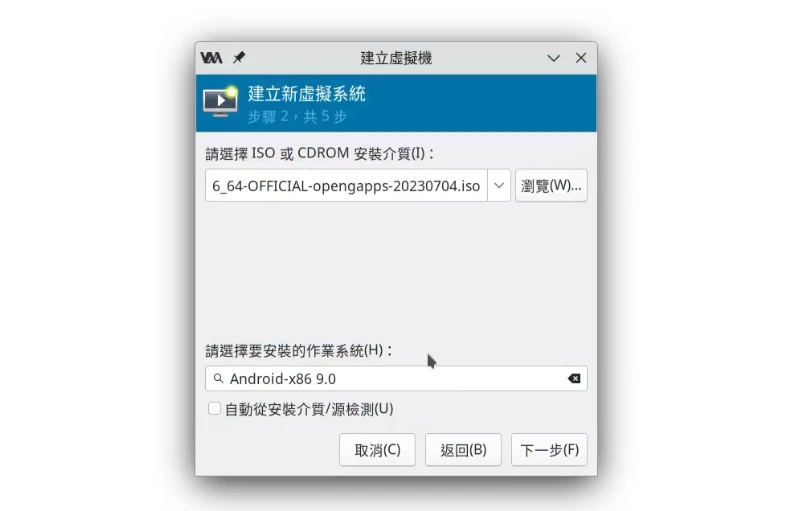
Open Virt Manager, create a new virtual machine, select the ISO, and choose Android-x86 as the system
-
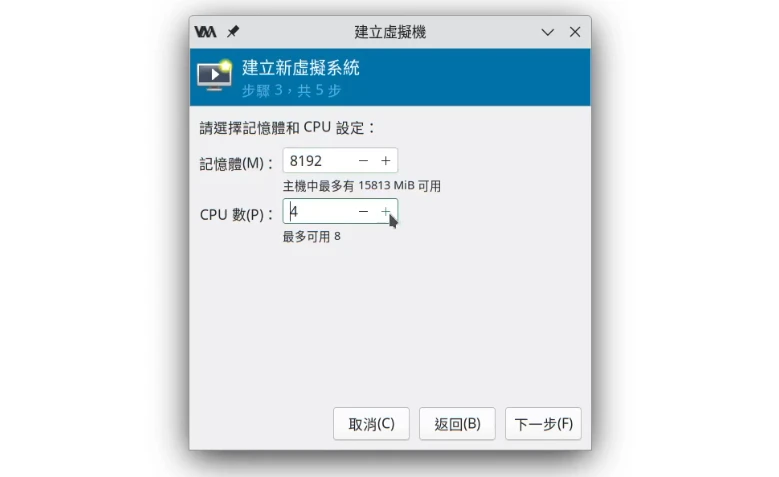
I recommend allocating 8GB RAM and 4 CPU cores. The more RAM, the better, because ARM instruction translation can sometimes consume a lot of RAM.
-
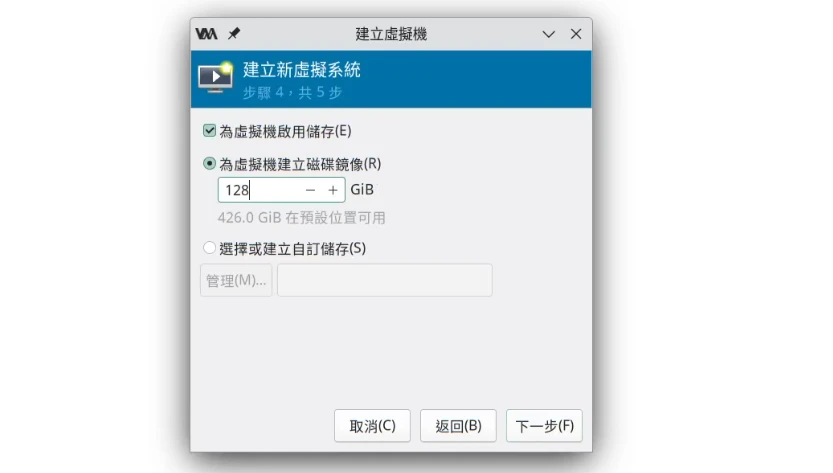
Allocate at least a 64GB virtual disk
-
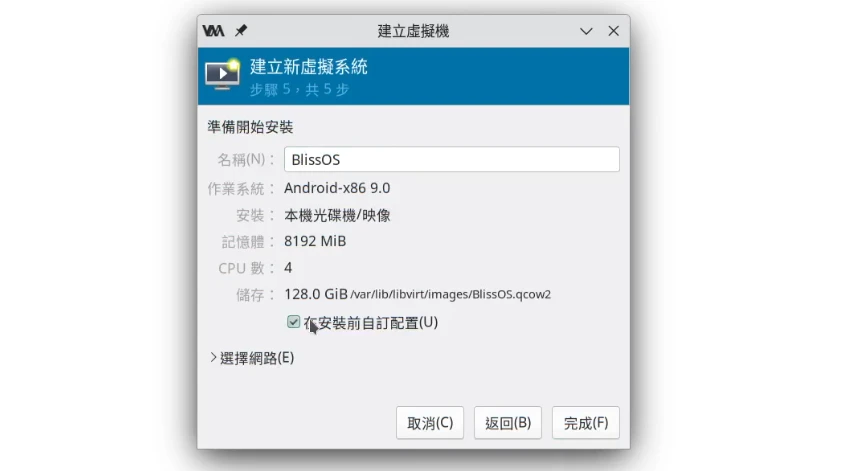
Check customize configuration before install
-
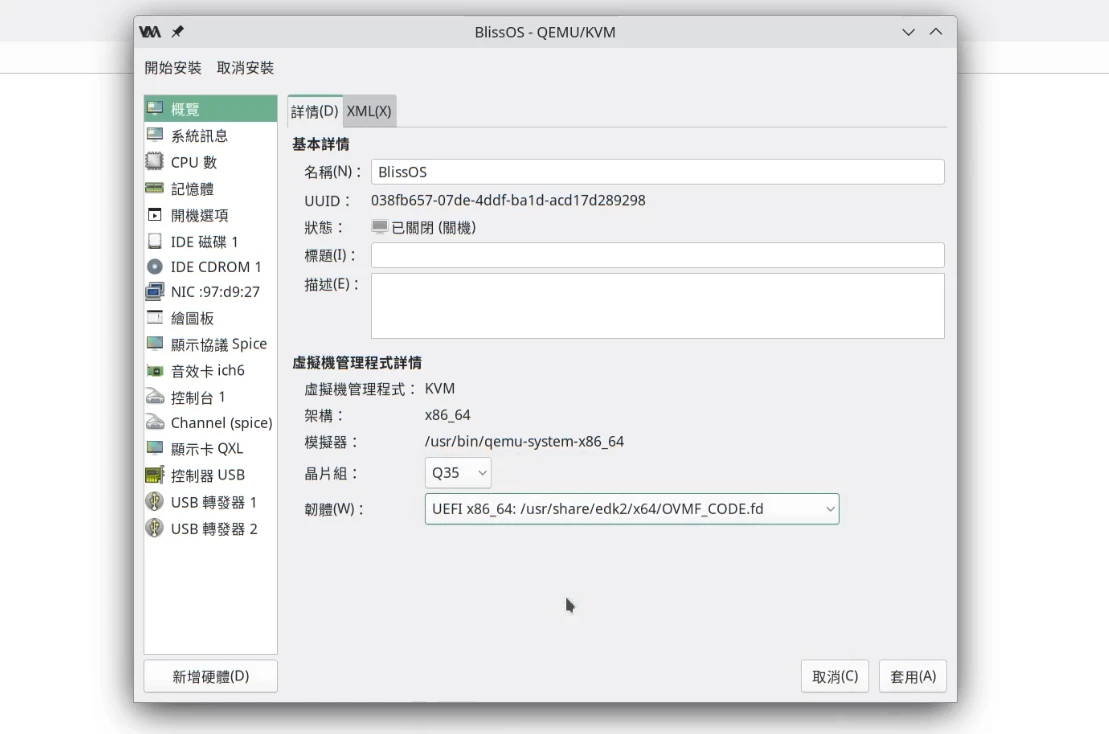
Choose Q35 for chipset type, and UEFI (OVMF_CODE.fd) for firmware
-
Set the disk to VirtIO
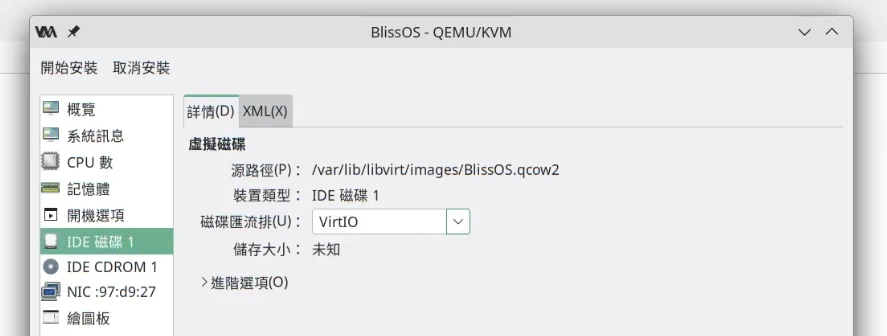
-
Change CDROM to SATA
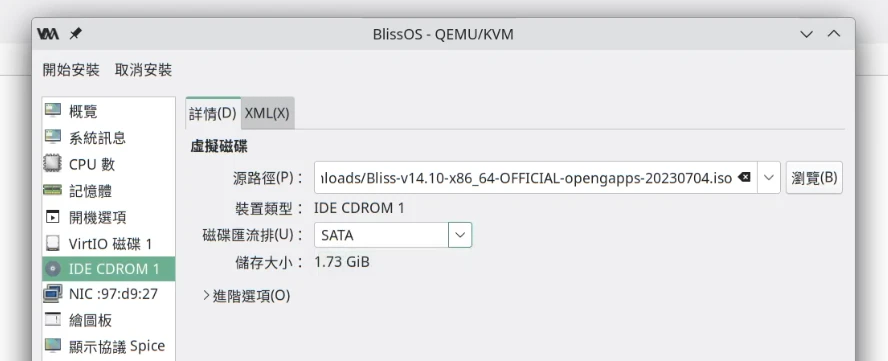
-
Check all boot devices and move CDROM to the top
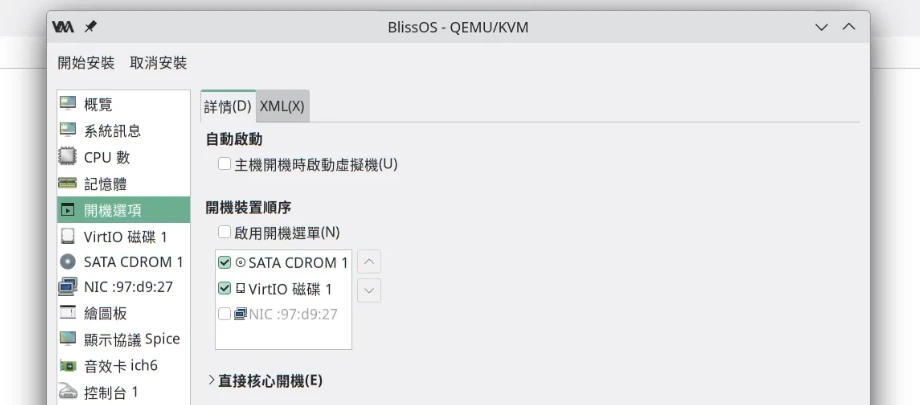
-
Set the Spice listen type to none, check OpenGL, and select the Intel graphics card as the device
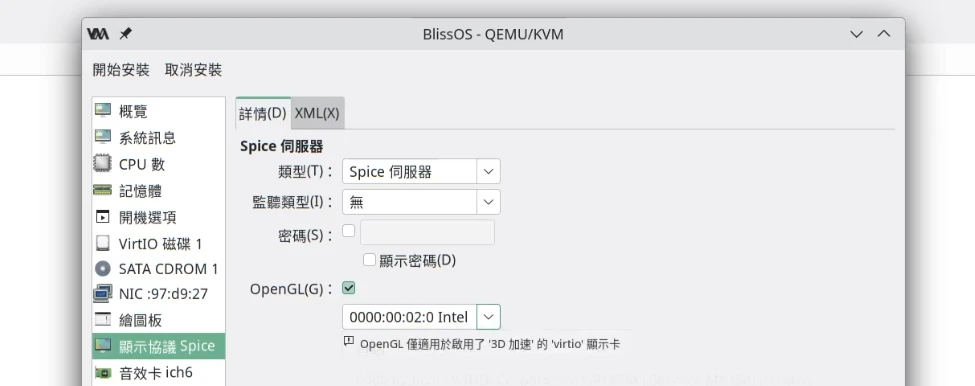
-
Set the video card to VirtIO and check 3D acceleration. The 3D acceleration here is achieved with VirGL. See Linux virtio-gpu virglrenderer for QEMU/KVM.
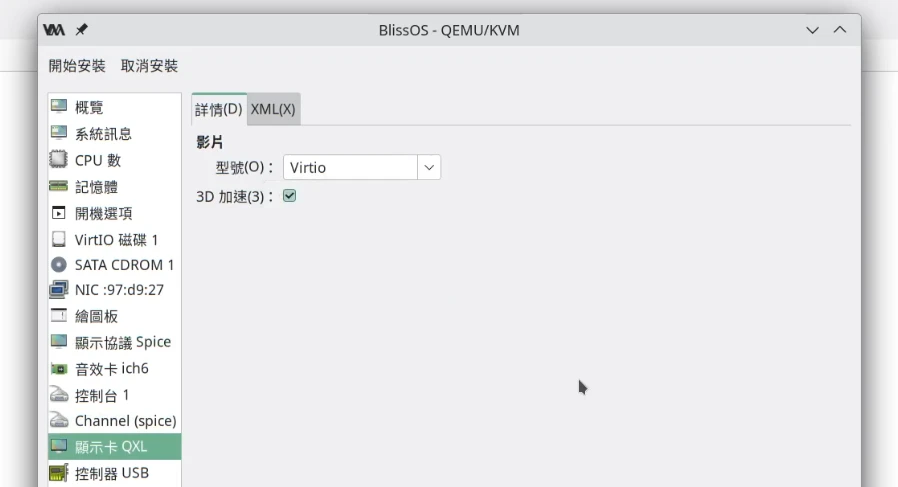
-
Click start installation
-
Use the keyboard to select Bliss OS Installation
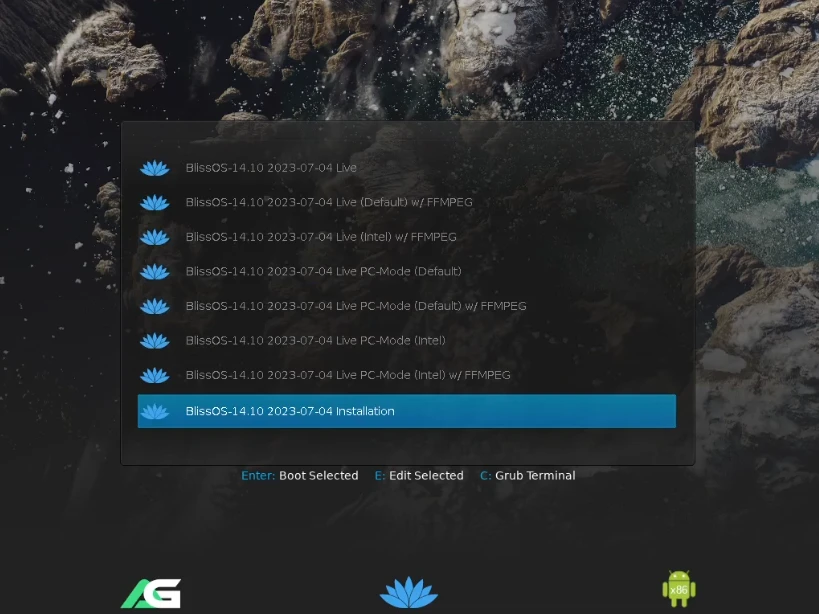
-
Press Enter and select
Create/Modify Partition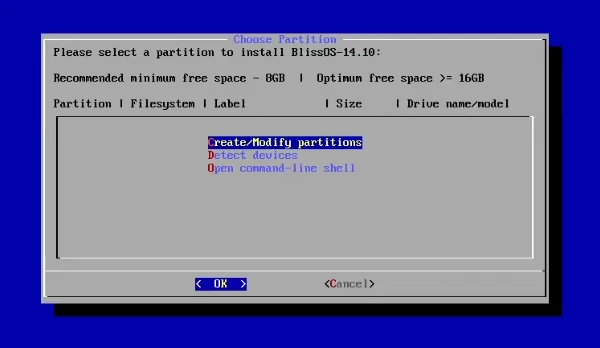
-
Confirm using the GPT partition table
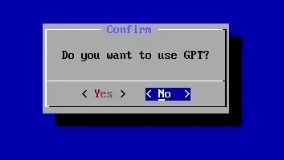
-
Operate with the keyboard: use the left and right arrow keys to move to
New, press Enter, enter+512M, then enteref00to change the partition type to EFI. Set the partition name toefi, and set the first partition as the EFI partition.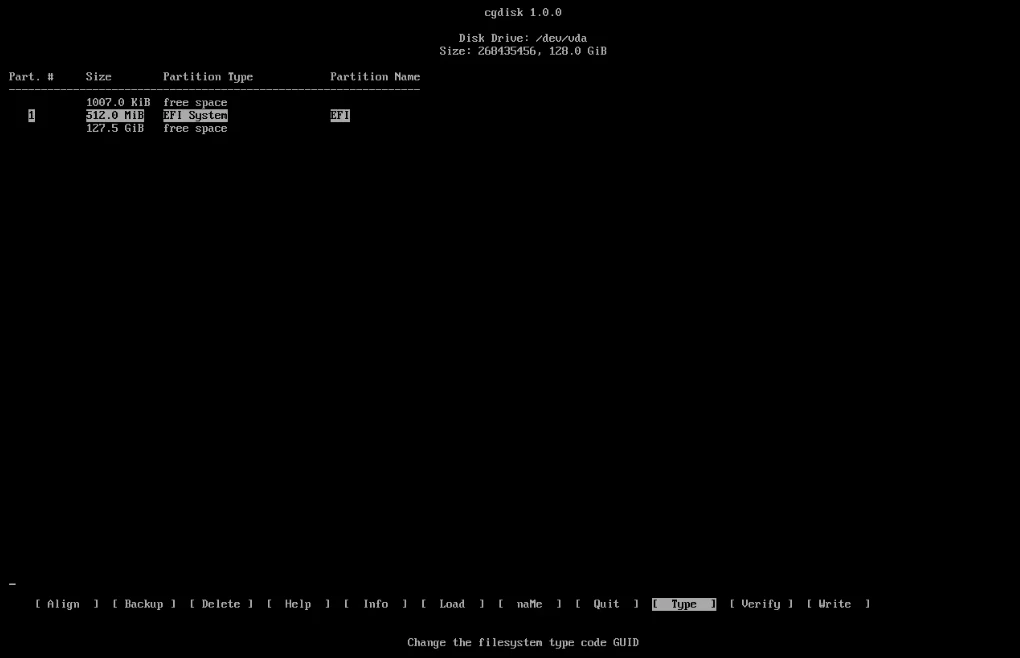
-
Move the keyboard selection to Free Space, press Enter, select
New, press Enter all the way through, enterandroidas the partition name, and set the second partition as the Linux system partition. (If three partitions appear due to misalignment, ignore it)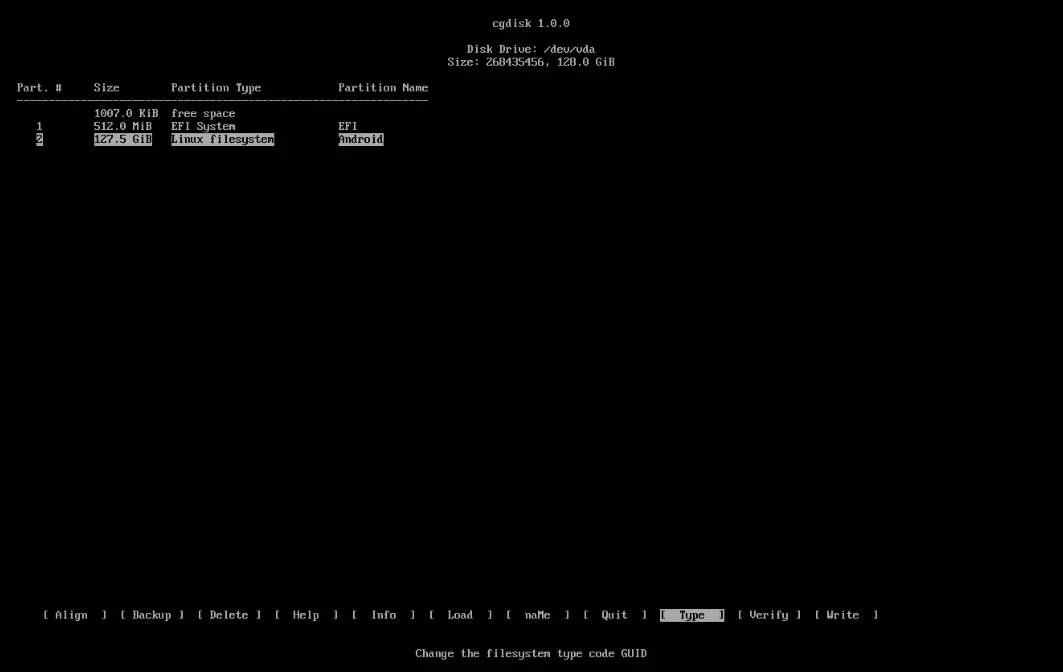
-
Move the keyboard selection to
Writeand press Enter to write changes. Then move toQuitto exit. -
Select the partitioned disk
vda2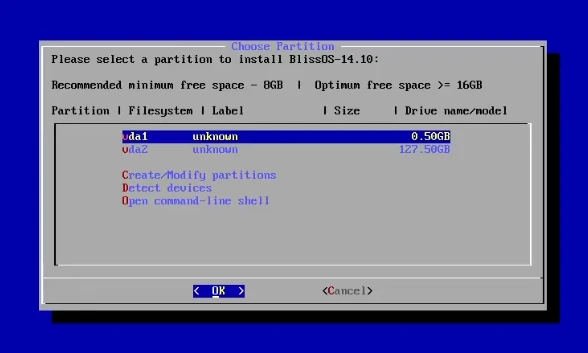
-
Format the system as Ext4
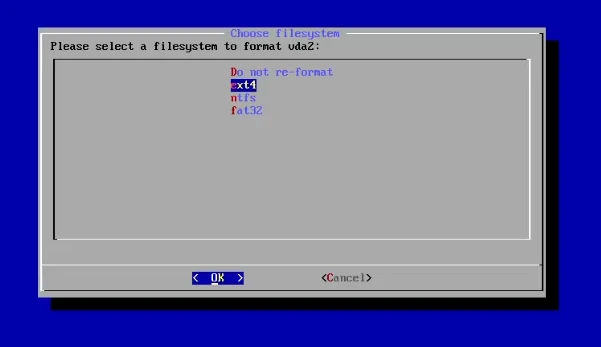
-
Install EFI/GRUB and format
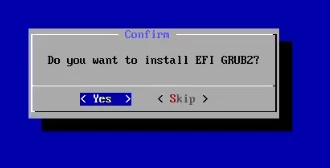
-
After installation, click Virt Manager’s force power off button. Remove CDROM from the hardware list
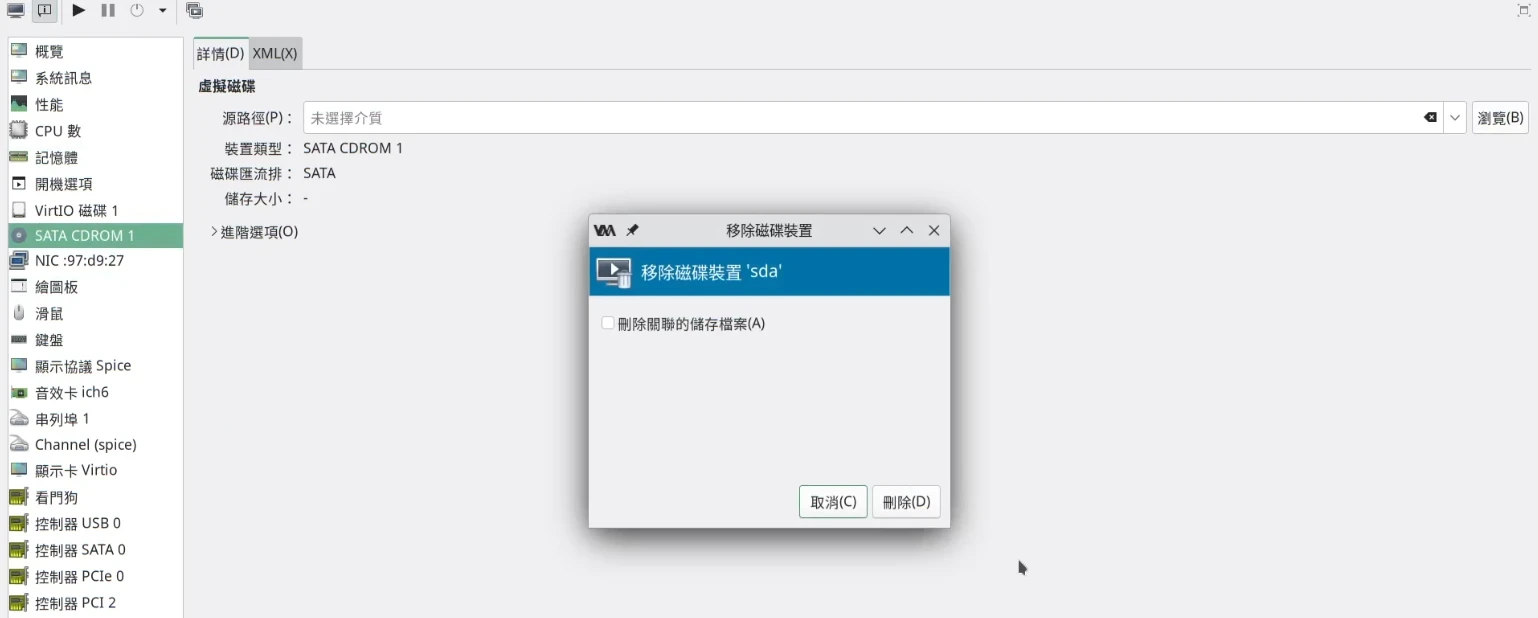
-
On the next boot, select the first option. By default it will load the system accelerated by virglrenderer. If you want to test the option without hardware acceleration, change the QEMU video card to QXL and select VM Options → VBox/VMWare - No HW Acceleration during boot.
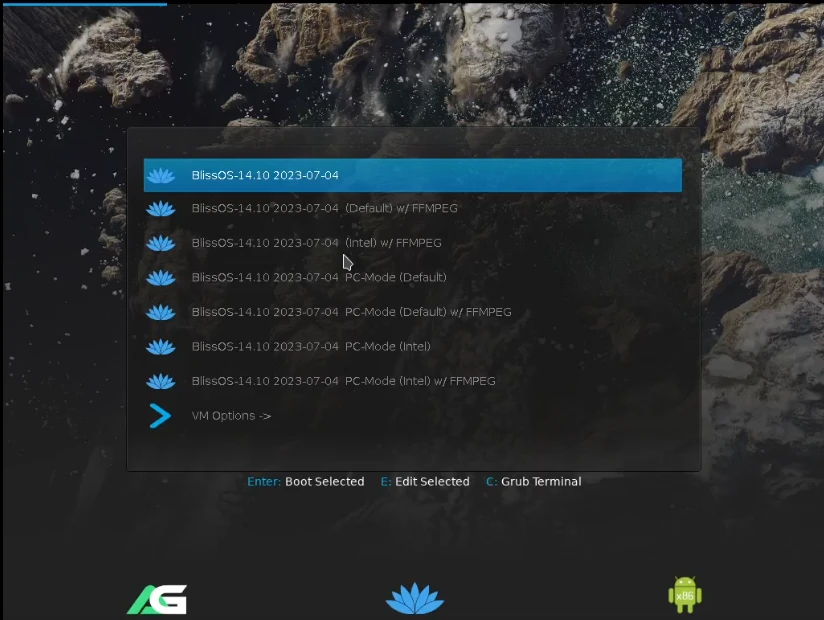
Bliss OS has a built-in Google Play Store. You can directly log in to a Google account without certifying the device.
The ARM translator is enabled by default; no manual installation is needed.
4. How to Change the Bliss OS Screen Resolution #
-
In the boot menu, choose VM Options → Debug QEMU/KVM VirGL to enter the Android shell
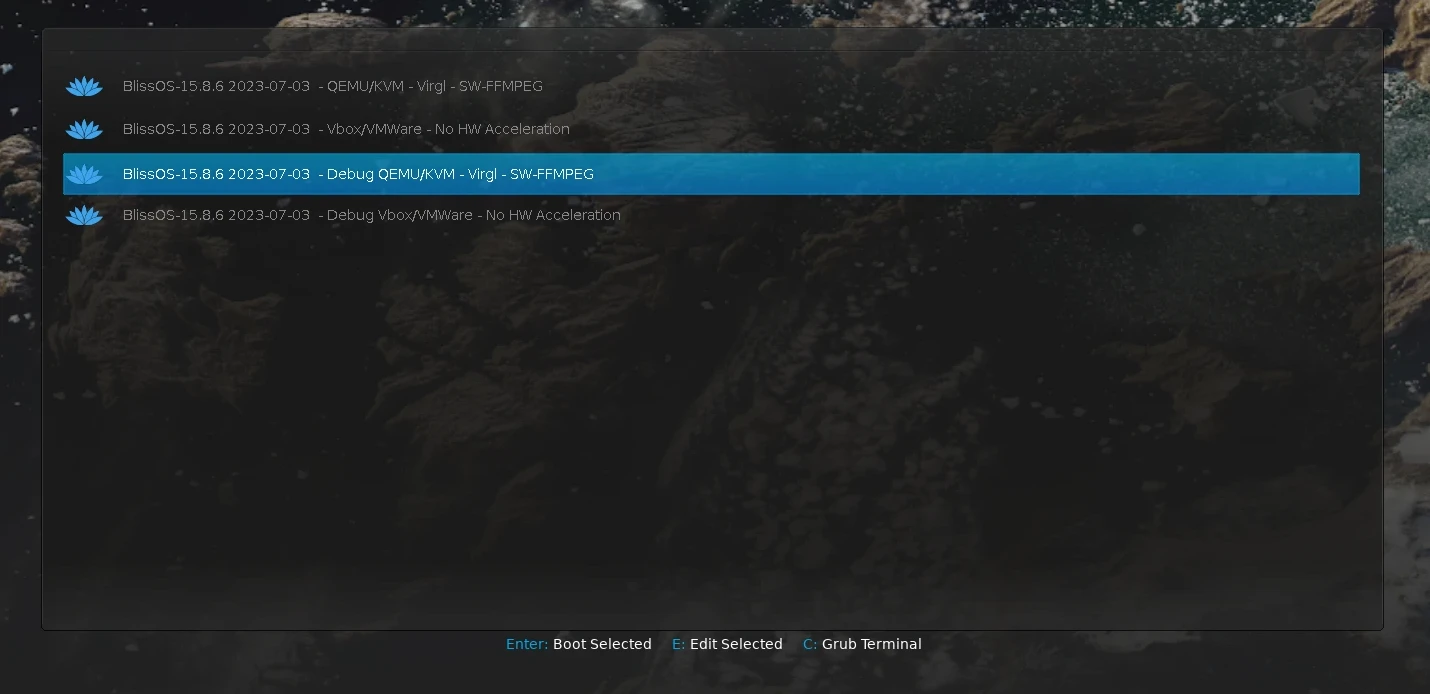
-
Use the
blikidcommand to check the EFI disk partition, usually/dev/sda1 -
Mount the EFI partition
mount /dev/sda1 /mnt- Edit
android.cfg
cd /mnt/efi/boot

vi android.cfg-
First find the line
linux $kd/kernel, and addvideo=1920*1080at the end. Then find the lineset gfxmode=and modify the resolution. -
Reboot
umount /dev/sda1

reboot -f
Another way to change the resolution is to install SecondScreen and then force the adjustment.
If the mouse cannot sync after changing the resolution, then prepare a second mouse and pass it through using Virt Manager’s USB redirection feature.
Virt Manager’s window does not seem to respond to changes in the Bliss OS virtual machine resolution, causing the image to still look blurry.
5. Bliss OS Tips #
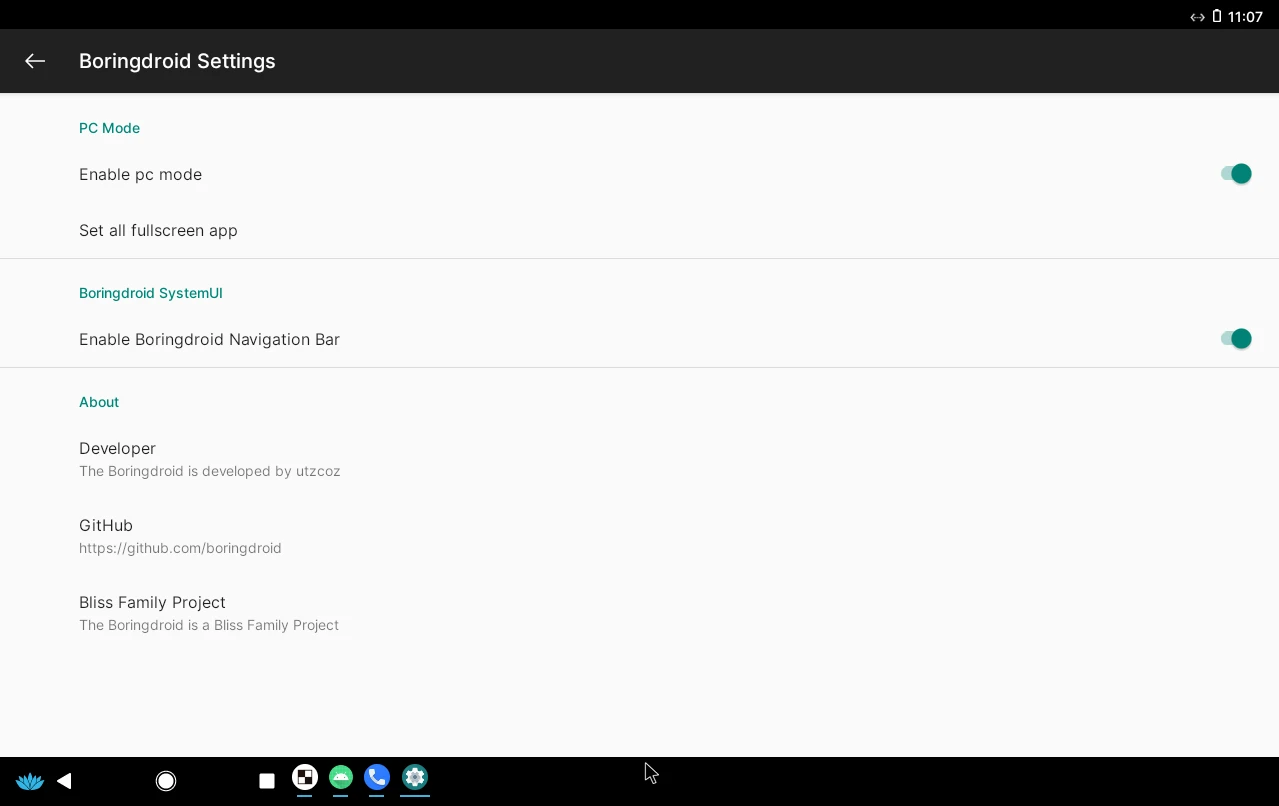
Bliss OS enables Boringdroid’s desktop mode by default, and there is a persistent taskbar at the bottom of the system.
If an app needs to run full screen, select it in system settings → Boringdroid → Set full screen app.
Bliss OS preinstalls the “Set Orientation” app to force screen rotation, but this one is too old. I think OHMAE Ryosuke’s Force Rotate Screen App is better.
For screenshots, pull down the menu and capture. As for screen recording, virglrenderer records weird colors, so I recommend using OBS Studio on the computer to capture the virtual machine window.
Native Android multi-window support is not very good. If you insist, you can enable “freeform windows” in Developer options.
Bliss OS has built-in KernelSU and Termux. Root permission is not globally enabled and needs to be mounted for individual apps.
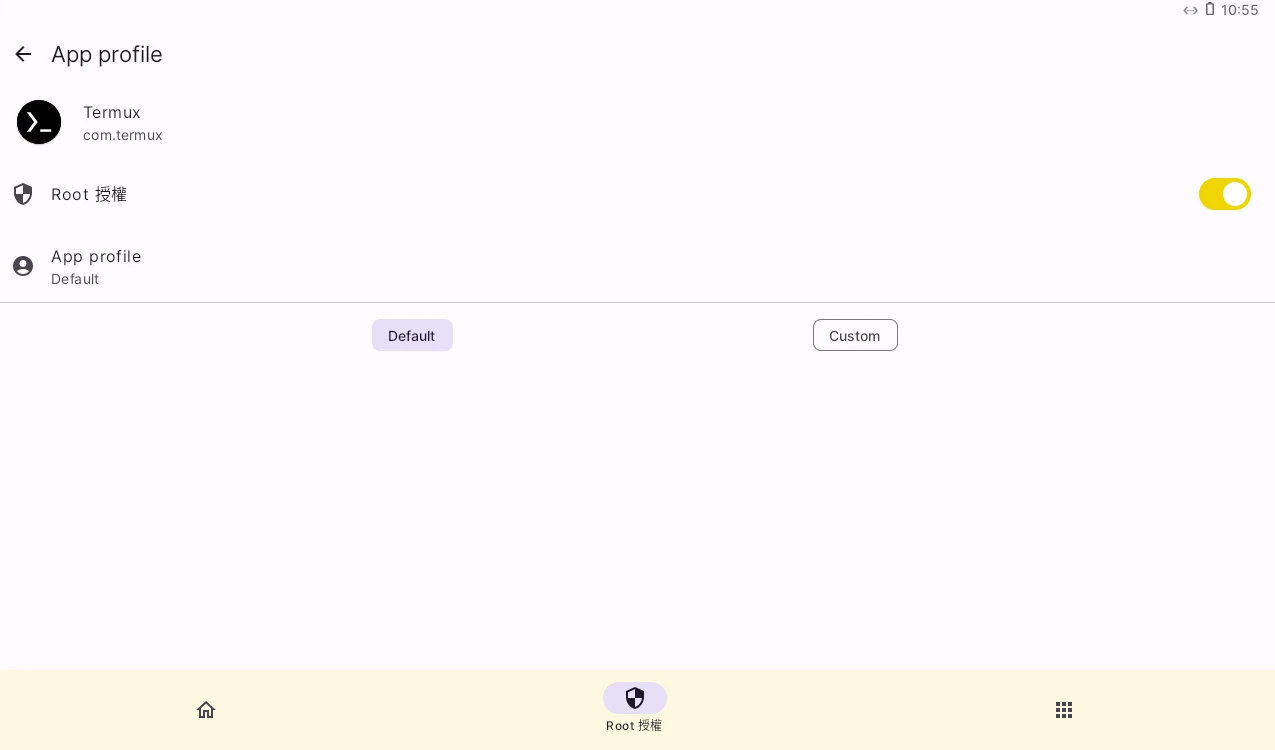
For virtual machine ADB connection, I referred to a Reddit article and used wireless connection. If you want to enable Root permission in ADB Shell: open KernelSU and grant permission to “com.android.shell”.
6. Actually Playing Games on Bliss OS #
When installing games, I recommend using versions that natively support x86 architecture. Google Play should automatically filter them for you. If you install ARM APKs, the system will spend extra resources on translation.
Games should start if they do not detect emulators, but some games have problems playing videos, probably a virglrenderer bug. Try booting from the boot menu using the hwcomposer.drm method under the Debugging menu.
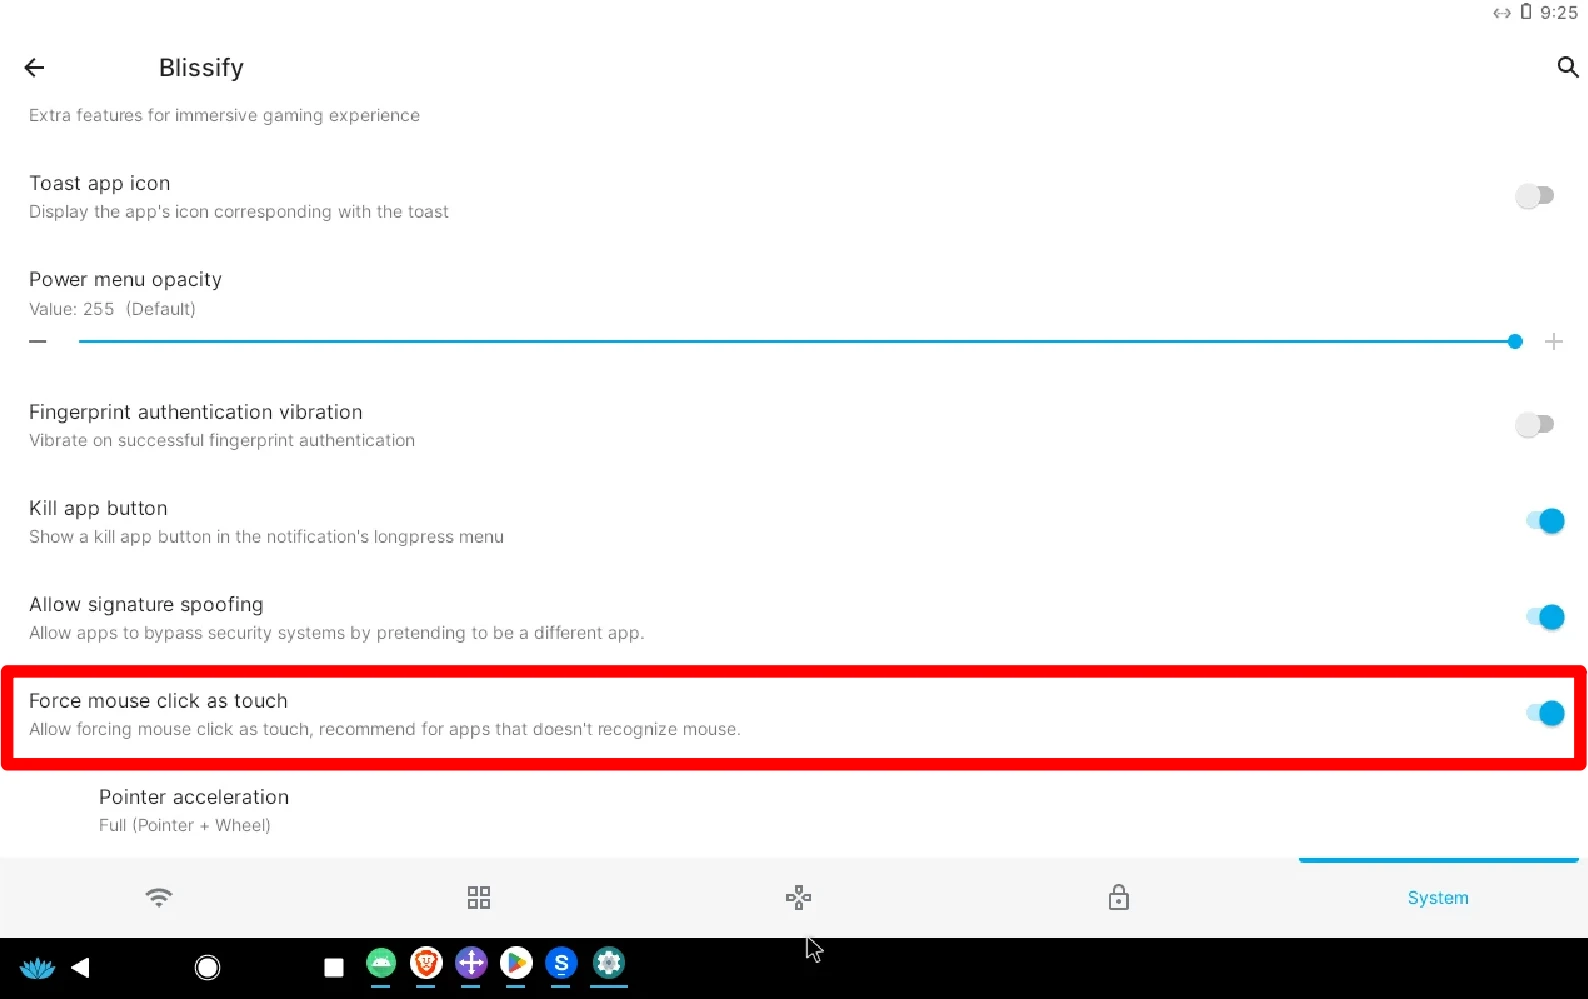
If mouse clicks do not respond in a game, you can go to system settings → Blissify → Force Mouse Click as touch, forcing mouse click events to be translated into touch taps. Note that enabling this option will cause the mouse wheel to stop working.
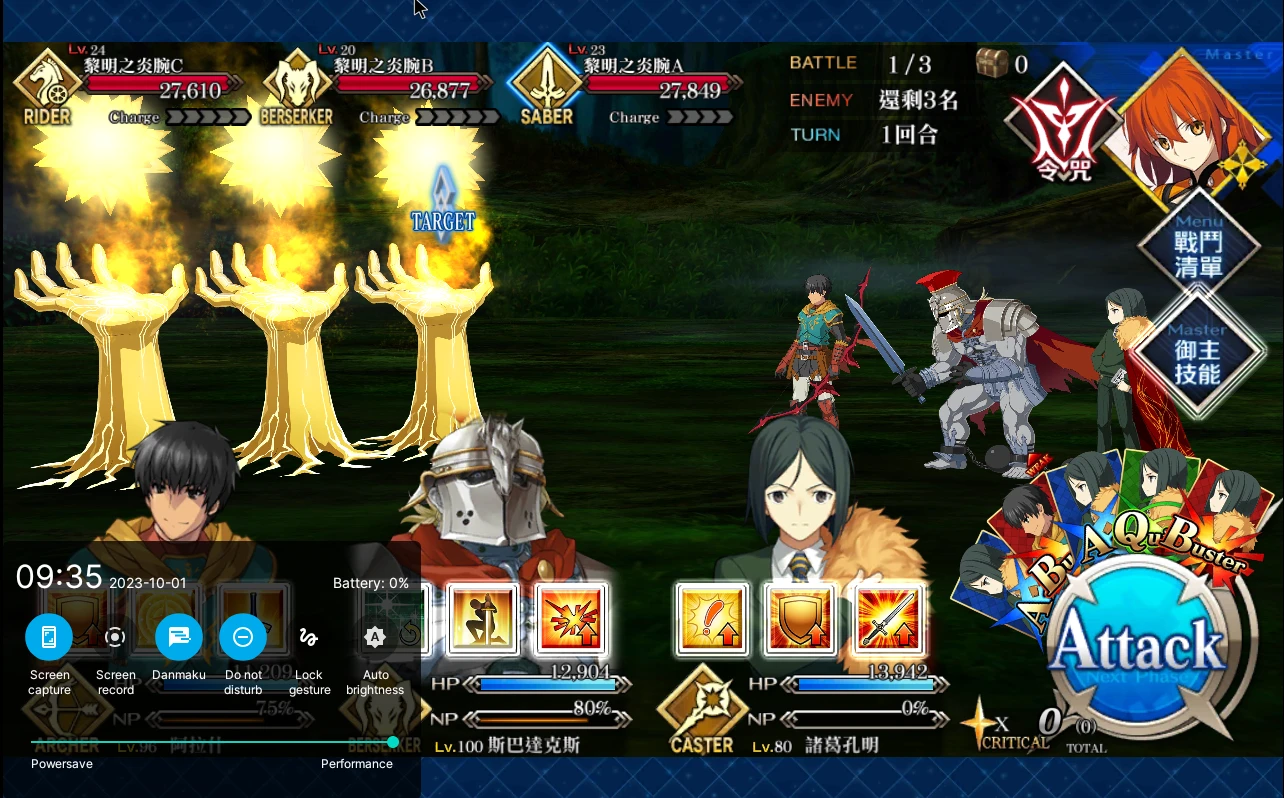
Bliss OS has a built-in “Gaming Mode”, enabled under system settings → Blissify → Gaming Mode. When the user opens a game app, notifications are automatically disabled, and a floating button appears for convenient screenshots.
Some games require key mapping to operate. You can open KernelSU and grant XtMapper Root permission. Then open XtMapper, enable the service, select the app, and set key bindings.
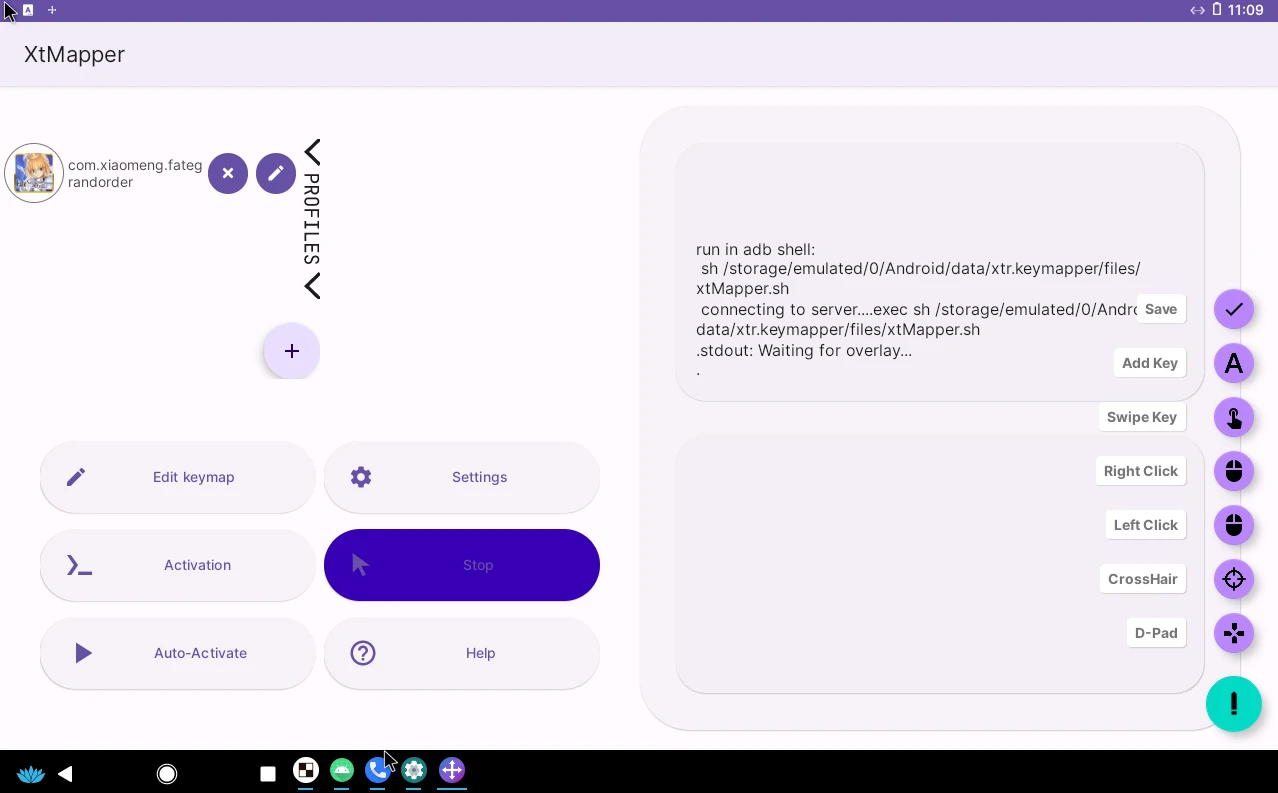
In addition, QtScrcpy’s key mapping can also be used with virtual machines.
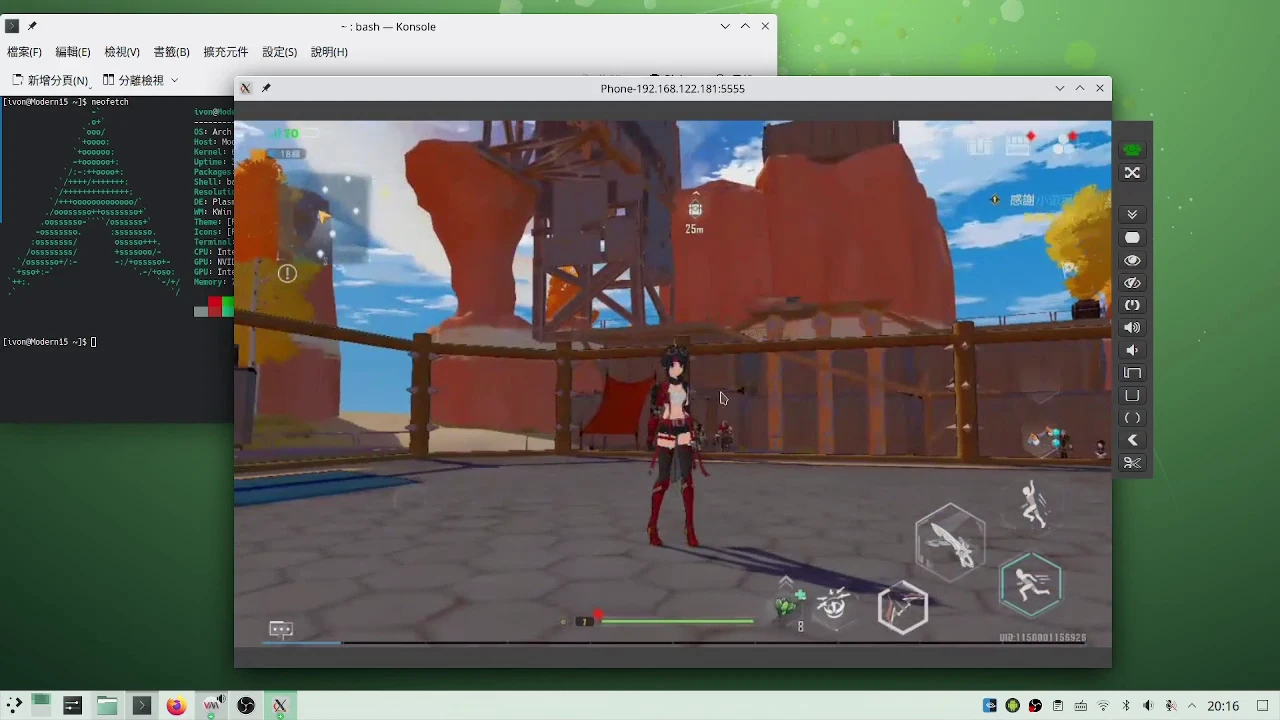
To test the capability of Bliss OS’s translator, I tested all of the following games using ARM-v8 APKs. If Google Play refuses to install them, find APKs yourself.
《Fruit Ninja》 and 《Temple Run 2》 run normally.
Next is 《Genshin Impact》. Waydroid can run it, so in theory Bliss OS should be able to as well… but virglrenderer is not very stable, and Genshin Impact v4.1.0 crashes while compiling shaders.
Another large game, 《Tower of Fantasy》, can successfully enter the game without any scripts.